Convert Forms offers seamless integration with the ConvertKit email marketing service. Connecting Convert Forms to your ConvertKit forms is surprisingly easy. Follow our step by step guide on how to connect Convert Forms with ConvertKit below.
- Addon Installation
- Campaign Setup
- Email & Name Fields
- ConvertKit Custom Fields
- ConvertKit Tags
- Assign form to Campaign
1. Addon Installation
- Navigate to Components > Convert Forms > Addons
- Click the Cog button for the ConvertKit Addon. A popup will appear where you can enable the addon.

- Click on the Status and select Enabled.
- Now you can click on Save & Close button to save the enabled addon.

2. Campaign Setup
To setup a Campaign with ConvertKit, follow the steps below.
- Navigate to Components > Convert Forms > Campaigns
- Create a new Campaign by clicking New
- Type a name for your Campaign. This name can not be seen by anyone else but you.
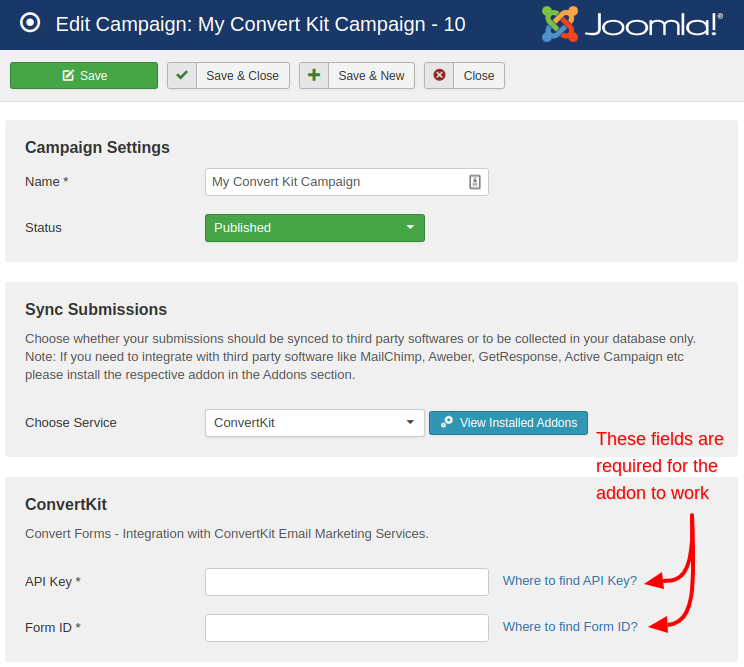
- For the Sync Leads > Choose Service selectbox choose ConvertKit. If you can not find the ConvertKit option then you do not have the ConvertKit Addon installed and activated. In that case, please go back to the top of the article and see how to install the mandatory addon.
- Save the Campaign for the special ConvertKit fields to show up.
ConvertKit API Key
To obtain your ConvertKit API Key you need to log into your ConvertKit Account and click the "Account" option in your ConvertKit's account main menu. Once you are there, you will be able to copy the API Key as it is shown in the screenshot below.
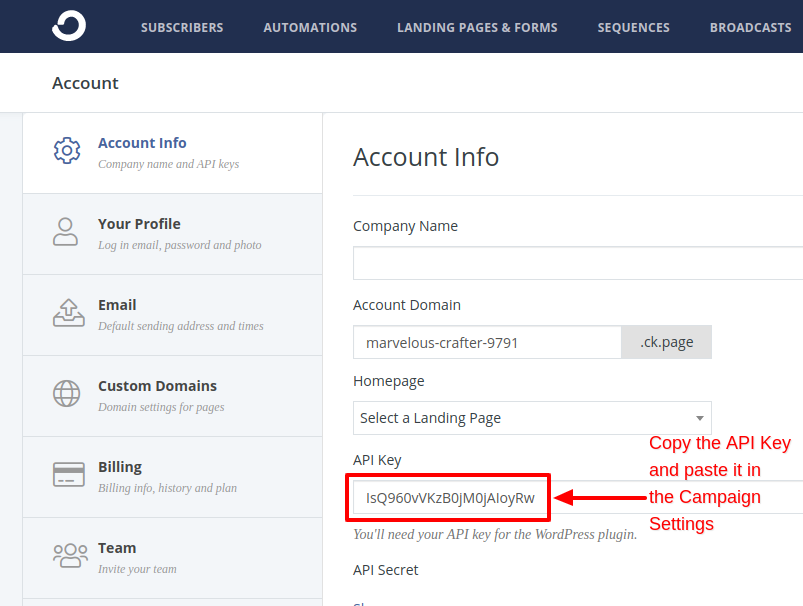
Now that you have the API Key, go ahead and paste it back into the Campaign settings you were setting up previously in Convert Forms.
ConvertKit Form ID
To obtain your ConvertKit Form ID you need to navigate to your Account's Forms. You can do that by clicking the "Forms" option in your ConvertKit account's main menu.
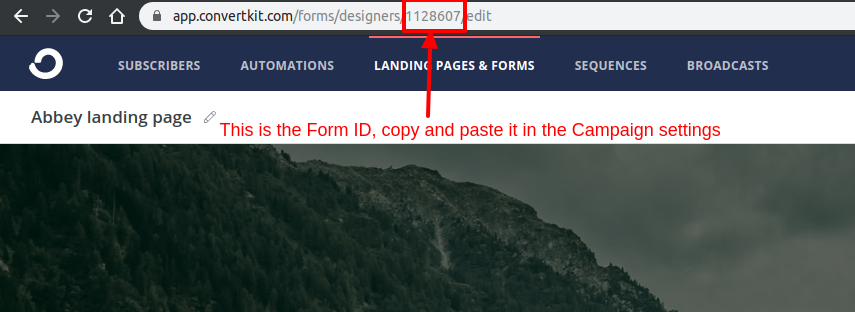
Once you are there, find the form you are interested in and click on it. While in the form's settings you can find the form ID as shown in the screenshot above. Now you can copy and paste the form ID into the Campaign settings exactly as you did previously with the API Key.
Finally, now that you have both prerequisite fields, you can Save & Close this Convert Forms Campaign.
3. Email & Name Fields
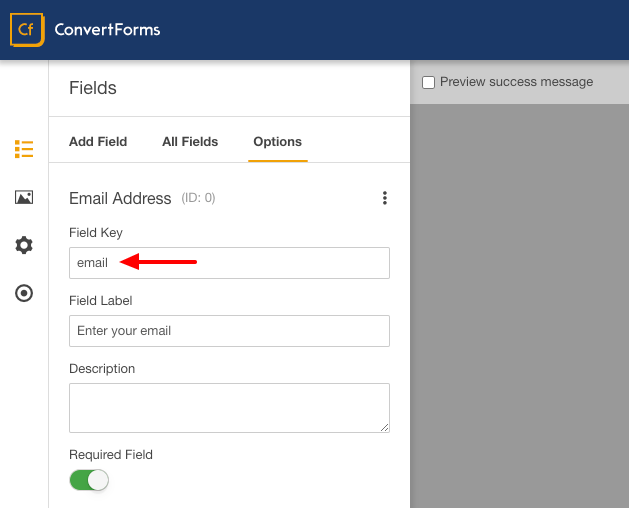
For a Convert Form to successfully store an email address to your ConvertKit account it needs to have an email field. This field is already set up at the time of creating the form and you don't have to change its input value as it is already configured for you.
Name
ConvertKit offers by default one field specifically for the contact's first name. To use that field you should create a field named first_name. See the screenshot below to understand where to set it up.
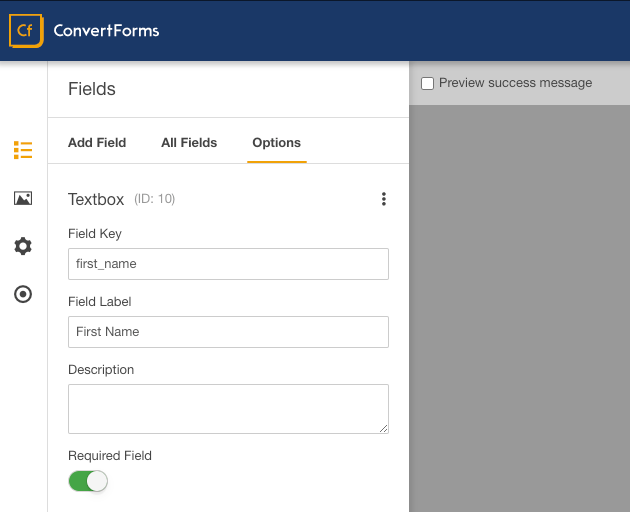
You can use this field as a fullname option as well but we recommend that you follow ConvertKit's architecture and instead use a custom field for a last name or even middle names. See next how to use ConvertKit's custom fields with Convert Forms.
4. ConvertKit Custom Fields
ConvertKit offers custom fields to collect more types of data for each of your contacts. We can also use these custom fields in a Convert Form for a more efficient data gathering and by extension, a more efficient campaign. Let's see how.
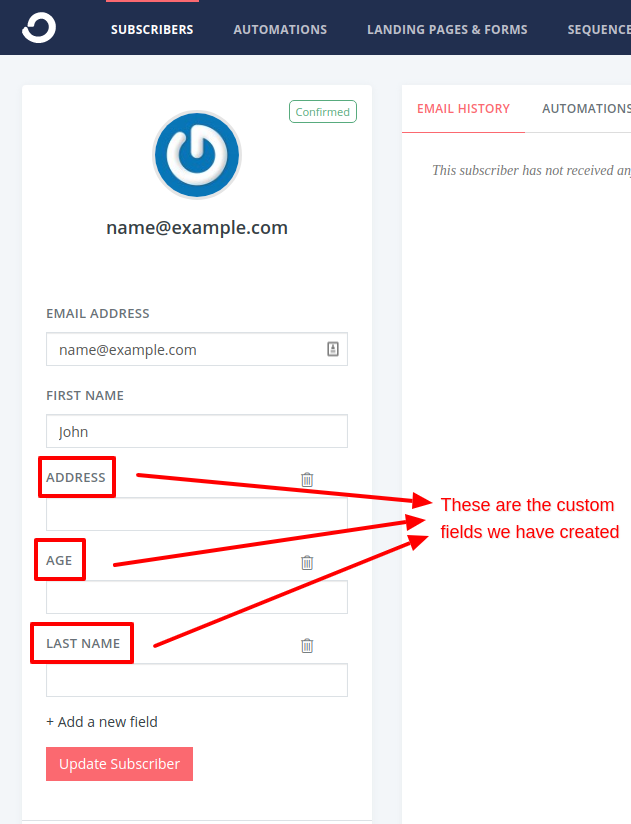
First you need to navigate to your ConvertKit Account, click "Subscribers" in your ConvertKit Account's main menu and select any existing contact or create a new one. As you can see in the screenshot below, we have created three custom fields as an example. Address, Age and Last Name.
With the custom fields you have configured on your ConvertKit Account, you can now proceed and use the same ones in your Convert Form. For example, we used our Address and Age custom fields in our Convert Form in the screenshot below.
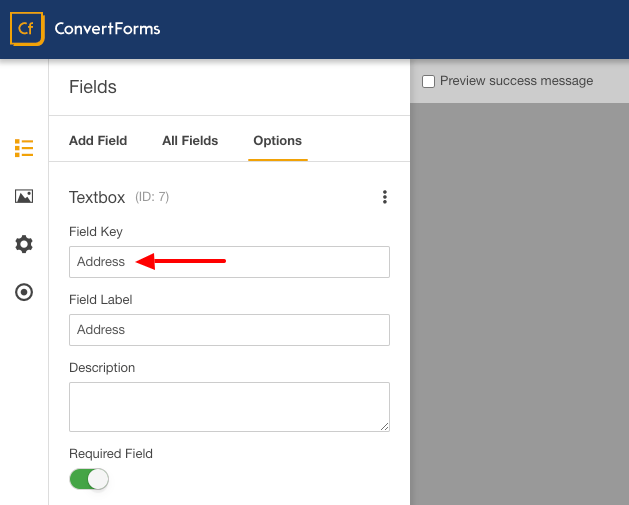

In case you create a custom field which has more than one words, in order for you to populate that field with Convert Forms you need add an underscore instead of a space. See how we setup the "Last Name" custom field in the screenshot below.

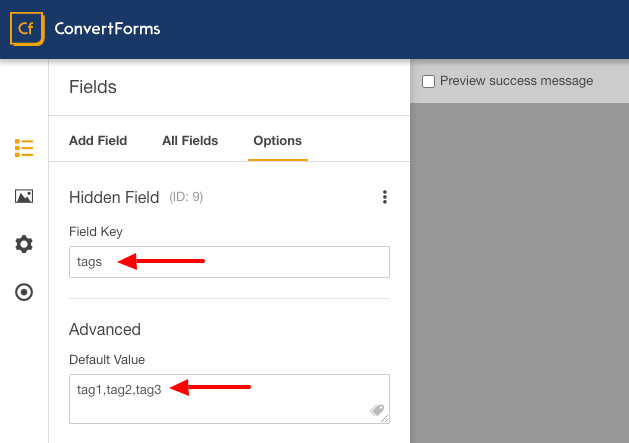
5. ConvertKit Tags
On top of custom fields, ConvertKit also offers the ability to tag your subscribers. To create tags you need to navigate to your ConvertKit Account's Subscribers and click on the "Create Tag" link in the sidebar. As you can see in the screenshot below we have created two tags for this example.
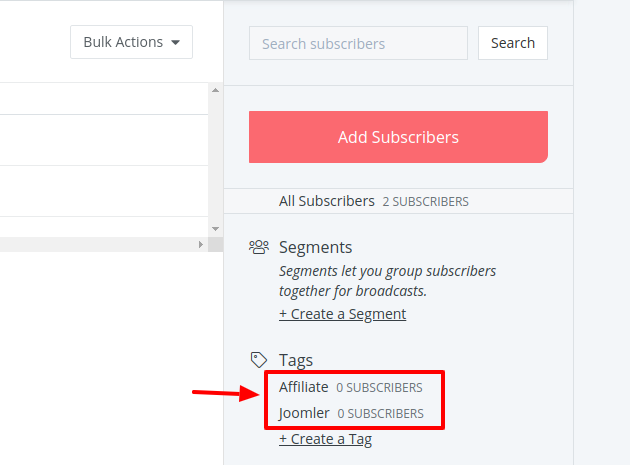
To use those tags in Convert Forms you need to create a hidden field and use one of those tags as a field value. If you want to use more than one tags then you need to add them as a comma separated list like in the screenshot below.
6. Assign form to Campaign
Of course don't forget to assign the form to our newly created Campaign! See the screenshot below to understand where to assign it.