Unlock this and dozens of other powerful features by upgrading to Convert Forms Pro.
Unlock this feature
-
- Redirect to a Menu Item After Form Submission
- Tracking Form Lead Source
- Show a Form Only to Logged-In Users
- How to Increment a Count on Each Form Submission
- Adding an “Other” Option
- Adding a Unique ID to Each Form Submission
- Show or Hide Form Fields Based on User Joomla User Group
- Disabling Browser Autocomplete for Form Fields
- Scroll the Page to the Top When a Long Form is Submitted
- Display Submissions Count for a Specific Form
- Populate Drop Down, Radio Buttons or Checkboxes with a CSV File
- Automatically Delete Submissions Older Than X Days
- Silently POST Submitted Data to Any API or URL
- Automatically Save Each Submission to a JSON file
- Create a Custom Login Form
- Auto-Populate Fields with Article Data
- Add a placeholder text to a Dropdown field
- Create Multilingual Forms in Joomla
- Redirect User to a URL After Form Submission
- Importing and Exporting Forms
- Exporting Form Submissions
- Display Convert Forms in a popup
-
- How to Create a Quiz Form
- Show Confirmation Popup After Submission
- Using the Conditional Content Shortcode in Convert Forms
- Copy Value From One Field to Another
- Submission Tasks
- Exporting Form Submissions with a Webhook URL
- Conditional Fields
- PDF Generator
- Input Masking
- Calculations
- Populate Fields Using Query String
- Smart Tags
-
- Minimum Time to Submit
- Restrict Form Submissions Based on IP
- Enforcing a Custom Password Policy in Convert Forms
- Add Cloudflare Turnstile to your Joomla Form
- Implement the Iubenda Consent Database in Joomla with Convert Forms
- Add Custom Validations to Fields and Forms
- Add Math Captcha to your Form
- Prevent a Field From Saving in the Database
- Add hCaptcha to your Form
- Enable Double Opt-in
- Allow Form Submissions in Specific Date Range
- Ensure a Unique Value is Entered Into a Field
- Block Form Submissions Containing Profanity (Bad Words)
- Block Email Addresses or Email Domains
- Honeypot
- Setting Up Google reCAPTCHA
- Create GDPR Compliant Forms
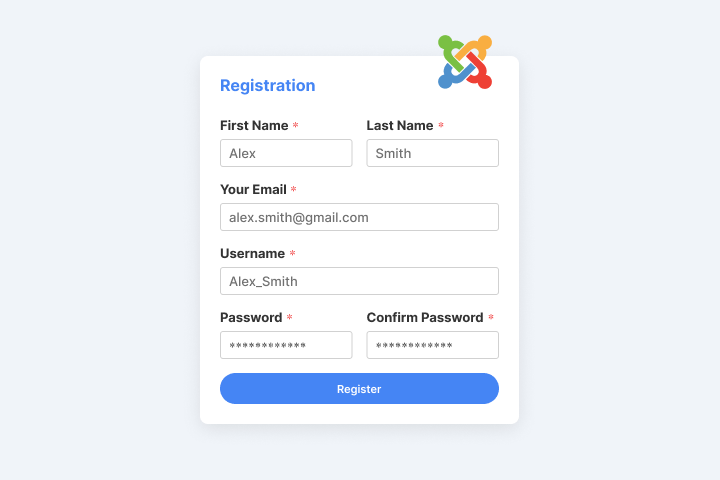
User Registration Integration
Make custom Joomla registration forms. Create user accounts upon form submission with key features like email-based usernames, auto-generated passwords, dynamic user group assignments and conditional logic.
User Registration Integration is available in Pro
Setting Up User Account Task
To set up the User Account task and create new user accounts, go into your form, and follow the steps listed below:
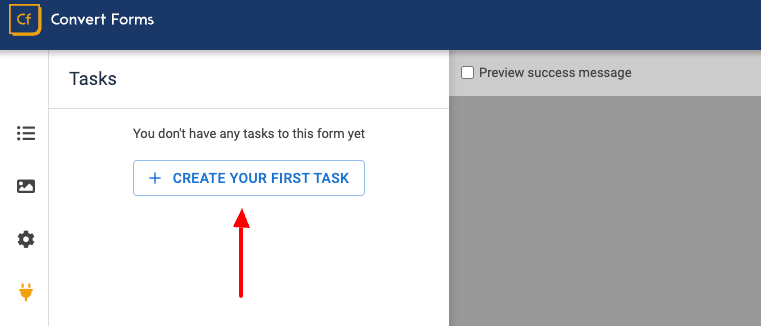
Select App
From within your form, click on Tasks > CREATE YOUR FIRST TASK.
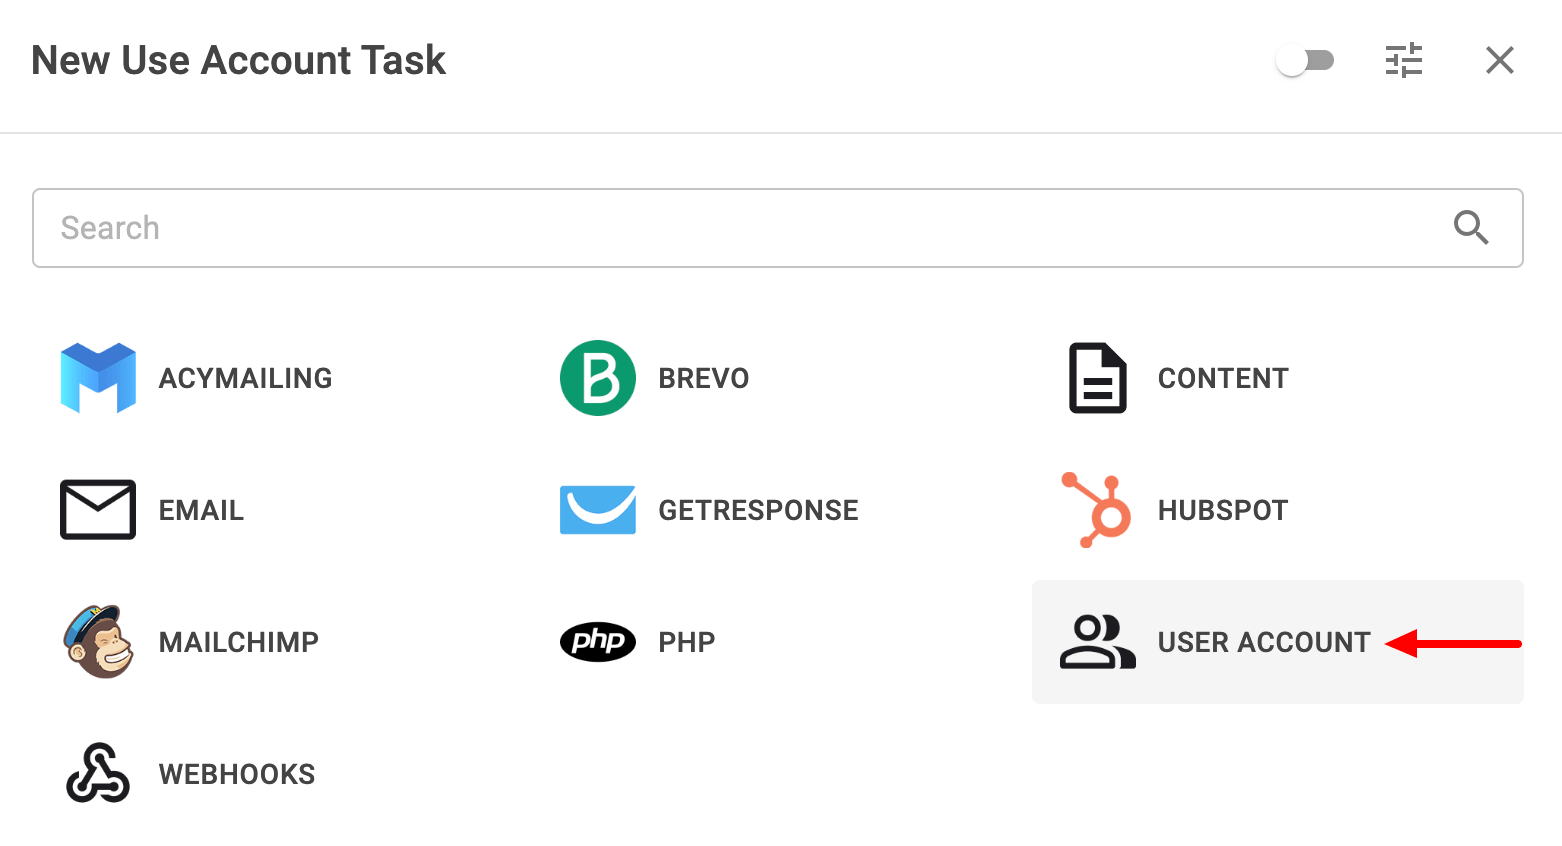
On the modal that will open, select the User Account task.
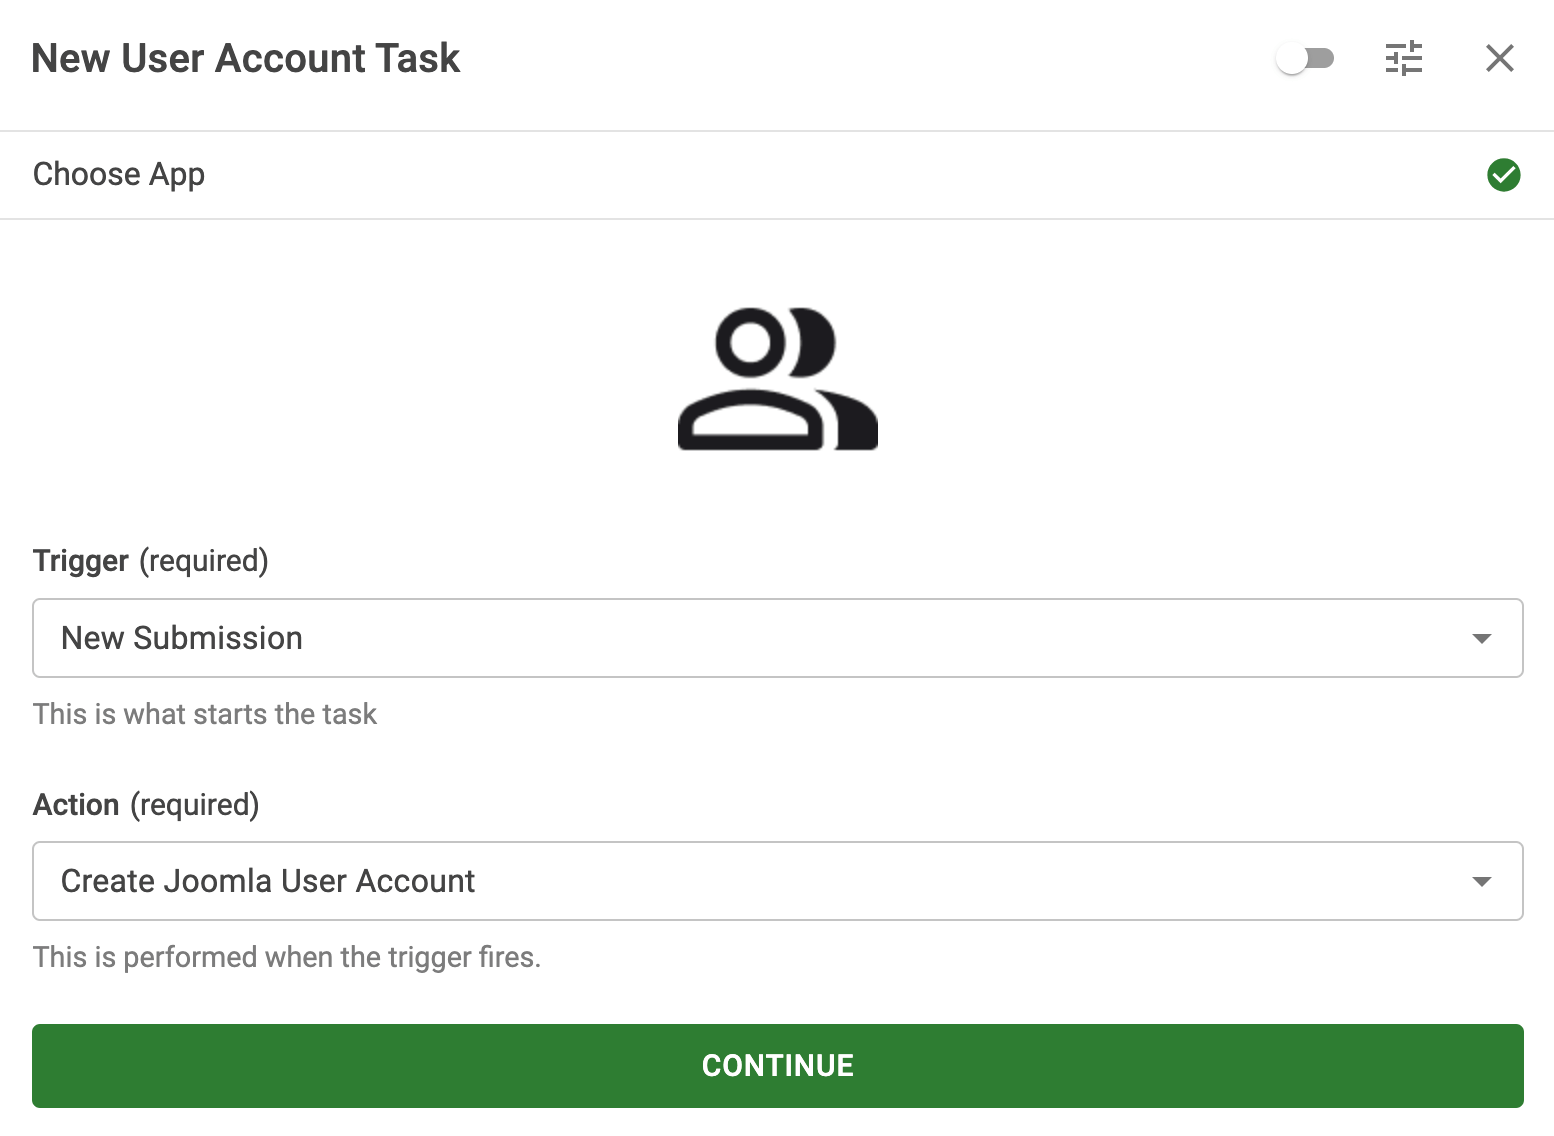
Select New Submission under Trigger and Create Joomla User Account under Action on the next screen, and click CONTINUE.
Setup Action
After you've set up the trigger, and action, it's time to set up the action itself and configure all available settings. We’ve outlined what each of these does below.
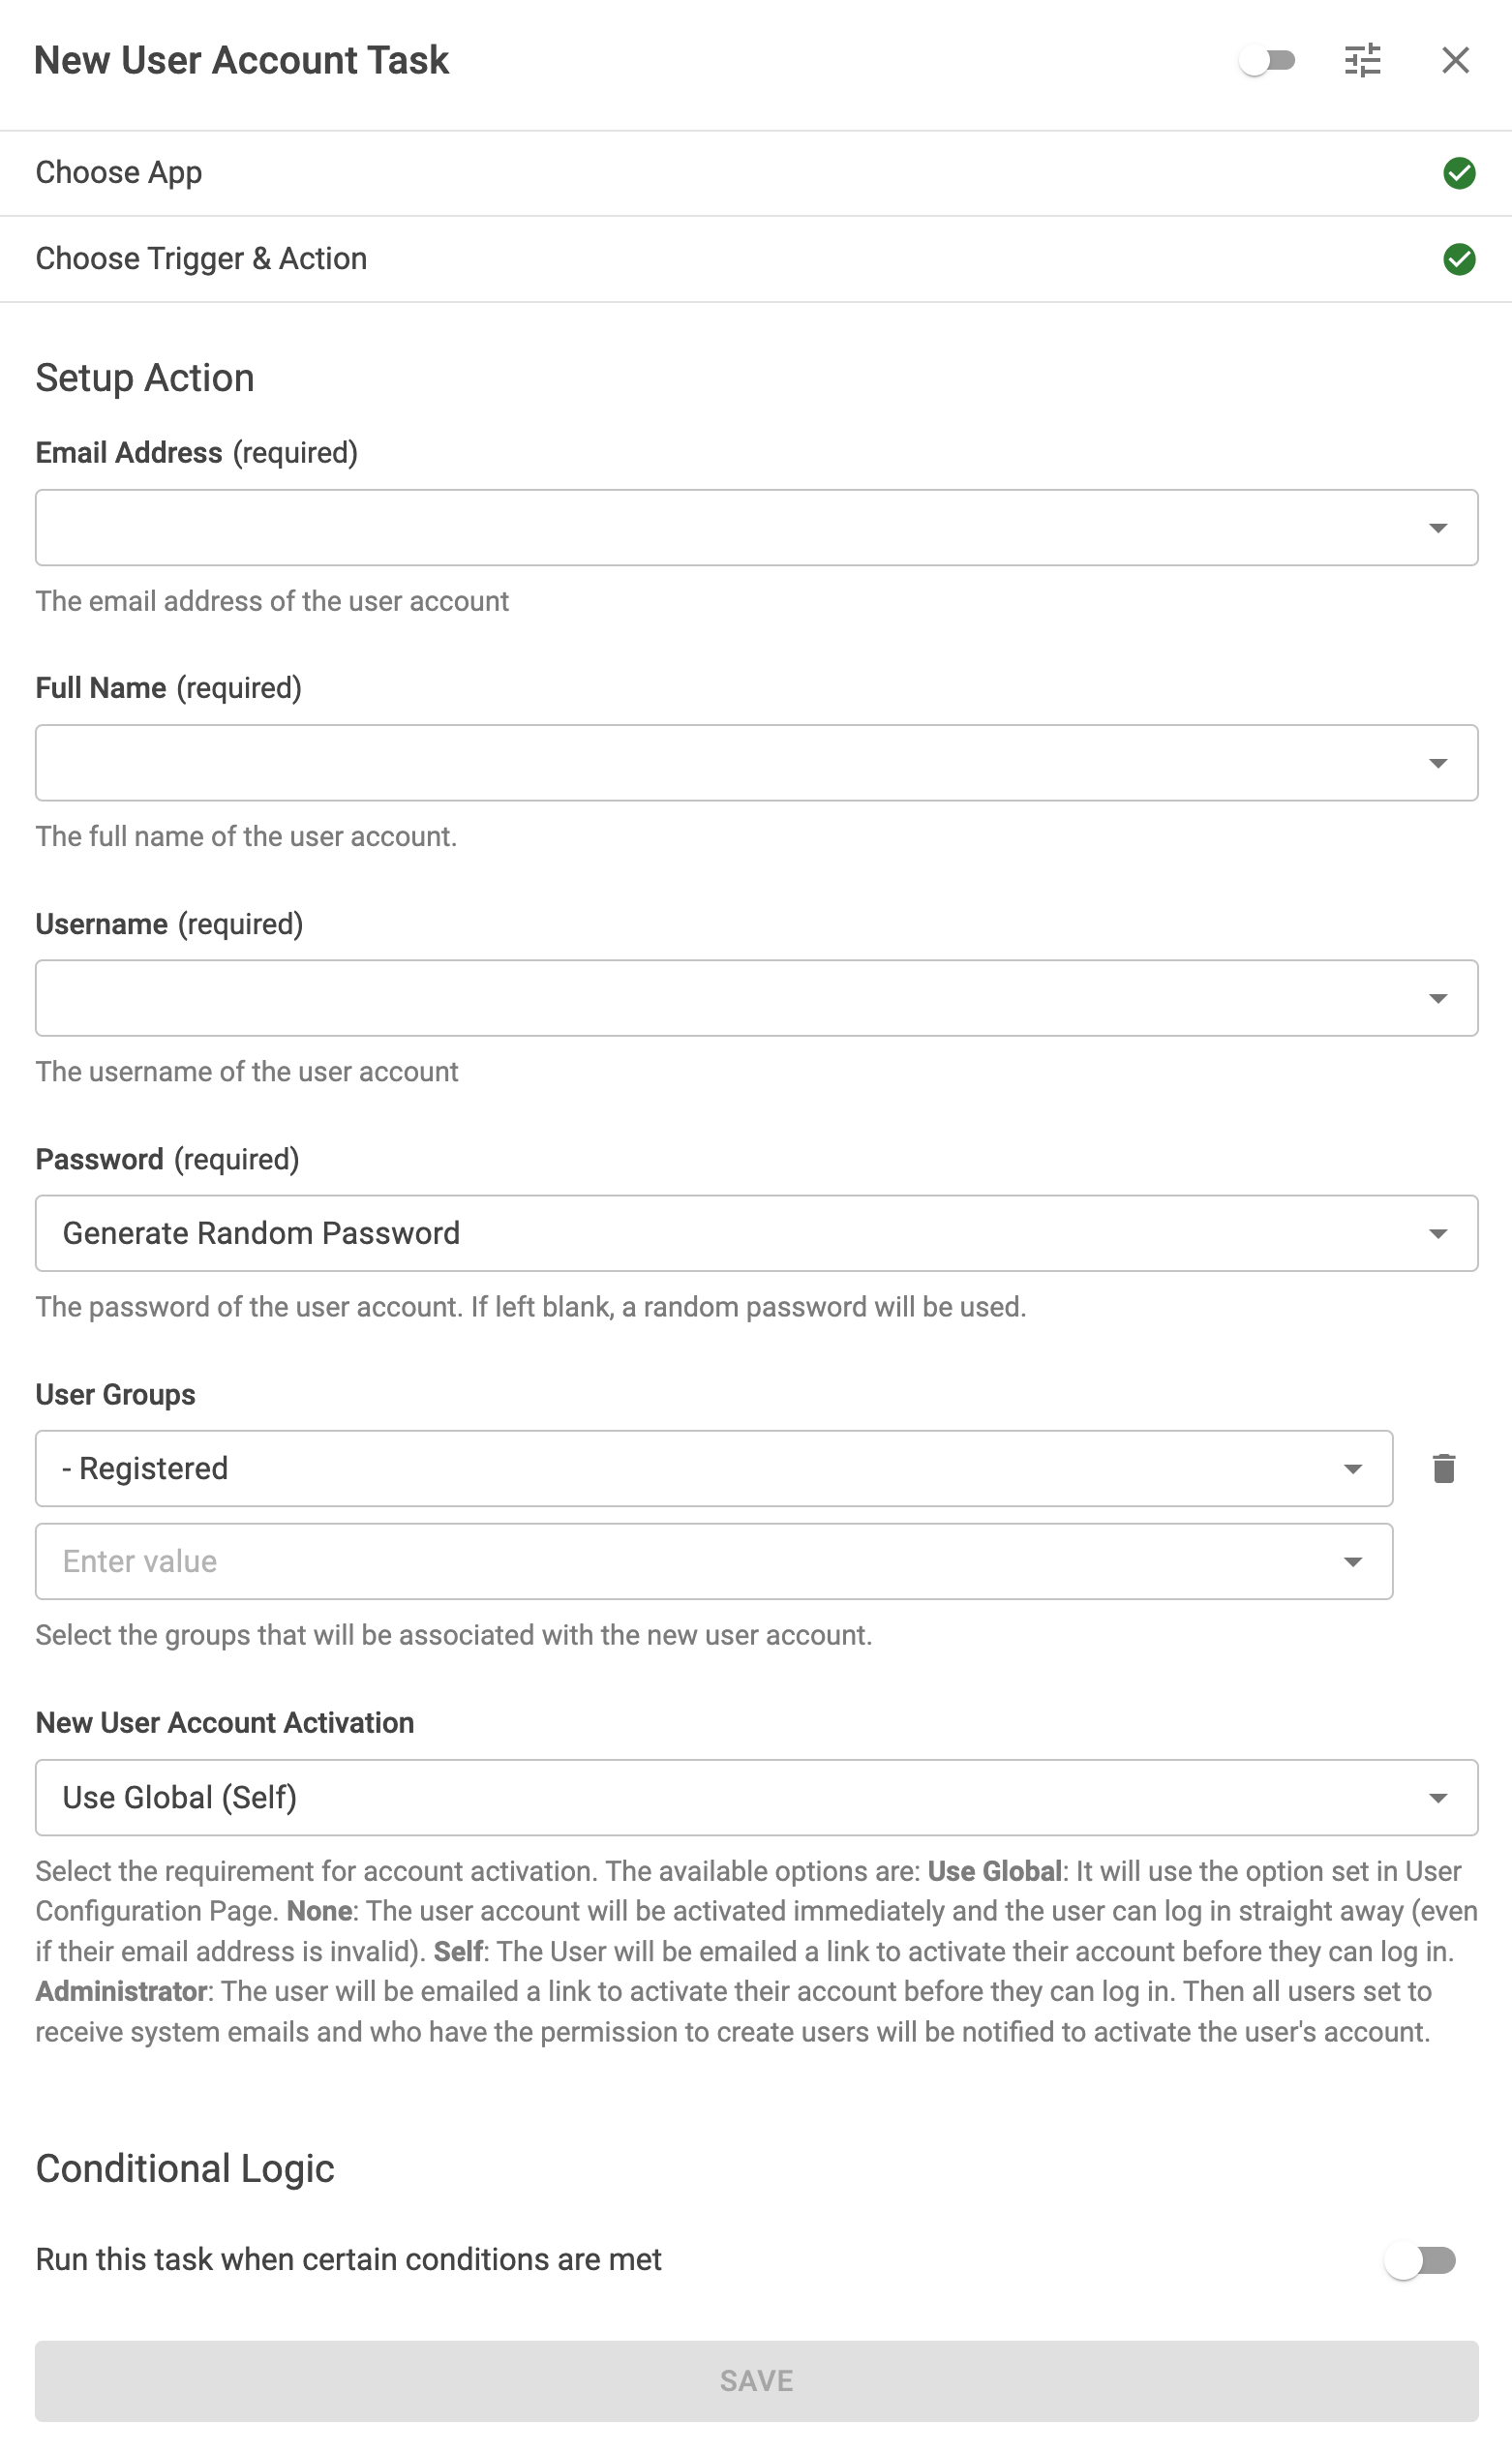
Email Address
The email address that will be assigned to the newly created user.
Full Name
The full name that will be assigned to the newly created user.
Username
The username that will be assigned to the newly created user.
Password
The password of the new user. You can either choose "Generate Random Password" or select any available mapping option.
User Groups
The user groups of the user. You can select one or more user groups for the new user.
New User Account Activation
Select the requirement for account activation.
The available options are:
- Use Global: It will use the option set in User Configuration Page.
- None: The user account will be activated immediately and the user can log in straight away (even if their email address is invalid).
- Self: The User will be emailed a link to activate their account before they can log in.
- Administrator: The administrator will be emailed a link to activate their account before they can log in. Then all users set to receive system emails and who have the permission to create users will be notified to activate the user's account.
Custom Fields
Specify which custom fields you’d like to pre-populate when creating the article. A specific set of single and multiple-value custom fields are supported. You can also use Smart Tags.
Add Conditional Logic
Conditional logic makes it possible to run tasks only if specific criteria are met, like a user’s email address matching a certain domain, the user being associated with a certain Joomla User Group, or a form submission having a specific value.
While editing the User Account task, go to the Setup Action step and scroll down to the Conditional Logic section to set up Conditional Logic. Here's where you define all the rules the task should meet to run.
For example, let's say we need to create a new account, only if the email is coming from a specific domain: @domain.com.
- Click to enable the Run this task when certain conditions are met.
- Click Add Your First Condition.
- Select the Email field in the Trigger dropdown.
- Select Contains in the Operator dropdown.
- Enter @domain.com in the value. Replace this with your domain name.
The condition should look like this:

You can read more on Conditional Logic on the Working with Tasks documentation page.
Activate Task
The final step is to enable our task. To do so, click the toggle on the dialog’s top right corner, as shown in the screenshot below.

Finally, click Save to save the task, close the dialog, and then click Save from the top right corner of the form builder to save the changes on the form.
Congratulations! You’ve successfully created a form that will create new user accounts whenever the form is successfully submitted!
How to populate custom fields
The User Account app lets you create users while also filling in custom fields. You can populate fields that accept both single and multiple values, giving you more flexibility in managing your content.
How to populate simple fields
When creating a new Joomla user, you can now easily populate simple fields. Simple fields are custom fields that accept a single value. The custom field value can either be typed manually, or mapped to a form field entered by your users.
The supported custom fields are listed below:
- Text
- Textarea
- Radio
- Calendar
- Color
- Editor
- Integer
- List
- List of Images
- Location
- URL
- User
- User Groups
- ACF Articles
- ACF Convert Forms
- ACF Country
- ACF Currency
- ACF Download Button
- ACF Facebook
- ACF Gravatar
- ACF HTML5 Audio
- ACF IFrame
- ACF Module
- ACF PHP
- ACF Progress Bar
- ACF QR Code
- ACF Telephone
- ACF Timepicker
- ACF True/False
- ACF Twitter
- ACF Video
- ACF WhatsApp Click to Call.
Create Custom Field
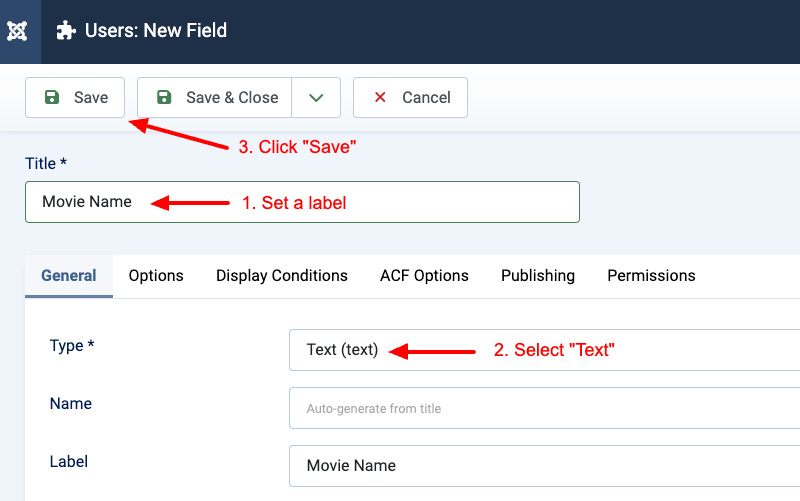
Let’s get started by creating a custom field under Users > Fields.
Select the “Text” type, and set it’s name to “Movie Name”.
Example #1: Mapping a Text field to a form field
Within our form, let’s add a text field called “Movie Name” in which our visitors will type in the Movie Name.
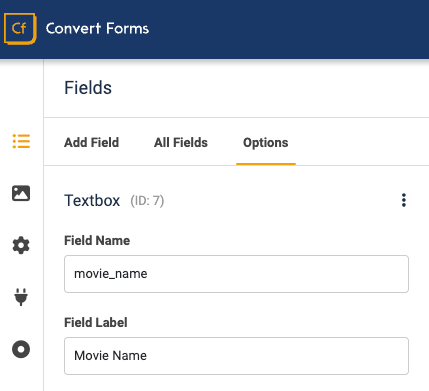
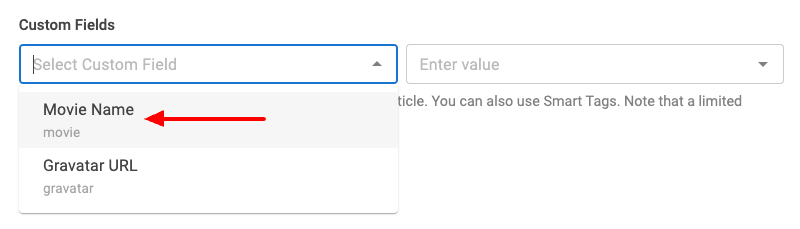
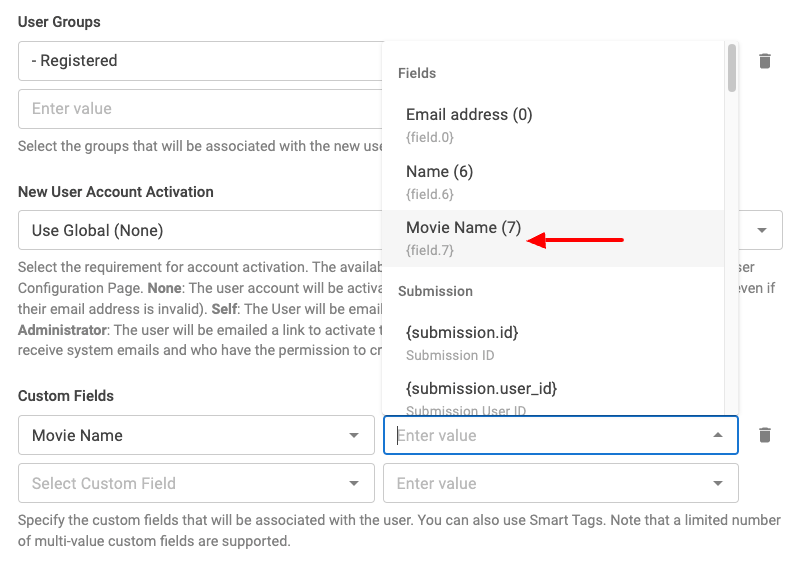
To populate the “Movie Name” custom field, head over to your form’s settings > Tasks > click to edit your User Account app, under the Custom Fields setting, click on the “Select Custom Field” area, and from the left-hand side select the “Movie Name” custom field.
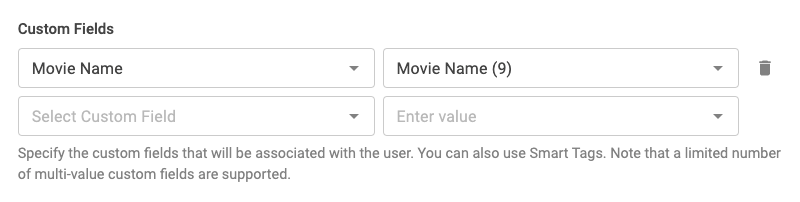
After selecting the “Movie Name” custom field, we then need to specify the value of this custom field. In this case, we select the “Movie Name” form field which we just created.
The final configuration looks like this:
Now, whenever a visitor types in a movie name, it will automatically appear in the user settings, in the corresponding custom field that’s named “Movie Name”.
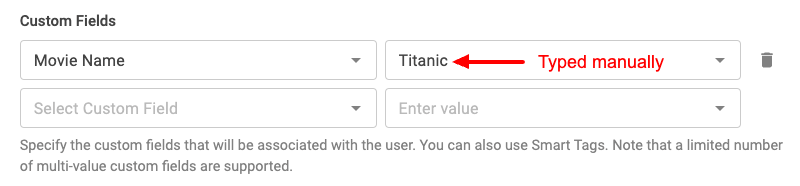
Example #2: Mapping a Text field to a fixed value
An alternative way to populate a custom field is by entering a fixed value instead of relying on the user input.
To populate the “Movie Name” custom field, head over to your form’s settings > Tasks > click to edit your User Account app, under the Custom Fields setting, click on the “Select Custom Field” area, and from the left-hand side select the “Movie Name” custom field.
After selecting the “Movie Name” custom field, we then need to specify the value of this custom field. In this case, we set a fixed value by typing the text “Titanic”.
How to populate list fields
When you’re creating Joomla users, you can now easily populate list-type fields. You can either populate list fields by mapping them to a form field or by setting a fixed value.
The supported list fields are listed below:
- List
- Checkbox
- List of Images
- User Groups
- ACF Articles
Create Custom Field
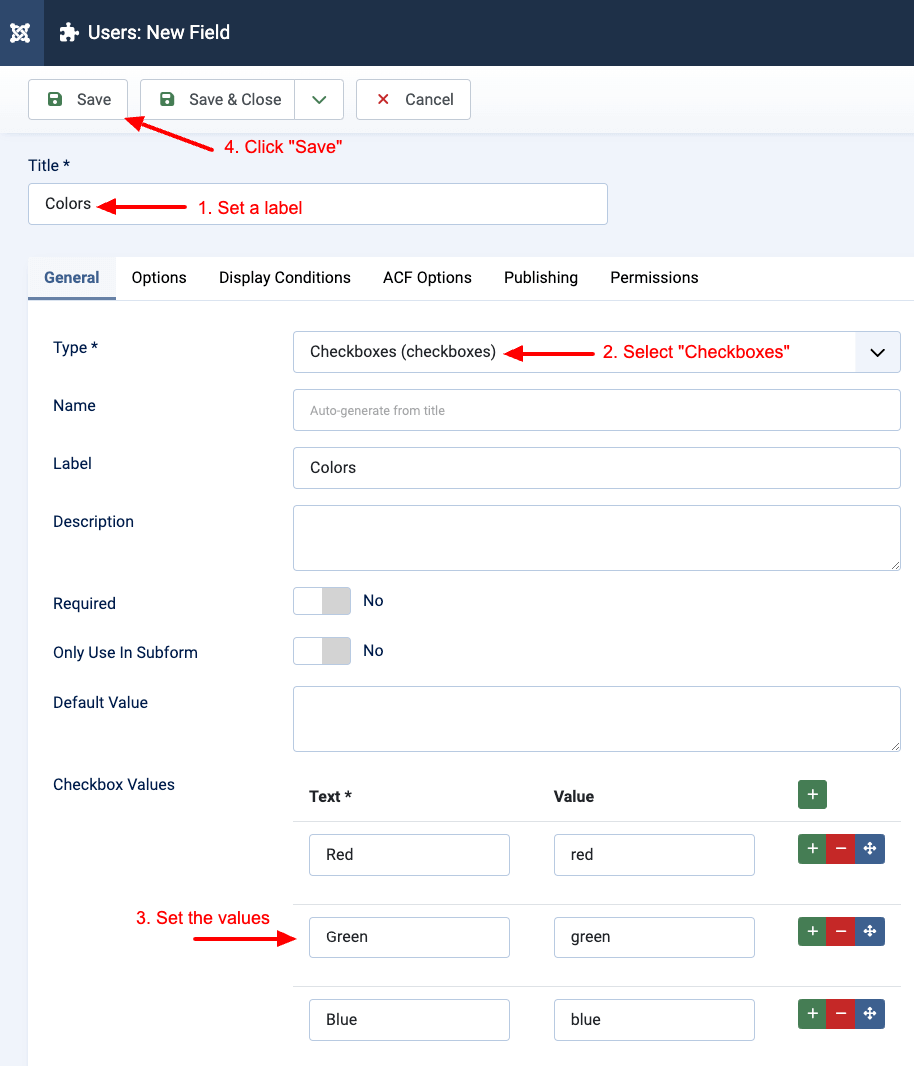
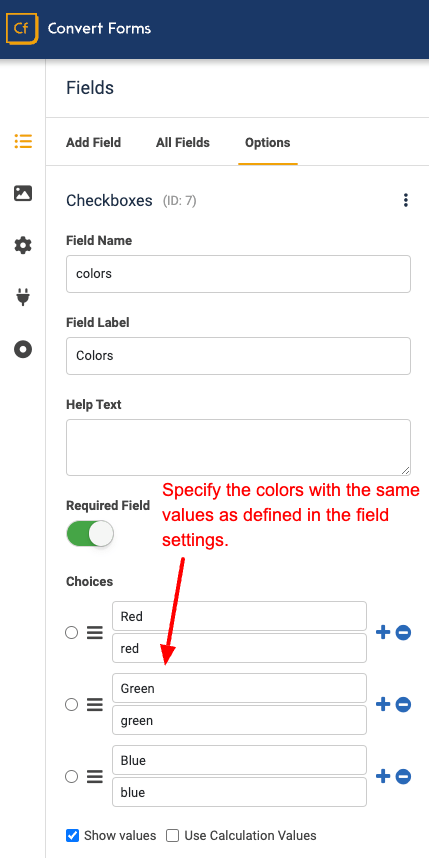
Let’s create a Checkbox custom field that accepts multiple values under Users > Fields, by selecting the “Checkboxes” type, and name it “Colors”.
Then specify the colors Red, Blue, Green, as seen below.
Example #1: Populating a List field by mapping it to a form field
Within our form, let’s add a Checkbox field called “Colors” in which our visitors will be able to select their desired colors.
Each value must correspond to an option defined in the previously created custom field settings.
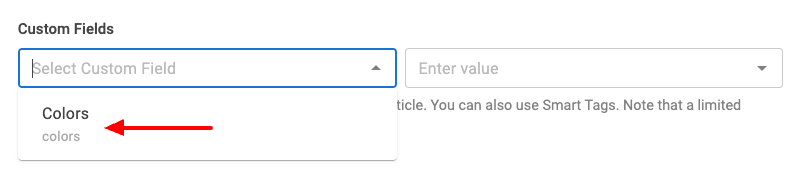
To populate the “Colors” custom field, head over to your form’s settings > Tasks > click to edit your User Account app, under the Custom Fields setting, click on the “Select Custom Field” area, and from the left-hand side select the “Colors” custom field.
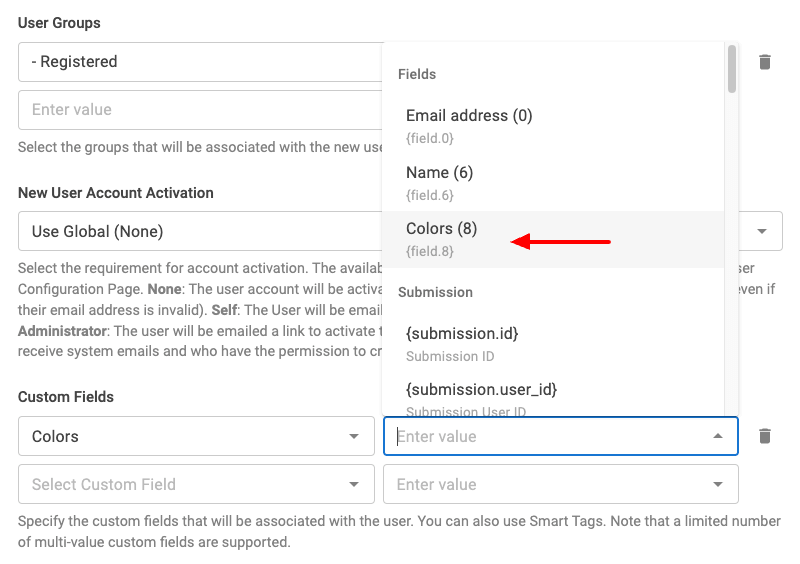
After selecting the “Colors” custom field, we then need to specify the value of this custom field. In this case, we select the “Colors” form field.
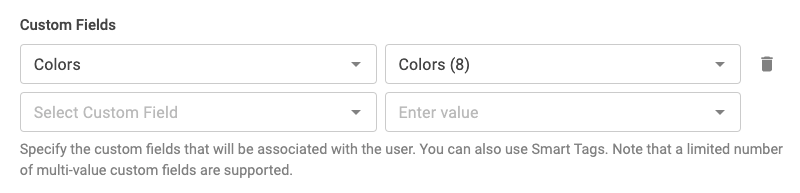
The final configuration looks like this:
Example #2: How to populate a list field with a fixed value
An alternative way to populate a list field is by entering the custom field value manually.
To populate the “Colors” custom field, head over to your form’s settings > Tasks > click to edit your User Account app, under the Custom Fields setting, click on the “Select Custom Field” area, and from the left-hand side select the “Colors” custom field.
After selecting the “Colors” custom field, we then need to specify the value of this custom field. In this case, we set a fixed value by typing the text “red, green”.
Note that the fixed value we set must correspond to an option defined in the custom field settings. We can define multiple values by separating each value with a comma, as seen below.

How to populate advanced fields
You may be wondering why we haven’t mentioned any advanced fields such as ACF - File Upload, ACF - Gallery, ACF - Map, etc…
These custom fields don’t accept a single or multi value(comma separated) but an object as a value which makes it difficult to populate via the existing Custom Fields section.
The complete list of custom fields that are currently unsupported are:
- Media
- ACF Address
- ACF Chained Fields
- ACF Countdown
- ACF Email
- ACF FAQ
- ACF File Upload
- ACF Gallery
- ACF Map
- ACF PayPal
- ACF SoundCloud
- Any advanced 3rd-party custom fields
We are committed to improve the user experience of the Custom Fields section to support such advanced custom fields.
Frequently Asked Questions
Can I populate user profile fields?
Unfortunately, updating user profile fields is not currently supported, but it’s on our plans.
Can I display the registration form in a popup?
Yes, you can transform your form into a pop-up using EngageBox. To learn how, visit the How to load Convert Forms through EngageBox guide.
Can I disable the Joomla User Registration Option?
The short answer is no! If you disable the option and the New User Account Activation setting is set to either Self or Administrator, users will not be able to activate their accounts. When they click the activation link in their email, they’ll hit a 403 Forbidden error. This happens because Joomla’s user component requires the core registration option to remain enabled to process activation links.
The only case where it’s safe to disable the core registration option is if New User Account Activation is set to None. In this scenario, accounts are activated instantly, and your Convert Forms registration form can fully replace Joomla’s built-in one without issues.
How to remove the newly registered user from submissions?
To remove the submission from your form (does not interfere with the registered user in Joomla!), navigate to your Form > Behavior > PHP Scripts > After Form Submission and add the following:
ConvertForms\Api::removeSubmission($submission→id);
User Registration Integration is available in Pro
Unlock this and dozens of other powerful features by upgrading to Convert Forms Pro.
Unlock this feature
Last updated on Oct 7th 2025 09:10
Tassos offers a premium suite of Joomla extensions with 7 products and over 2.2 million downloads, providing reliable solutions since 2014.


 Rated:
Copyright © 2014 - 2026 - Smile Motive Development LP. All Rights Reserved.