-
- Email the Person Who Filled Out the Form
- Set up Auto-Responder Emails
- Send an Email Only When a Checkbox Is Checked
- Attach the Submission PDF to Emails
- Send Email Based on Drop Down Selection
- Send Different Email Content Based on Form Responses
- Resending Emails
- Sending Plain-Text Alternative Body Emails
- Styling Emails with CSS
- Tracking Sent Emails
- Troubleshooting Email Delivery
-
- Browser Autocomplete for Form Fields
- Disable Submission Storage in Convert Forms
- Redirect to a Menu Item After Form Submission
- Tracking Form Lead Source
- Show a Form Only to Logged-In Users
- How to Increment a Count on Each Form Submission
- Adding an “Other” Option
- Adding a Unique ID to Each Form Submission
- Show or Hide Form Fields Based on User Joomla User Group
- Scroll the Page to the Top When a Long Form is Submitted
- Display Submissions Count for a Specific Form
- Populate Drop Down, Radio Buttons or Checkboxes with a CSV File
- Automatically Delete Submissions Older Than X Days
- Silently POST Submitted Data to Any API or URL
- Automatically Save Each Submission to a JSON file
- Create a Custom Login Form
- Auto-Populate Fields with Article Data
- Add a placeholder text to a Dropdown field
- Create Multilingual Forms in Joomla
- Redirect User to a URL After Form Submission
- Importing and Exporting Forms
- Export Submissions
- Display Convert Forms in a popup
-
- How to Create a Quiz Form
- Show Confirmation Popup After Submission
- Using the Conditional Content Shortcode in Convert Forms
- Copy Value From One Field to Another
- Submission Tasks
- Exporting Form Submissions with a Webhook URL
- Conditional Fields
- PDF Generator
- Input Masking
- Calculations
- Populate Fields Using Query String
- Smart Tags
-
- Minimum Time to Submit
- Restrict Form Submissions Based on IP
- Enforcing a Custom Password Policy in Convert Forms
- Add Cloudflare Turnstile to your Joomla Form
- Implement the Iubenda Consent Database in Joomla with Convert Forms
- Add Custom Validations to Fields and Forms
- Add Math Captcha to your Form
- Prevent a Field From Saving in the Database
- Add hCaptcha to your Form
- Enable Double Opt-in
- Allow Form Submissions in Specific Date Range
- Ensure a Unique Value is Entered Into a Field
- Block Form Submissions Containing Profanity (Bad Words)
- Block Email Addresses or Email Domains
- Honeypot
- Setting Up Google reCAPTCHA
- Create GDPR Compliant Forms
Working with Tasks
Automate actions after a form submission, like sending emails or creating Joomla accounts. Tasks can run with conditional logic based on field values.
The Convert Forms Tasks Addon makes it possible to create automations and workflows that make things happen when certain events occur on your form.
Let’s say that after you receive a form submission, you would like to send an auto-responder email to the user who submitted the form, create a Joomla account, and subscribe the user to your AcyMailing list.
With Convert Forms Tasks, it’s easy and requires zero code. You can connect multiple extensions and apps, automating workflows and passing data between apps. These automated recipes can save Joomla site owners hundreds of hours yearly by automating sales, marketing, administrative, learning, and other processes. It connects things that would otherwise be impossible to connect.
Learn Key Concepts
Here are the core concepts and terminology you need to know to use Convert Forms Tasks.
Tasks
Tasks are automated recipes built by the user. Each task comprises an app, a trigger, and an action. A task effectively tells, “if this happens, then do that“. For instance, when we receive a new submission, add a new lead to MailChimp, send an email notification, and update a contact in HubSpot.
Forms can contain unlimited tasks, and you can even create multiple tasks from the same app. Consider all tasks a series of steps running from top to bottom.
Each task requires a set of input fields and typically returns data. Tasks can talk to each other by pulling data from the task using a JSON-based Smart Tag. For instance, you can create a webhook task that returns data from an API which can then be read by the next task using the {task.prev.data} Smart Tag.
Convert Forms process tasks synchronously; for example, only process a second task when the first task has been completed.
Apps
Apps are the main building blocks of your tasks. You will find an extensive list of pre-built integrations for popular services such as MailChimp, GetResponse, HubSpot, AcyMailing, etc. We have done all the heavy lifting with these pre-built add-ons for you. The service API endpoints and functions (e.g., list MailChimp audiences, create new HubSpot contact, etc.) are configured in easy drop-down menus.
If a service you want to use is not listed, it is possible to build your custom app integration using our Webhooks app.
Triggers
Triggers determine what event to listen to run the action described in a task. This is what kicks off the automated process between your apps. Triggers are real-time and are initiated by Convert Forms. A task can have a single trigger.
Currently, we support only the On New Submission trigger, which fires every time someone submits a form.
We plan to support the following 2 triggers in the near future:
- On Submission Edit: Fires when a submission is modified
- On Submission Delete: Fires when a submission is deleted
Do you have a trigger to suggest? Please, do let us know.
Actions
An action tells what to happen when a trigger fires. Actions are app-based. Most of the time this means moving - pushing the data to the destination app - adding a new lead record to MailChimp, sending a Slack notification, or sending an email to notify the site’s administrator.
A task can have a single action.
Conditional Logic
Conditional logic makes it possible to run tasks only if specific criteria are met, like a user’s email address matching a certain domain, the user being associated with a certain Joomla User Group, or a form submission having a specific value.
Conditions are optional settings that can be defined for every task. A condition consists of 3 parts:
- Trigger Value: The token that a value will be checked against. In most cases, this is a form field value, but it can be also a date, email address, user group, or even a Smart Tag.
- Operator: The criteria that determine whether the Trigger Value matches a certain value, like “is”, “contains”, “is greater than”, etc. All text-based comparisons are not case-sensitive. That means both “good morning” and “good MORNING” values will be treated the same. If you need to match the exact letter case, use the RegEx comparison with the “i” flag. The available options shown may vary depending on the Trigger Value.
- User Value: The value that the Trigger Value is compared to or, in other words, the expected value of the Trigger Value that will make the condition to be valid. Usually, this is hard-coded (e.g. a full name like “John Doe”) but it also accepts a Smart Tag.
Tips and Rules
- Conditions are organized into groups.
- Conditions inside a group are evaluated using the AND operator, while Condition Groups are evaluated using the OR operator. That means a task is expected to run when all conditions inside at least one group are valid.
- Conditions are processed from top to bottom.
- Condition values are not case-sensitive.
- There's no limit on how many conditions a task can have.
Connections
When you use Tasks to connect to third-party services such as MailChimp or Salesforce, you need to authenticate to those services. This authorization is referred to as a connection, and it mostly happens via an API-based token, but it can also be a simple username and password.
Connections are not tied to a task - a single connection can be used for multiple tasks. When you make an authentication, you can name it, and it’s then available for re-use in other tasks across all forms. If, for example, you have two different logins for Salesforce which have access to various company divisions or have different levels of permissions, you can store both of these authentications to be quickly used at any time.
Connection Errors
On occasion, app connections can become invalid. These are the most common reasons:
- Modified credentials. The connection might become invalid if credentials were changed in the app and not in Convert Forms.
- Insufficient permissions. In this case, the API Key authorizing the connection doesn't have permission to access required data or perform certain actions.
Installing Tasks
The Tasks addon has been included in both the Free and Pro package of Convert Forms since version 4. The only difference between the Free and Pro version is that the Free version has access to limited apps. In the App Integrations section, you can find a list of all supported apps.
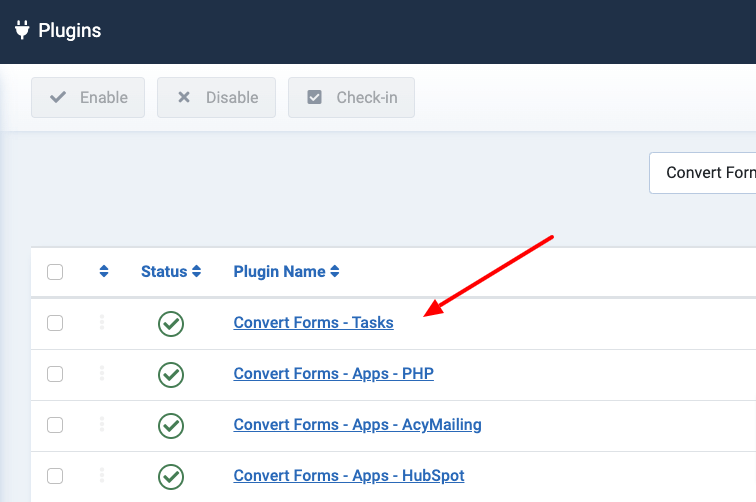
To verify you have the Tasks addon on your site, after the installation or update of the Convert Forms package, go to Extensions → Manage and make sure the Convert Forms Tasks plugin is installed and activated.
Create your first task
Creating your first task with Convert Forms is easy. The following steps guide you through building a task that sends an autoresponder email to the user who submits the form only if the “Send a copy to my self” field is checked.
Before you start
- Make sure your site is properly configured and can send emails.
- You have Convert Forms 4+ installed on your site.
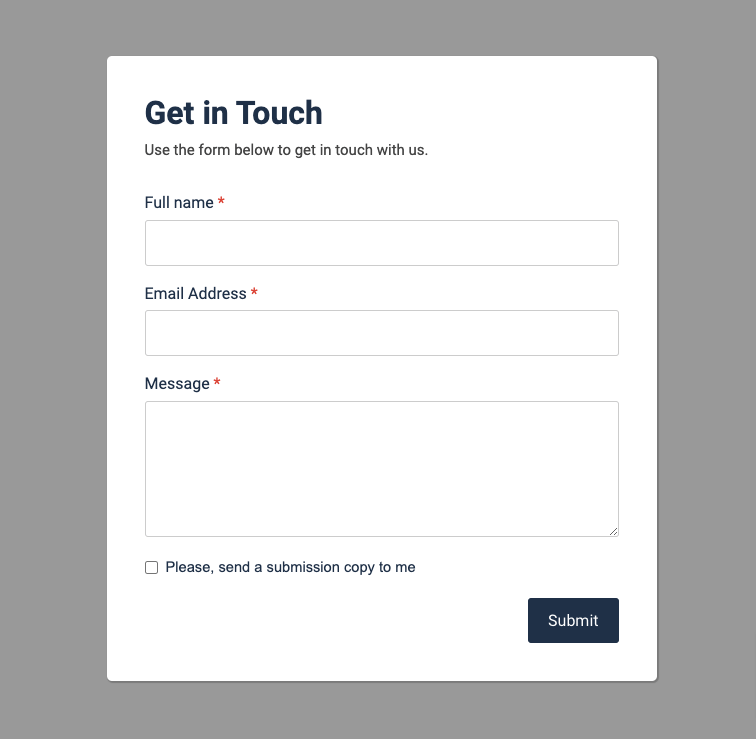
- You have a form that includes the following fields:
- Full Name (textbox)
- Email Address (email)
- Message (textarea)
- Send a copy to me (checkbox or terms of service)
Here's what your form may look like:
Step 1: Choose an app
- Go to Components - Convert Forms - Forms.
- Create a new form or click to edit an existing one.
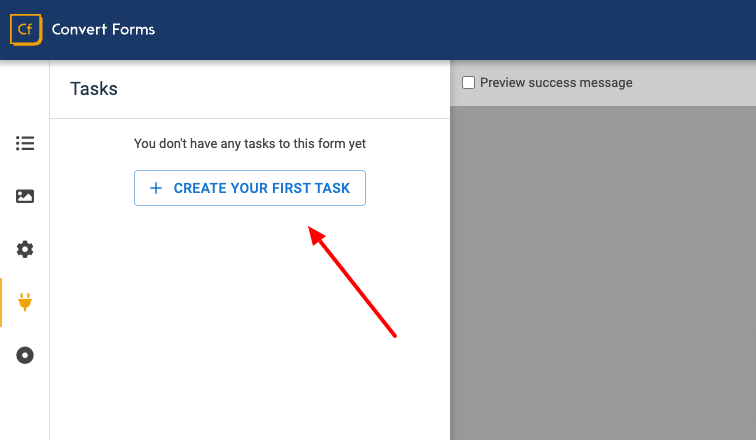
- From the left sidebar go to the Tasks panel.
- Click Create Your First Task. This starts the process of creating a new task.
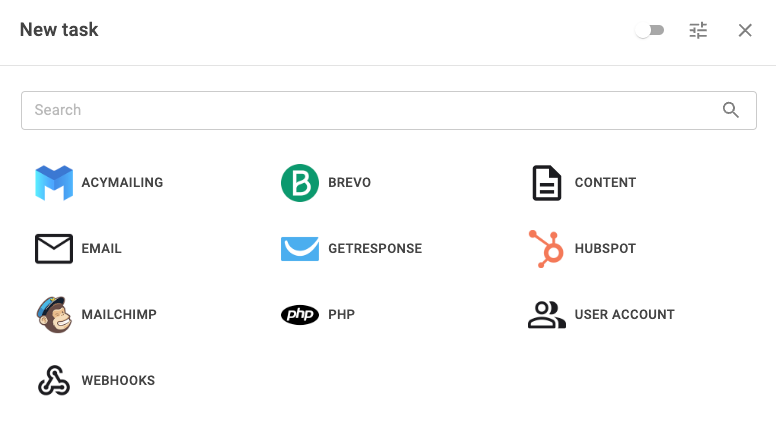
Upon opening the pop-up dialog, you will see a list of apps. Search for the email app. Your screen should look like this:
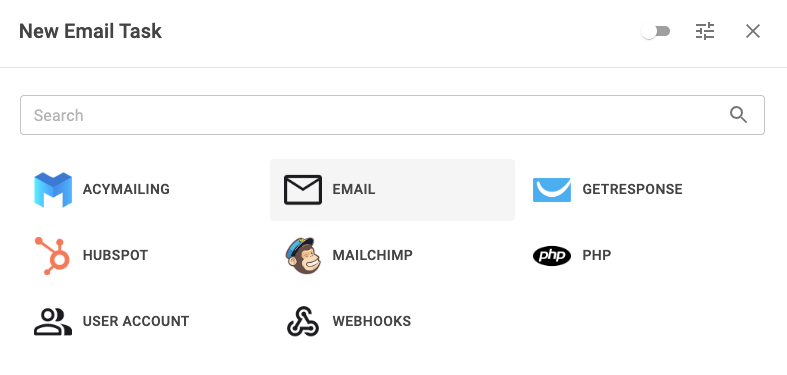
Note: If you can’t find the app you’re looking for, make sure the respective plugin is installed and activated. In our case, the plugin is called Convert Forms - Apps - Email.
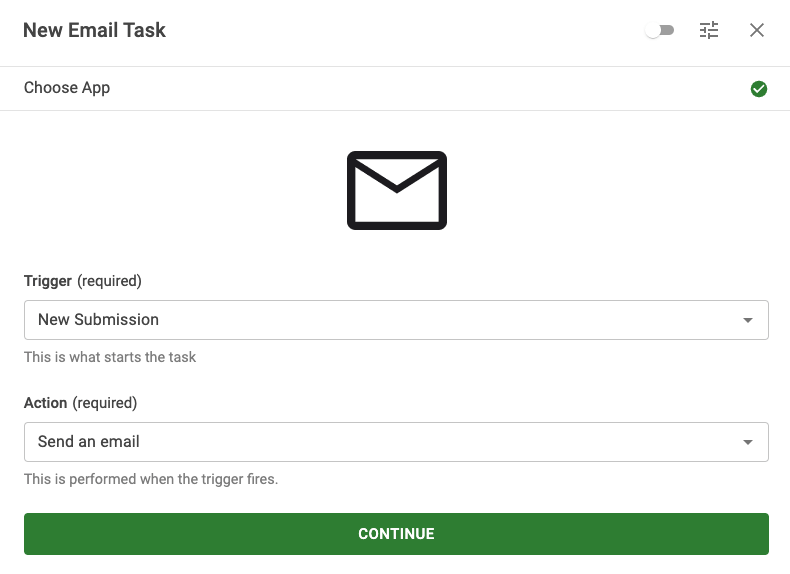
Step 2: Choose a trigger and an action
To fire the task at the right time we must choose the proper trigger. As mentioned earlier, the trigger determines what event to listen to execute the action described in a task.
- Select New Submission in the Trigger option. This will make the task fire every time our form receives a submission.
- Select Send an Email in the Action option. This will send a new email message.
- Click Continue.
Your screen should look like this:
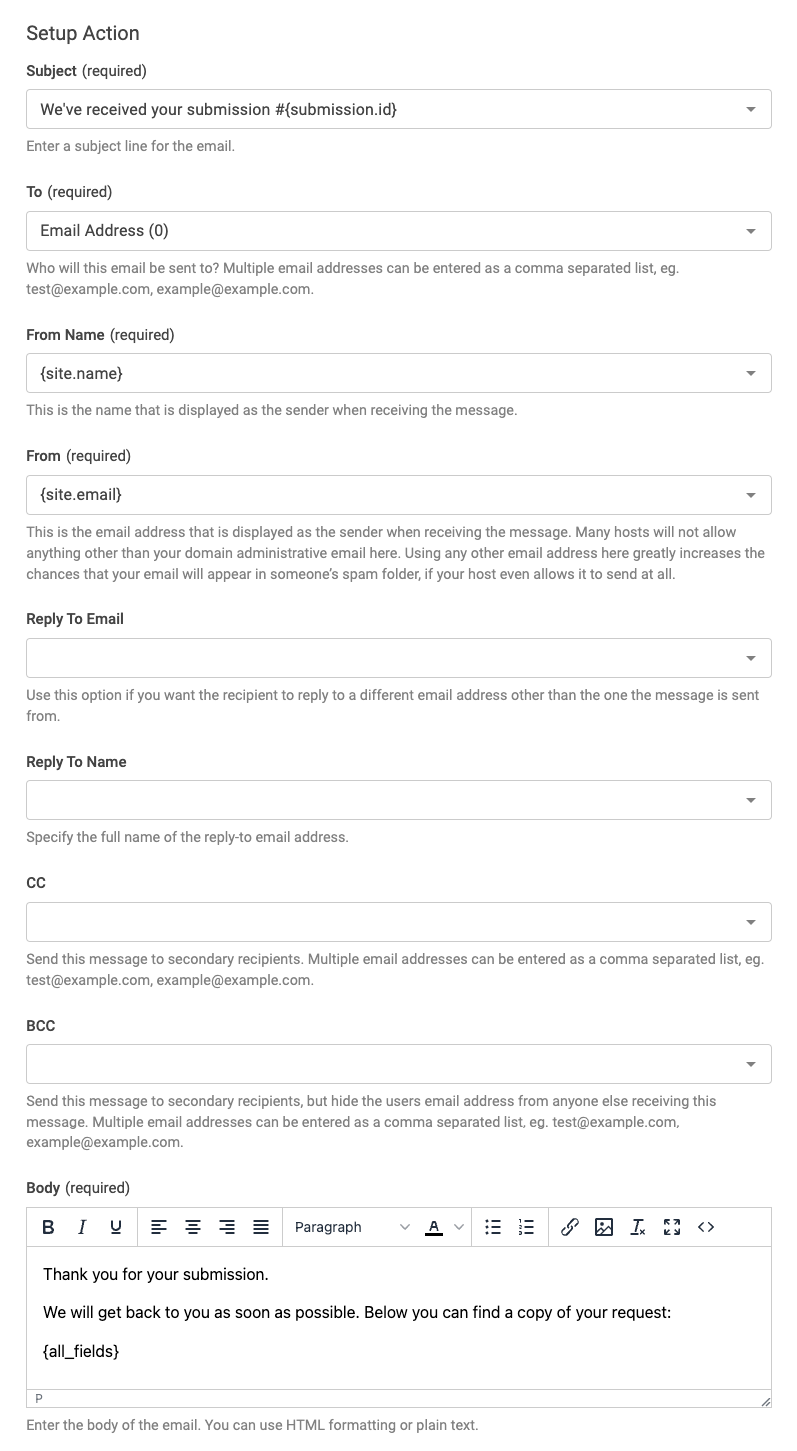
Step 3: Set up the action
After selecting the trigger and the action, the next step is to configure the action itself. In this step, you are presented with all the settings required by the selected action to run. Here you can map each option with a fixed or dynamic value using Smart Tags.
The Send an Email action makes our life easier by prefilling all the required settings. By default, it’s configured to send a notification email to the site’s email address. However, in our example, the email should be delivered to the user who submitted the form instead.
Let’s see what needs to be changed.
- Select the Email Address field in the To option.
- Set the Body option to something like this: “Thank you for your submission. We will get back to you as soon as possible. Below you can find a copy of your request: {all_fields}. The {all_fields} Smart Tag includes all the submitted data.
- Optionally, you can also change the Subject option to something like: “We’ve received your submission #{submission.id}”. Here, the {submission.id} represents the unique ID of the submission.
The settings should look like this:
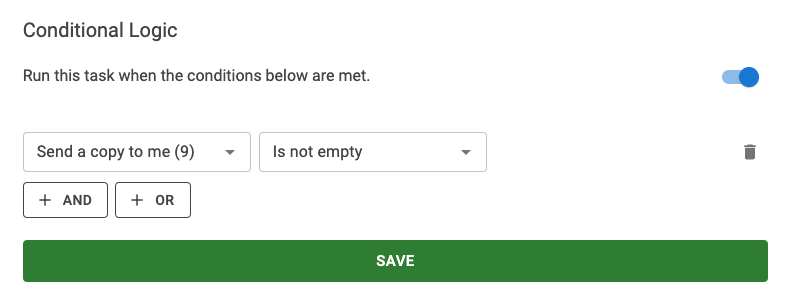
Step 4: Set up conditions
While on the same page, scroll down to the Conditional Logic section. Here’s where you define all the rules the task should meet to run.
Remember, the email should be sent only when the user Send Copy.
- Click to enable the Run this task when certain conditions are met toggle.
- Click Add Your First Condition.
- Select the Send Copy field in the Trigger dropdown.
- Select Is Not Empty in the Operator dropdown.
The condition should look like this:
Step 5: Set a Title
The penultimate step is to give your task a title so you can distinguish it later. This is rather useful when you have multiple tasks set in your form.
To set a title click on the label at the top of the popup dialog. Once you focus on it, an input will appear where you can set your title as shown in the screenshot below.

Step 6: Activate Task
After configuring your task and entering a title, there’s one extra step. You need to turn the task on. The default state when you add a new task is draft. This allows you to set up your tasks completely before they’ll start to run.
- Click the toggle next to the task’s title input to enable it.
- Click Save.

Congratulations! You have successfully created your first task with Convert Forms!
Passing Data between Tasks
Tasks are executed sequentially, and each task returns a response when it completes. You can use this response in any of the following tasks by referencing it through the following Smart Tag.
{task.XX.response.PROPERTY}- XX is the index of the task in the list (starting from 1).
- PROPERTY is the name of the property you want to read from the response object.
If the task simply returns a string or number (not an object), you can omit the property and use:
{task.XX.response}Let's say you have the following task order:
- Administrator Email
- Submitter Email
- Webhook Task
If you want the Webhook Task to access the response from the Administrator Email, you would use:
{task.1.response}To access the response from the Submitter Email task:
{task.2.response}Using the prev Alias
To make things easier, there's a special alias: prev, which always refers to the immediate previous task. This way, you don't need to count the task numbers manually.
For example, in the Webhook Task (task #3), to read the response of the Submitter Email task (task #2), you can use:
{task.prev.response}Note: The prev alias only works for the directly preceding task.
Reading the Response from a PHP Task
The PHP Task gives you full control to run custom PHP code, connect to external APIs, or interact with the database.
You can use the return statement to pass data to the following tasks.
return [
    "name" => "John",
    "email" => "[email protected]",
    "age" => 30
];
If the next task is an Email Task, you can use this data as follows:
- To: {task.prev.response.email}
- Recipient Name: {task.prev.response.name}
Reading the Response from the User Account App
The User Account App lets you create custom registration workflows. When a user is successfully created, the task returns a Joomla\CMS\User\User object with the user’s data.
To access this data in a subsequent task:
- User ID: {task.XX.response.id}
- Username: {task.XX.response.username}
Just replace XX with the task number where the User Account task is located.
Task Settings
Before taking a task to live, a few extra settings are available to fine-tune your task even further. Click on the gear icon next to the task’s title to open the task settings.
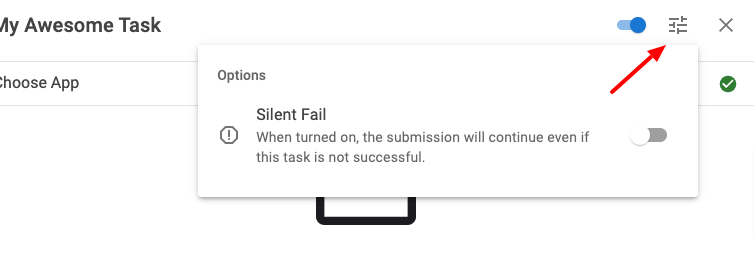
Silent Fail
Tasks run in order from top to bottom, as displayed in the form editor. By default, the next task in the list is processed only when the previous task runs successfully to maintain the workflow. When a task fails, the process stops, and the task’s error is displayed in the form. This means that the tasks supposed to run after the failed task never run. By enabling Silent Fail, you can ignore minor errors for non-critical tasks, preventing interruptions in the task sequence.
Troubleshooting
Tasks UI is not loading or responding
If the Tasks interface does not show up or some actions do not work, the most common cause is a browser extension blocking parts of the page. To confirm this is not an issue with Convert Forms, open the form editor in another browser or try again in incognito mode. If everything works there, the issue comes from an extension in your main browser.


 Rated: