Getting started
Here is a Getting Started tutorial for the MailChimp Auto-Subscribe extension
Setup
- Login to Joomla! back-end
- Go to Extension -> Plugin manager
- Search for the "MailChimp Auto-Subscribe" plugin and click to edit it
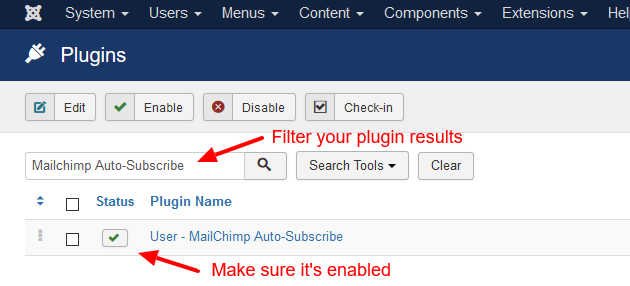
- Set the status to Enabled
- Enter the MailChimp's API Key and List Unique ID
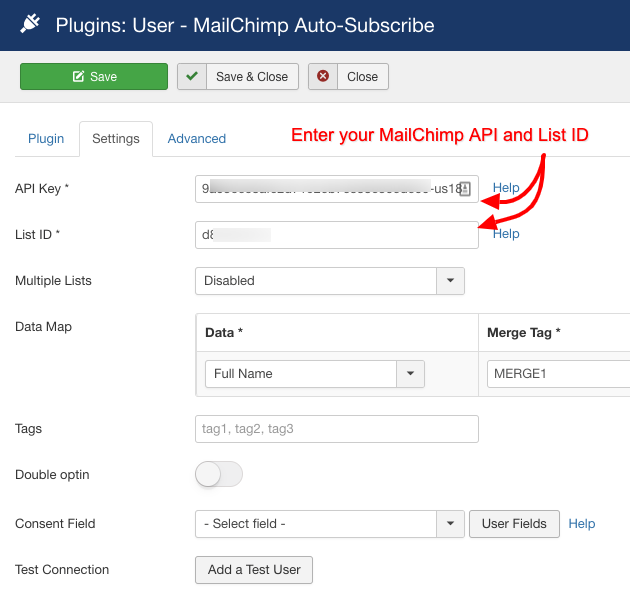
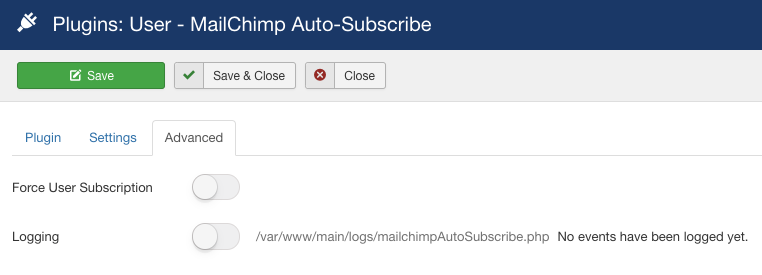
- Optionally set the appropriate settings under the Advanced Tab
How to Create a MailChimp API Key
- Login to your MailChimp account
- Go to Account -> Extras -> API Keys
- Click on the Create A Key button if you don't have already created an API Key.
- Copy the API Key and paste it to the extension's API Key field.
A typicall MailChimp API Key looks like: b2a476a53c84dd3d9fd886f542e81756-us5
Read the MailChimp's official tutorial on How to Find or Generate your API Key .
Find Your List ID
- From to the MailChimp's top menu go to Audience
- Click on the Audience's title you want to use
- Go to Manage Audience -> Settings
- Scroll down until you find the text field named Unique id for audience X
- Copy the value and paste it to the extension's List unique id field.
Read the MailChimp's official tutorial on how to Find your List ID .
A typicall MailChimp List ID looks like: ba6fae5a17
Last updated on Nov 26th 2024 12:11
In This Article
Tassos offers a premium suite of Joomla extensions with 6 products and over 1.7 million downloads, providing reliable solutions since 2014.


 Rated:
Copyright © 2014 - 2025 - Smile Motive Development LP. All Rights Reserved.