Using the Gallery Module (Slideshow, Masonry, Grid)
Create photo galleries with our Masonry, Grid, Justified and Slideshow layouts. Perfect for showcasing your images.
The Smile Pack Gallery Widget is your go-to solution for integrating stunning and responsive photo galleries into your Joomla site. With a user-friendly drag-and-drop builder, this widget makes it a hassle-free choice for creating visually appealing photo galleries on your Joomla site. Whether you're a novice or an experienced user, the Smile Pack Gallery Widget ensures a seamless and dynamic image showcase for an engaging user experience. Choose from various styles, including grid, masonry, justified, and slideshow, to enhance the visual appeal of your photo displays.
This article provides insights into the functionality of the Smile Pack Gallery Widget and guides you through integrating a gallery module into your Joomla! Site.
Requirements
- Ensure you have the fileinfo PHP extension installed on your server (it should be installed by default).
- Ensure you have the gd PHP extension installed on your server, as it's required for the resizing and watermark functionality.
- Ensure you have the exif PHP extension installed on your server.
The PHP extensions required must be installed on your host, either via cPanel (or alternative) or by contacting them and asking them to install them for you.
How to add a gallery module to Joomla
To start creating a gallery module and add it to your Joomla Website, follow the steps listed below:
Step 1: Head to Content > Site Modules and press the New button. Search for "Smile Pack" on that page, and select the Smile Pack - Gallery Module.

Step 2: Select the module position and click the Markers tab to add your locations.

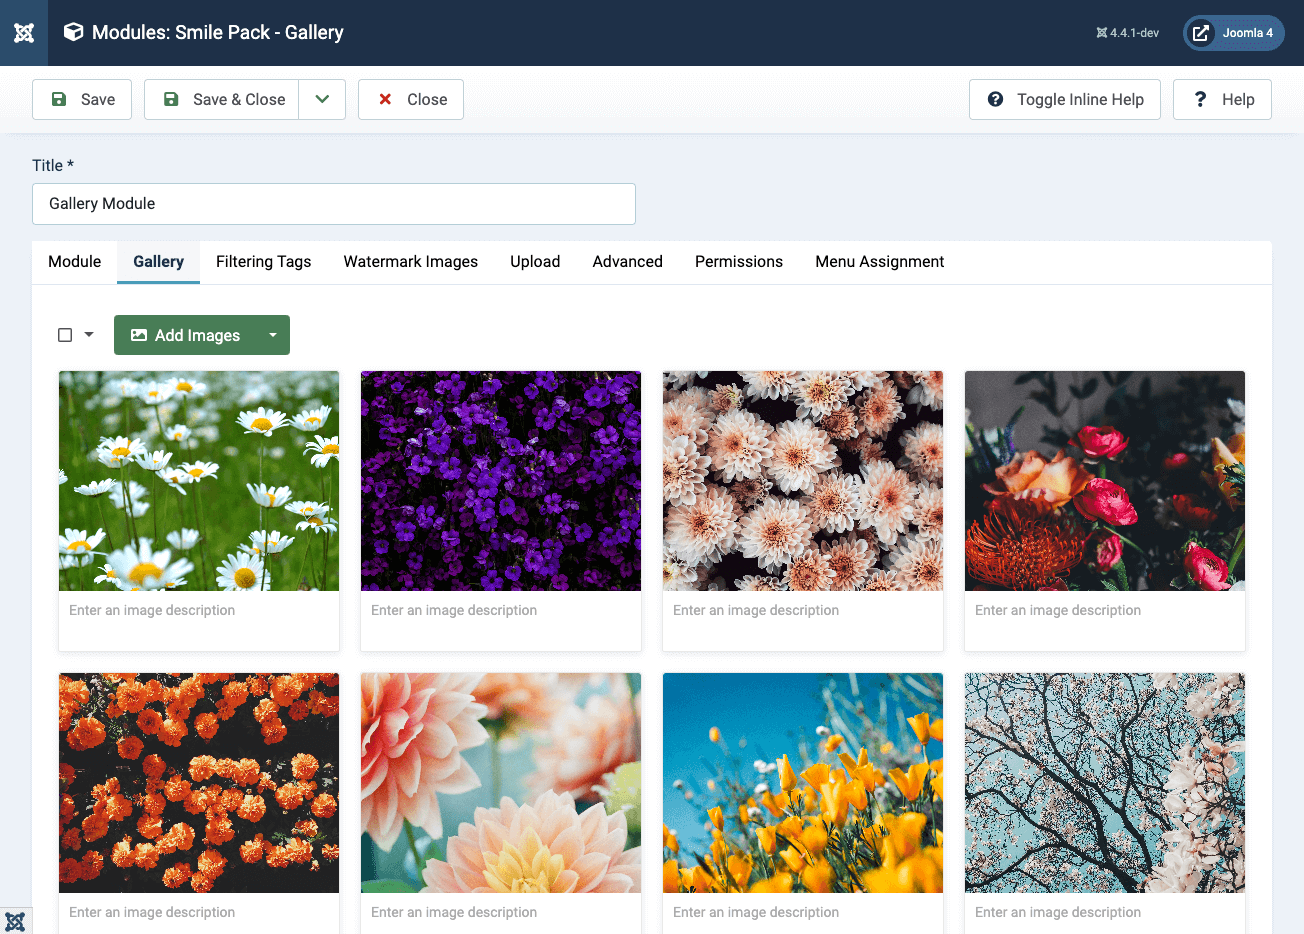
Step 3: Once on the Gallery tab, upload your images via drag 'n' drop or the Add Images button. Once your gallery is ready, hit the Save button.
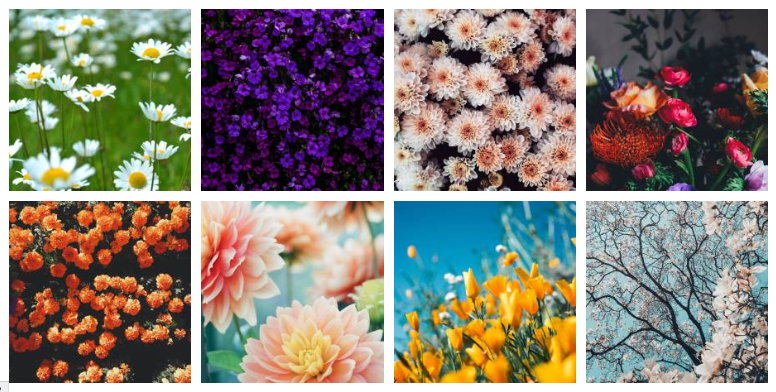
Step 4: Your gallery module is ready! View it on your site.
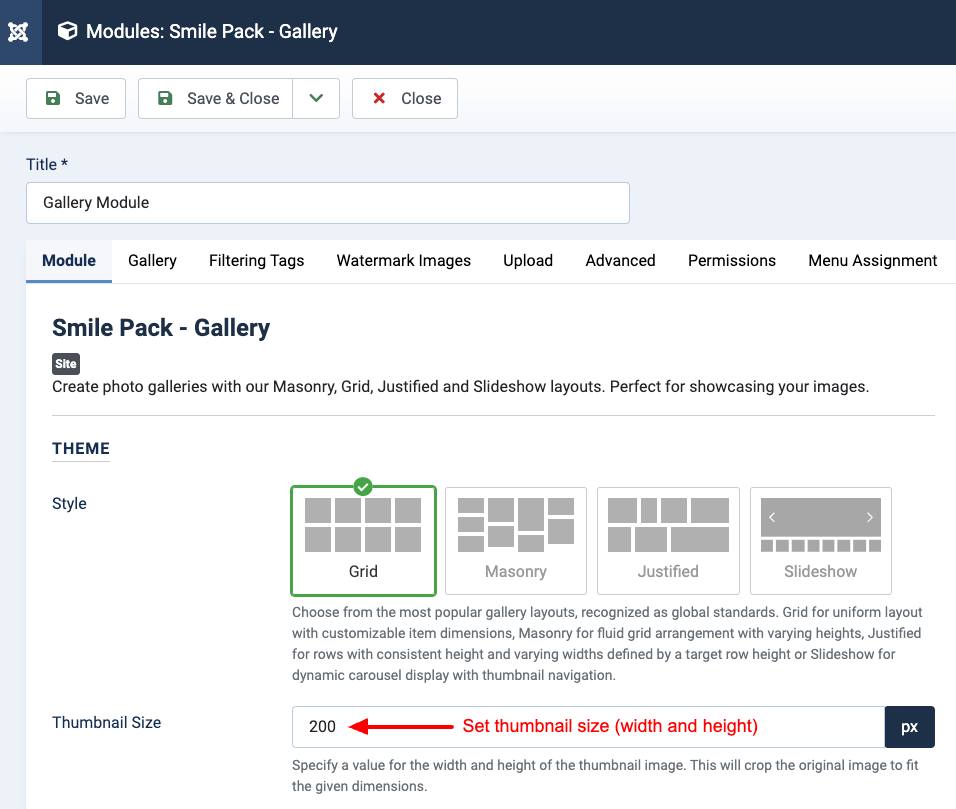
How to add a Grid Gallery module to Joomla
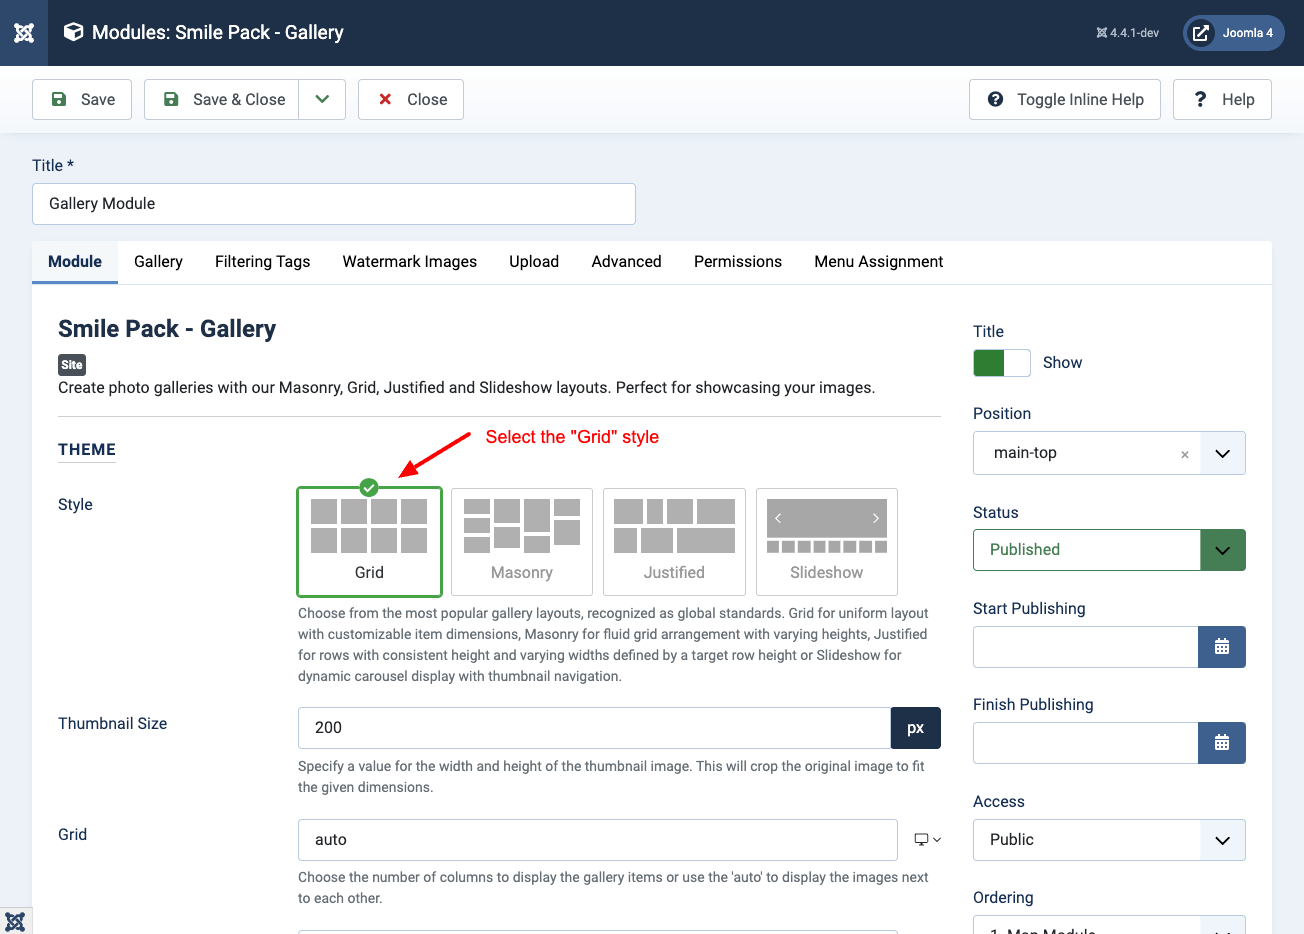
To add a Grid Gallery module, follow the steps listed in How to add a Gallery module to Joomla, and on Step 2, set the Style to Grid, and click on the Save button.
How to add a Masonry Gallery module to Joomla
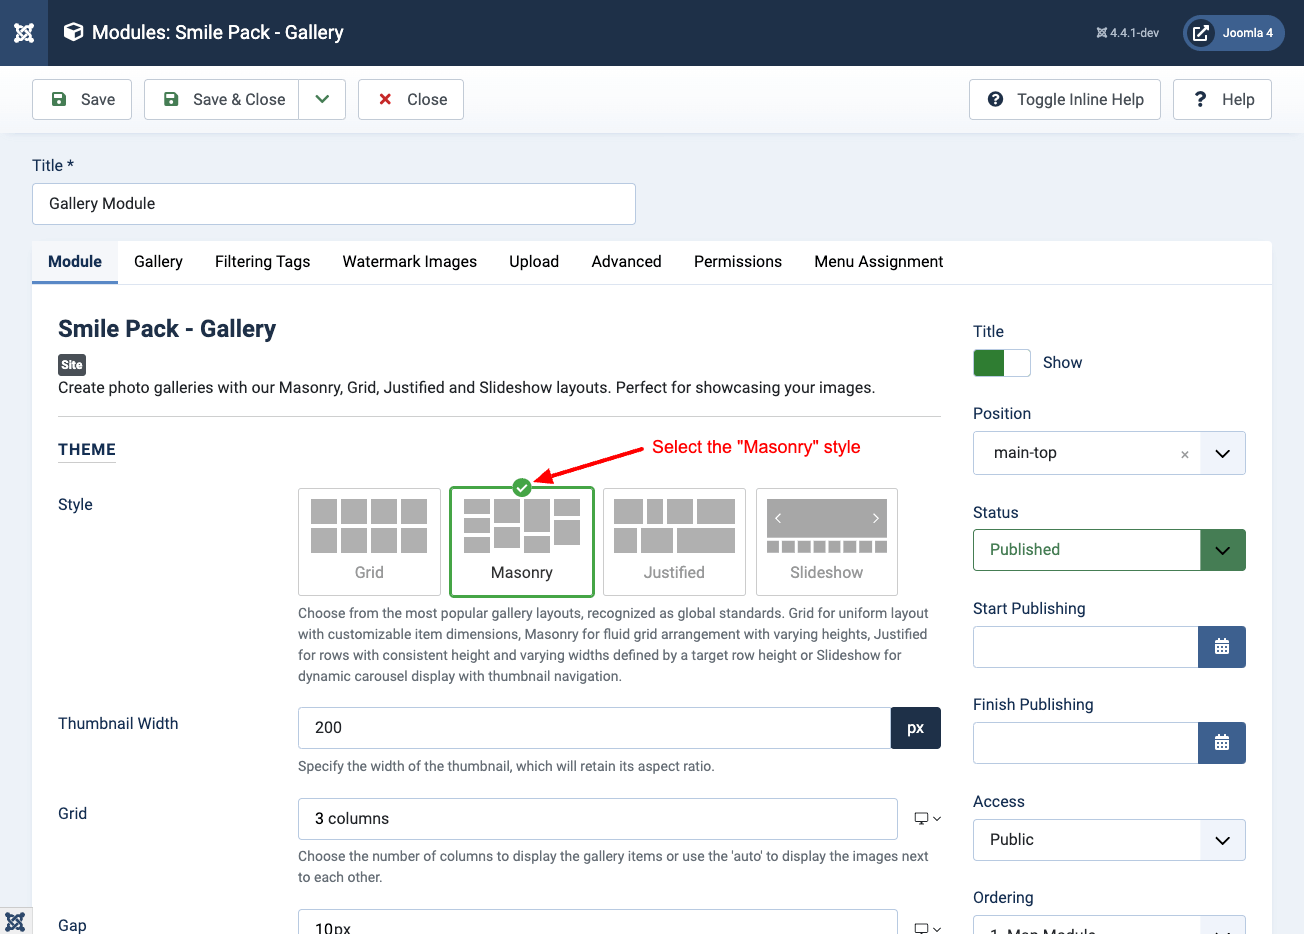
To add a Masonry Gallery module, follow the steps listed in How to add a Gallery module to Joomla, and on Step 2, set the Style to Masonry, and click on the Save button.
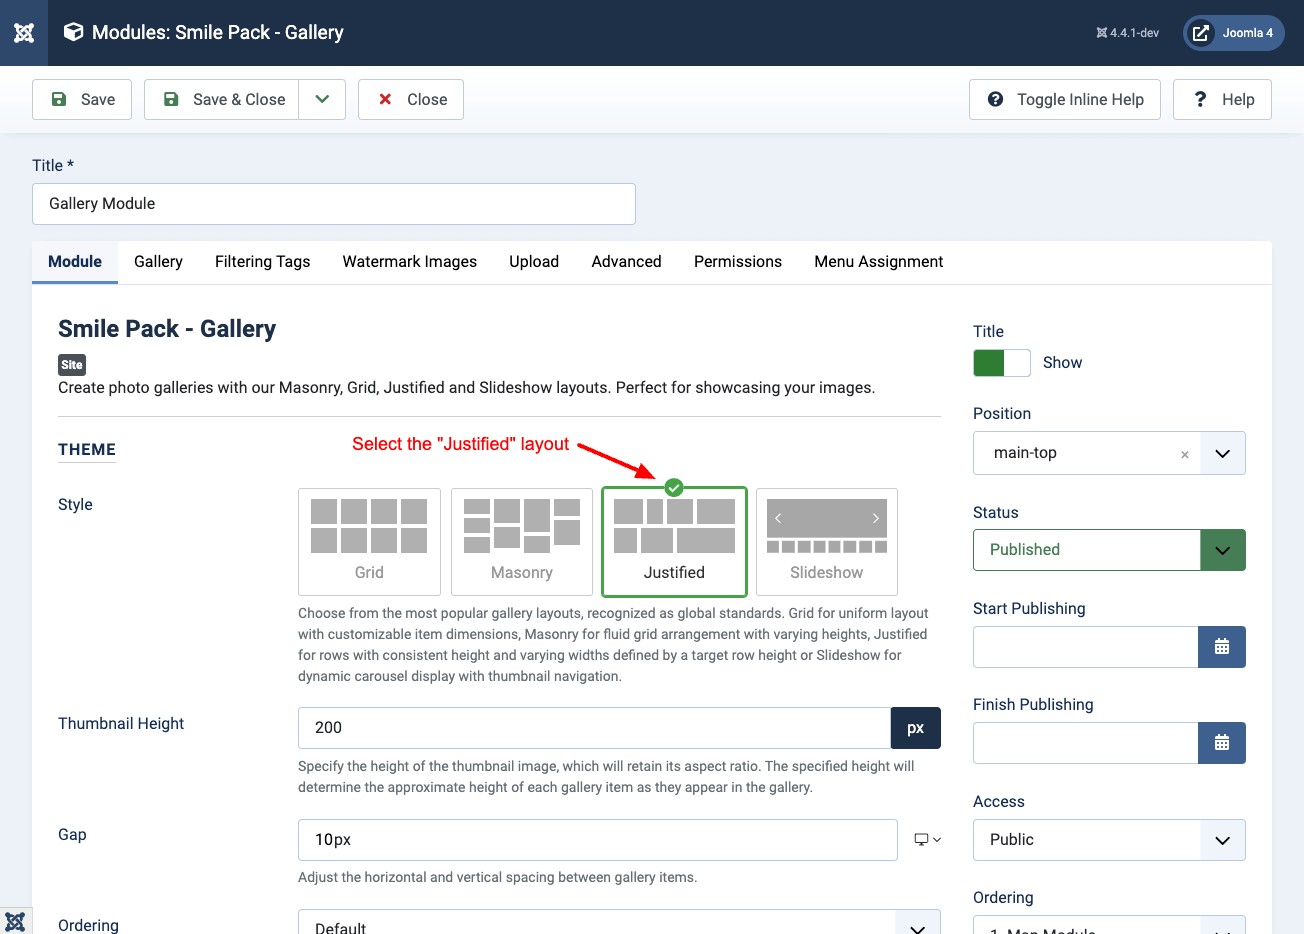
How to add a Justified Gallery module to Joomla
To add a Justified Gallery module, follow the steps listed in How to add a Gallery module to Joomla, and on Step 2, set the Style to Justified, and click on the Save button.
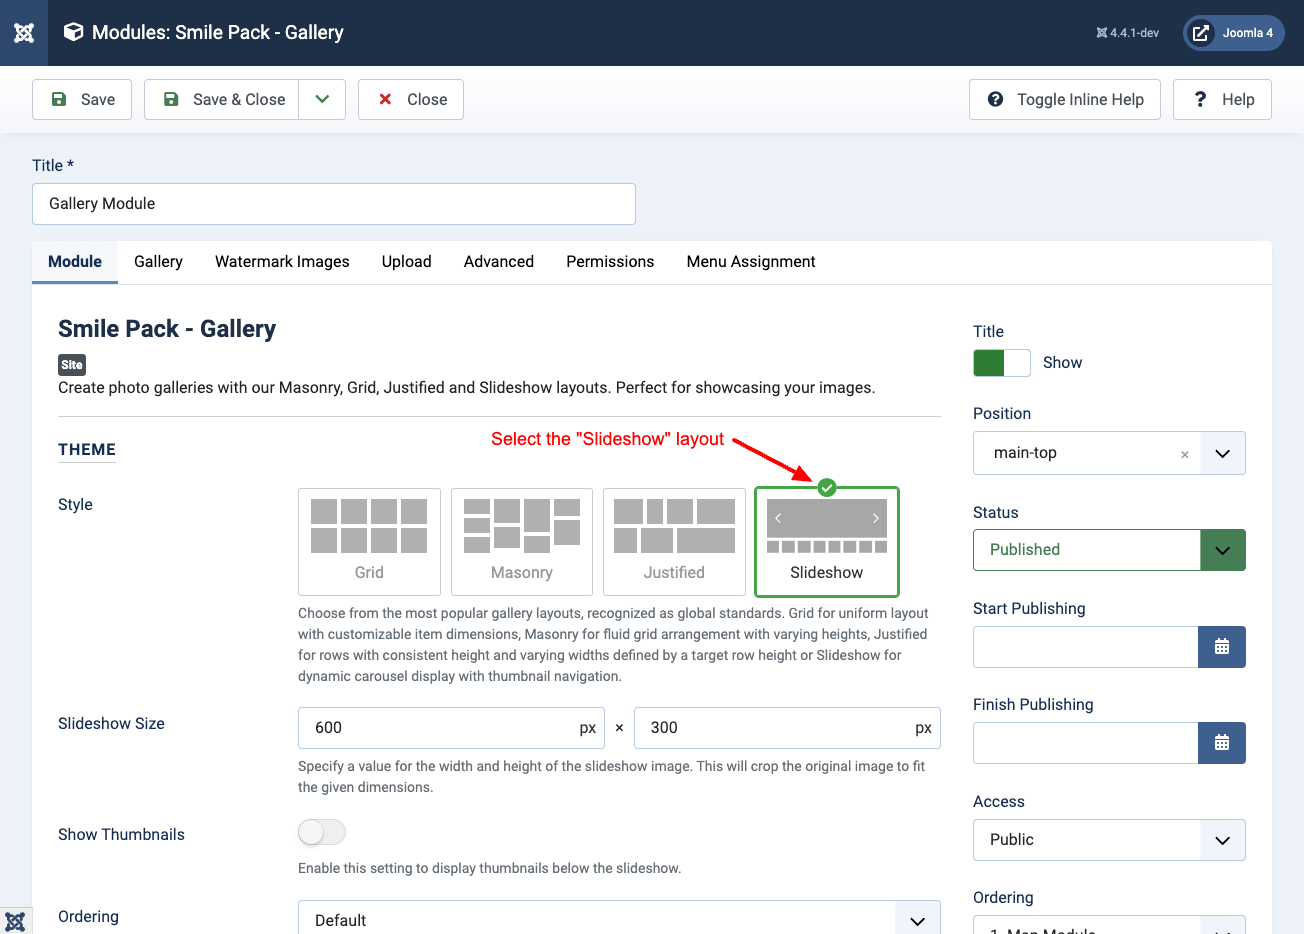
How to add a Slideshow Gallery module to Joomla
To add a Slideshow Gallery module, follow the steps listed in How to add a Gallery module to Joomla, and on Step 2, set the Style to Slideshow, and click on the Save button.
How to resize the full images
To resize the full image, go into your Gallery module > Module tab > Full-Size Image section, set the Resize Width and/or Resize Height, and click Save.
How to resize the thumbnails
How to resize your Grid gallery thumbnails
To resize the thumbnails, go into your Gallery module > Module tab > set a number for both the width and height under Thumbnail Size, and click Save.
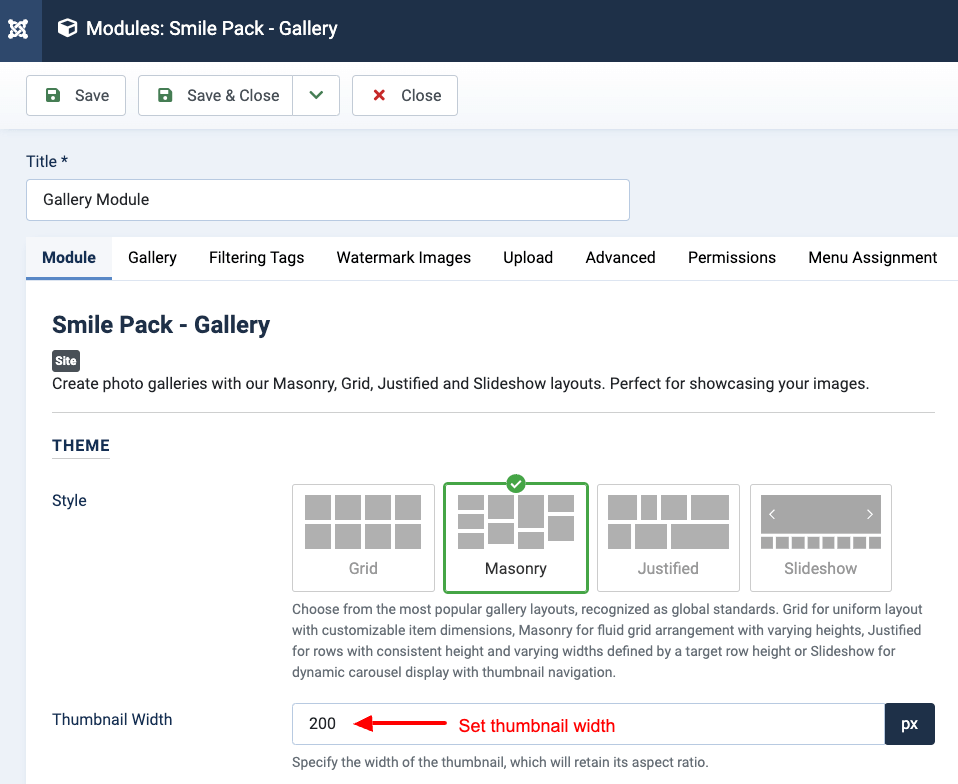
How to resize your Masonry gallery thumbnails
To resize the thumbnails, go into your Gallery module > Module tab > set the width under Thumbnail Width and click Save.
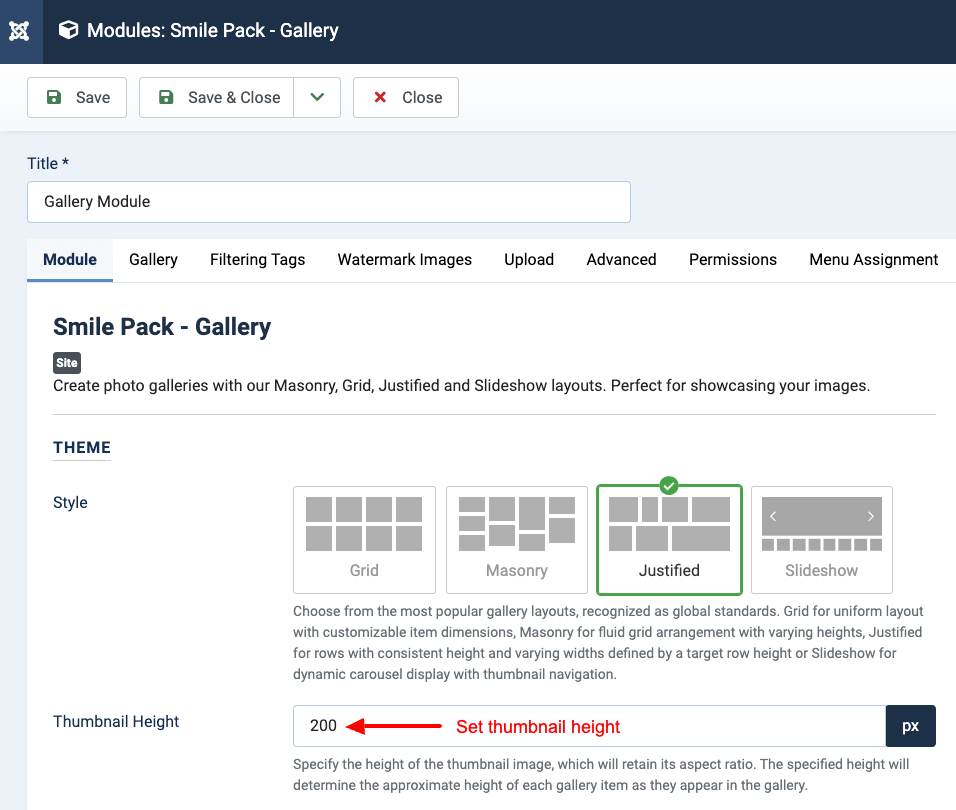
How to resize your Justified gallery thumbnails
To resize the thumbnails, go into your Gallery module > Module tab > set the height under Thumbnail Height and click Save.
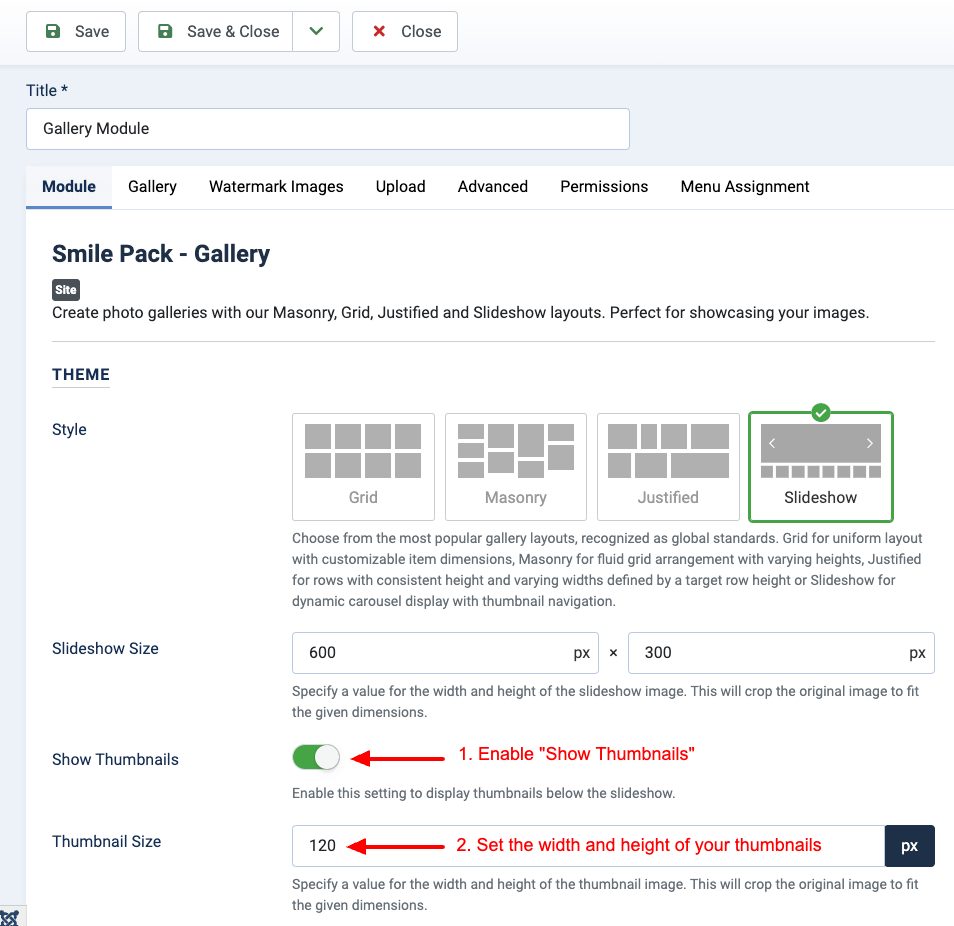
How to resize your Slideshow gallery thumbnails
To resize the thumbnails, go into your Gallery module > Module tab > enable "Show Thumbnails" > set the width and height under Thumbnail Size and click Save.
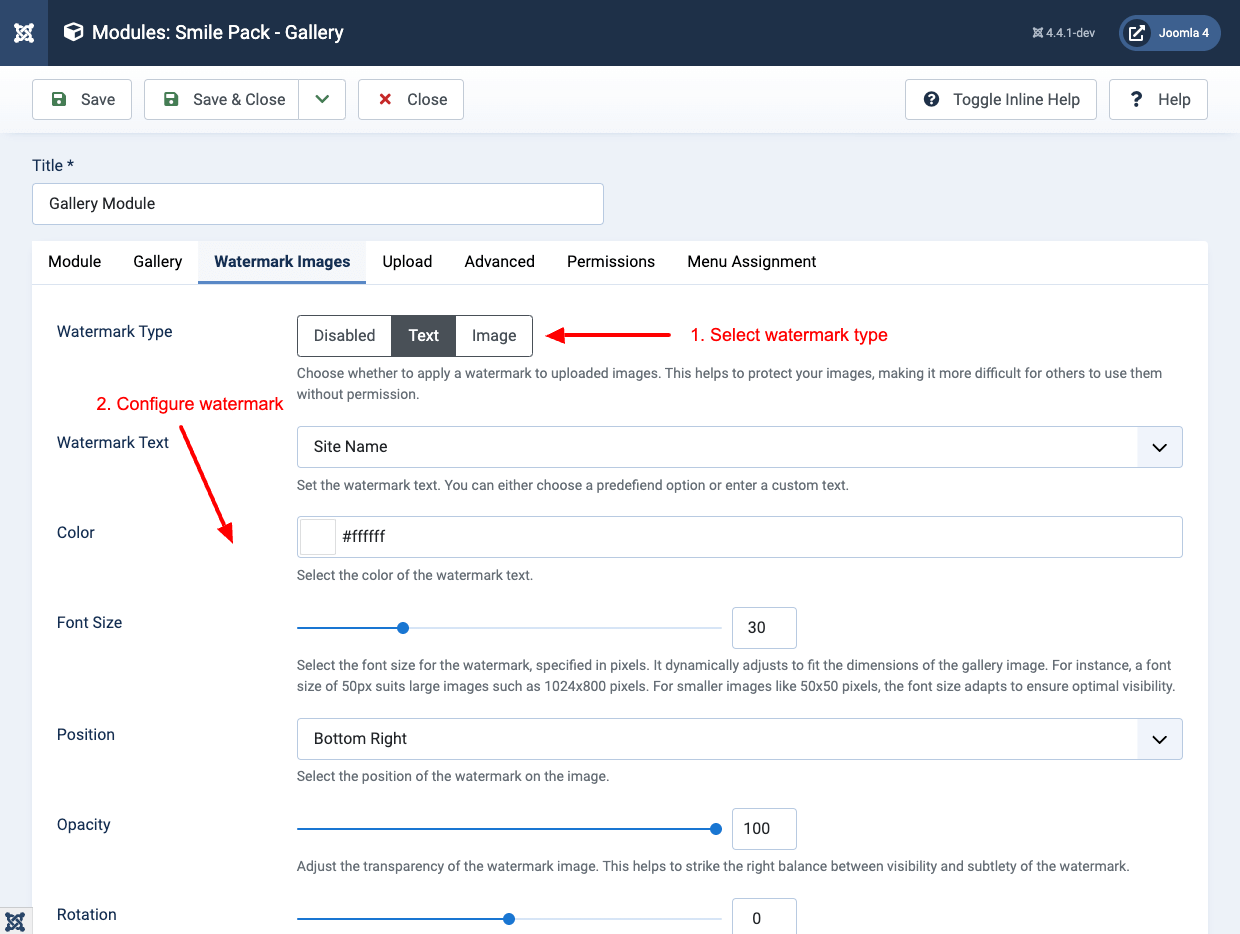
How to add watermark to your images
To add a watermark in your images, navigate to the Watermark Images tab > select either Text or Image as the watermark type, and click the Save button.
How to filter your images with tags
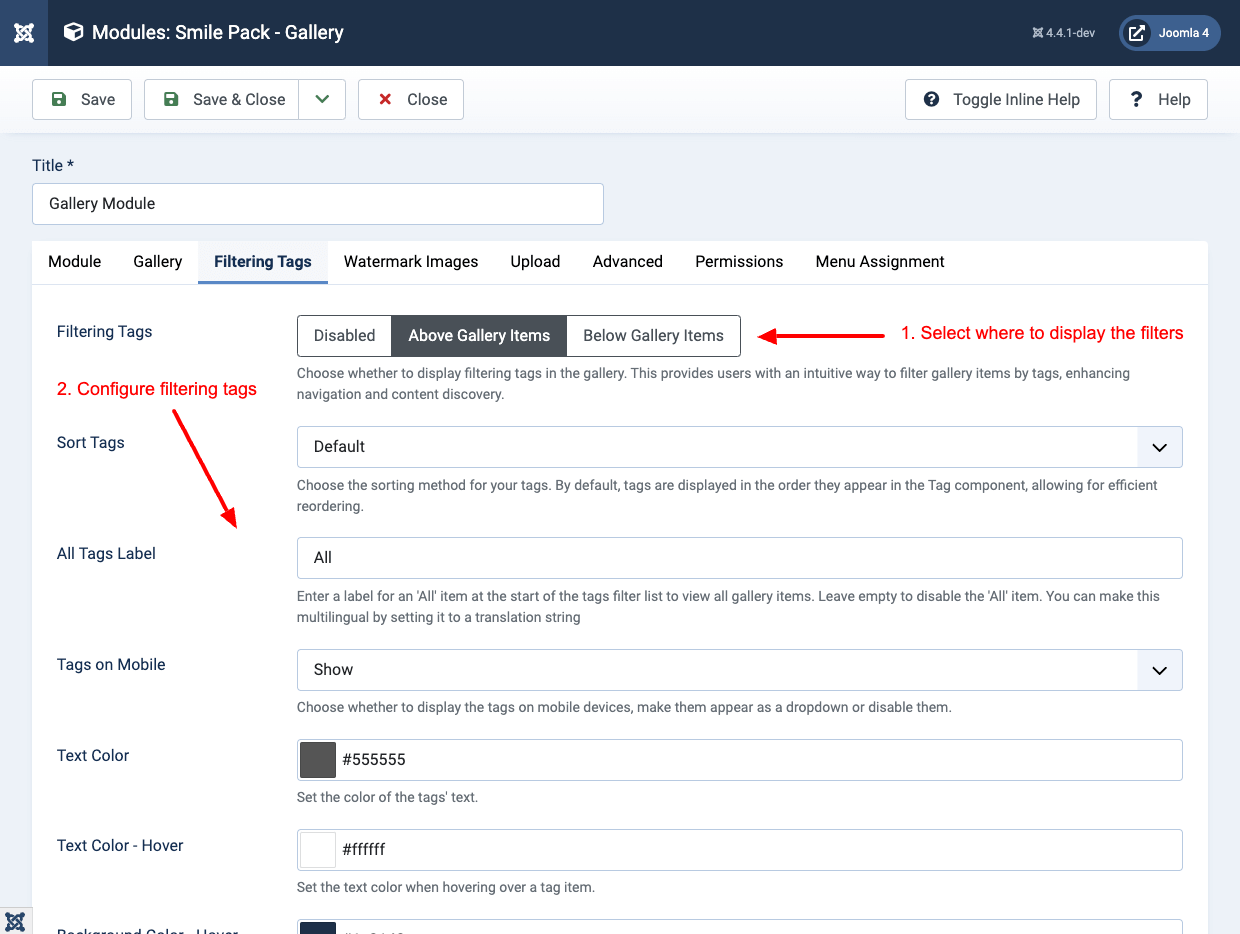
To display the tags set in your gallery items, above or below your gallery, allowing you to filter the gallery items, go into your Gallery Module > Filtering Tags tab, set where to display the filtering tags and configure its appearance, and functionality.
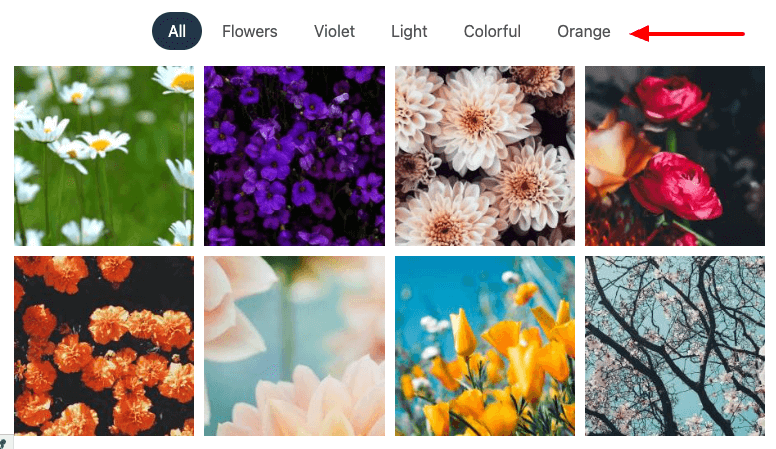
Once you view your Gallery Module, it should display all added tags, allowing you to filter your gallery items.
How to limit maximum allowed images
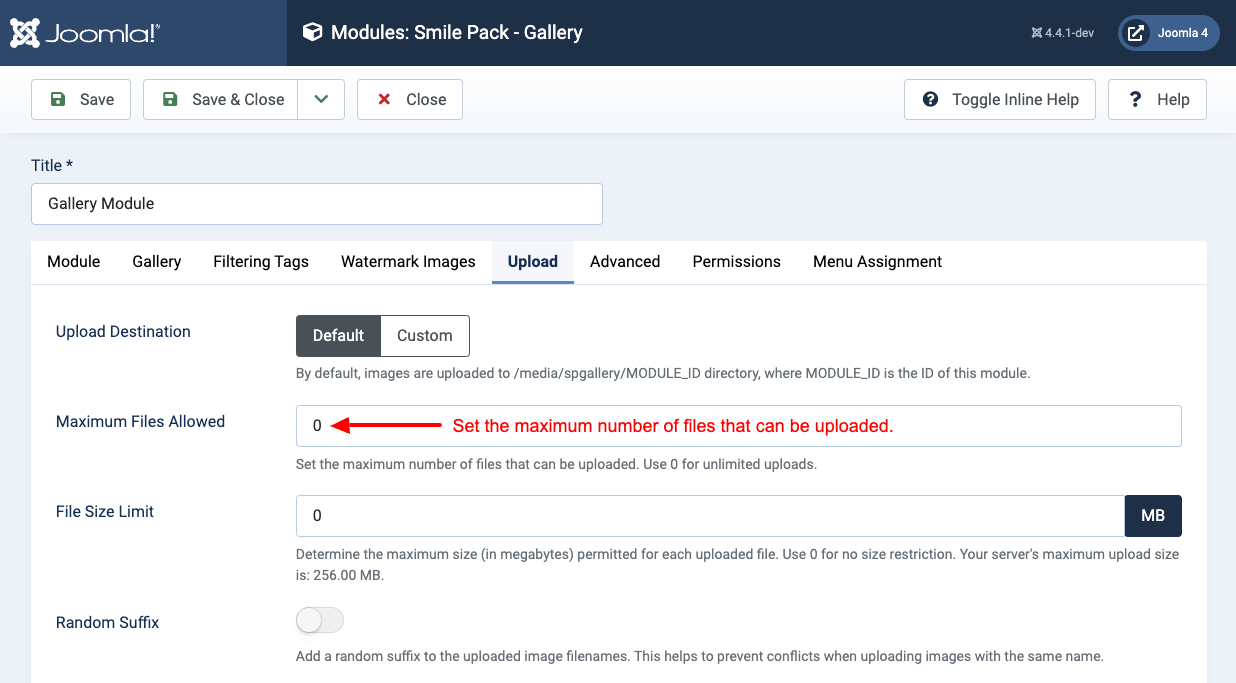
There are cases where you need to limit the number of images uploaded in the Gallery module. To apply a limit, go into the Gallery Module > Upload > set "Maximum Files Allowed". Setting this to 0 will allow unlimited files to be uploaded. This is useful when you have specific user groups that manage your galleries, and you'd like them to upload a specific number of images.
For example, to limit the maximum images allowed to 5, set Maximum Files Allowed to 5.
How to set a custom upload folder
To set a custom upload folder that matches your needs, go into your Gallery Module > Upload tab > Select "Custom" under Upload Destination, and configure the upload folder under "Custom Upload Folder". Note that this field supports Smart Tags.
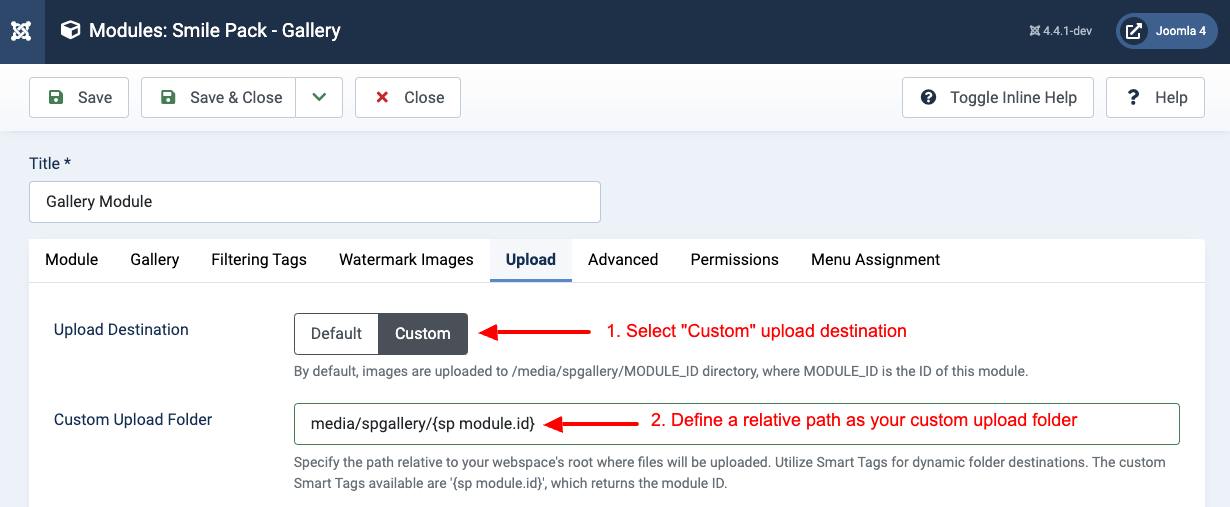
Once you upload new images on your Gallery module, they will be uploaded on the specified custom upload folder.
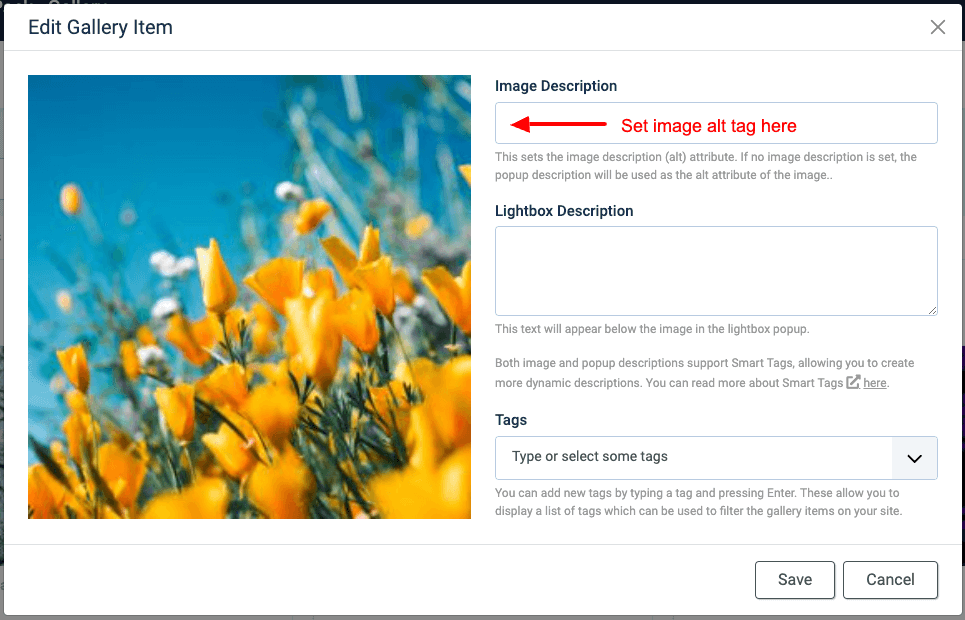
Set image description (alt) for your images
Setting the image description (alt) for your images enhances SEO by providing search engines with relevant information about the image, improving accessibility for users with visual impairments, and ensuring a positive user experience by displaying descriptive text when images cannot be loaded.
To set the image description (alt), you have two options:
Option 1: Set the image description (alt) below the gallery image in the textarea field:

Option 2: Set the image description (alt) by hovering over the gallery item > click the Pencil (edit) icon > in the edit modal that will appear, type in the image description (alt) in the respective field:
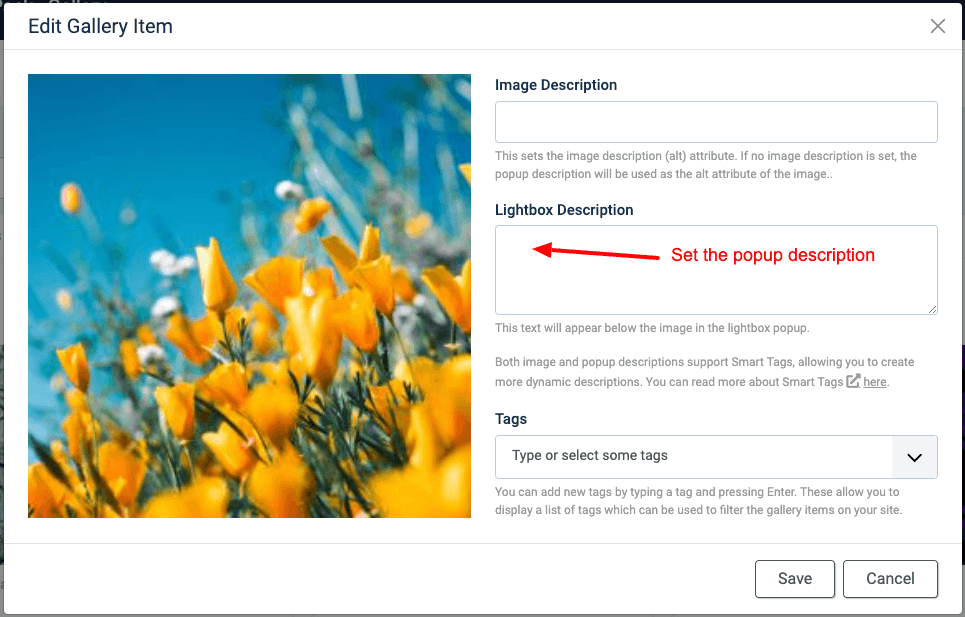
Set custom caption for your images
To set a custom caption that will appear when you open the image in the lightbox popup, follow the steps below.
Hover over the gallery item > click the Pencil (edit) icon > in the edit modal that will appear, type in the popup description in the respective field.
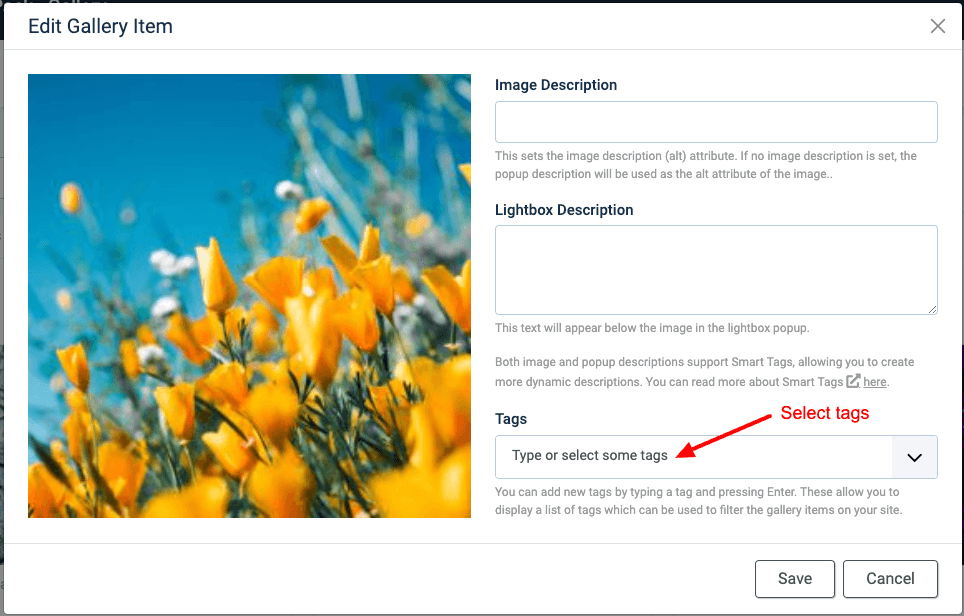
Set tags for your images
To tag your image, where the tags can appear above/below the gallery items, after enabling the setting "Filtering Tags" in the custom field settings, follow the steps below.
Hover over the gallery item > click the Pencil (edit) icon > in the edit modal that will appear, add your tags in the respective field.
How to generate image descriptions using AI
Long gone are the times when you manually had to set image descriptions (alt text) for the uploaded gallery items. Using AI, you can now generate image descriptions with the click of a button, by letting AI do its magic.
Before we get started, please set up your Open AI key by following this guide How to enable AI Features in Tassos extensions.
How to generate image descriptions on a specific gallery item
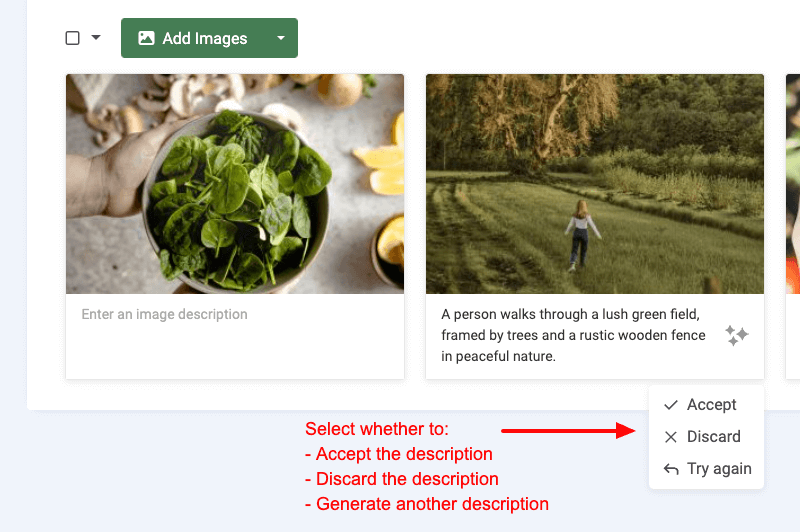
To generate an image description using AI, find a gallery item, hover over the image description textarea, and click on the "AI magic" button that appears.
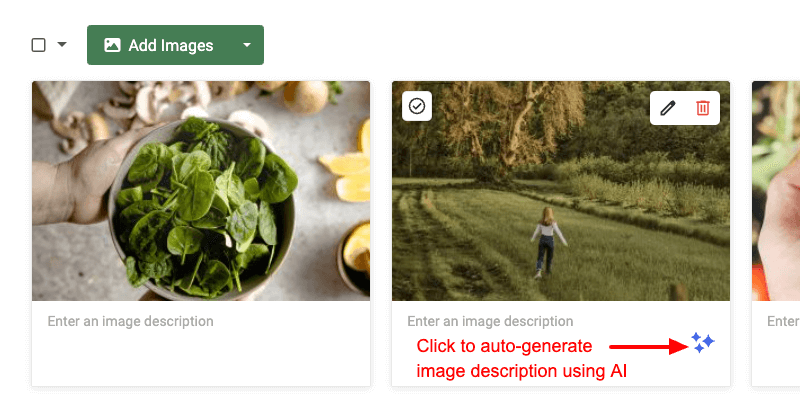
Upon clicking it, it will automatically start generating the image description for you. When it finishes loading, the image description will appear in the textarea, allowing you to perform three actions:
- Accept the generated image description
- Discard the generated image description
- Or try again, by generating a new image description.
How to generate image descriptions on all gallery items
Generating image descriptions one by one can be a tedious job when your gallery contains a lot of images. For this reason, we've implemented one button to do this job for all selected images.
Simply select the images you want to generate an image description, and at the top of the gallery, you will find the same "AI magic" button. Upon clicking it, it will prompt you to confirm that you want to generate an image description for all selected images.
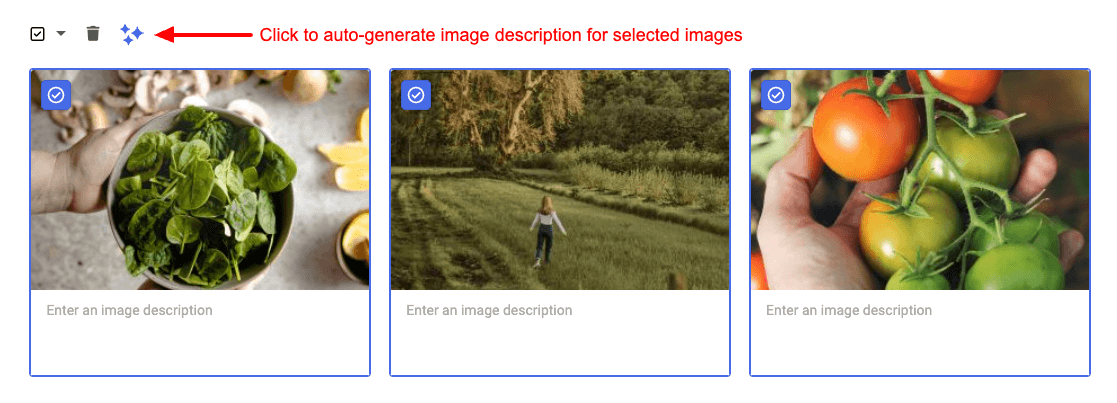
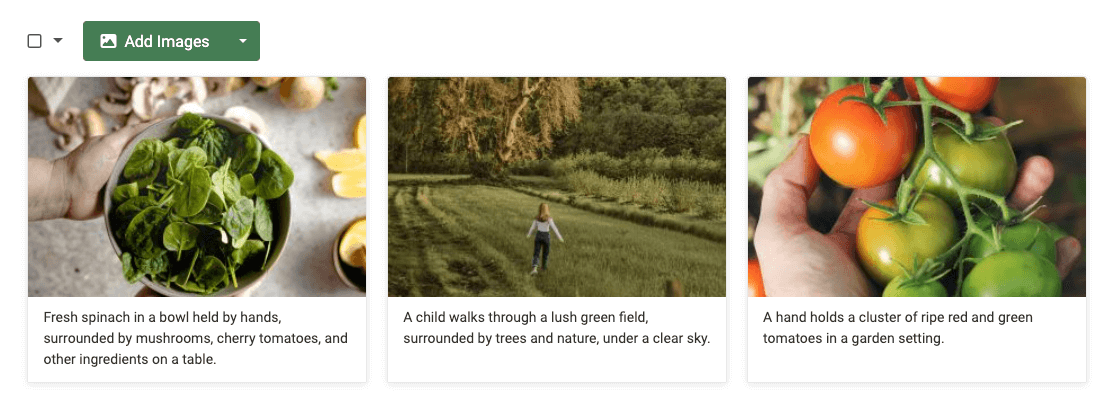
When it finishes generating the image description, all gallery items should contain their descriptions.
Module settings table
Below, you can find all settings available in the Gallery Module.
| Name | Description |
|---|---|
| Module | |
| Style | Choose from the most popular gallery layouts, recognized as global standards. Grid for uniform layout with customizable item dimensions, Masonry for fluid grid arrangement with varying heights, Justified for rows with consistent height and varying widths defined by a target row height or Slideshow for dynamic carousel display with thumbnail navigation. |
| Grid | Choose the number of columns to display the gallery items or use the 'auto' to display the images next to each other. |
| Thumbnail Size | Set the thumbnail size. Depending on the selected style, the thumbnails will be generated accordingly. For 'Grid', the thumbnail will be a square image. For 'Masonry', the thumbnail will be resized by width and keep its aspect ratio. For 'Justified', the thumbnail will be resized by height and keep its aspect ratio. For 'Slideshow', the thumbnail will be a square image. |
| Gap | Adjust the horizontal and vertical spacing between gallery items. |
| Item Ordering | By default, gallery items are displayed in the same order as they appear in the Gallery Manager, providing the flexibility to reorder items using drag and drop functionality manually. Alternatively, you can display items alphabetically or randomly to create a diverse and dynamic display. |
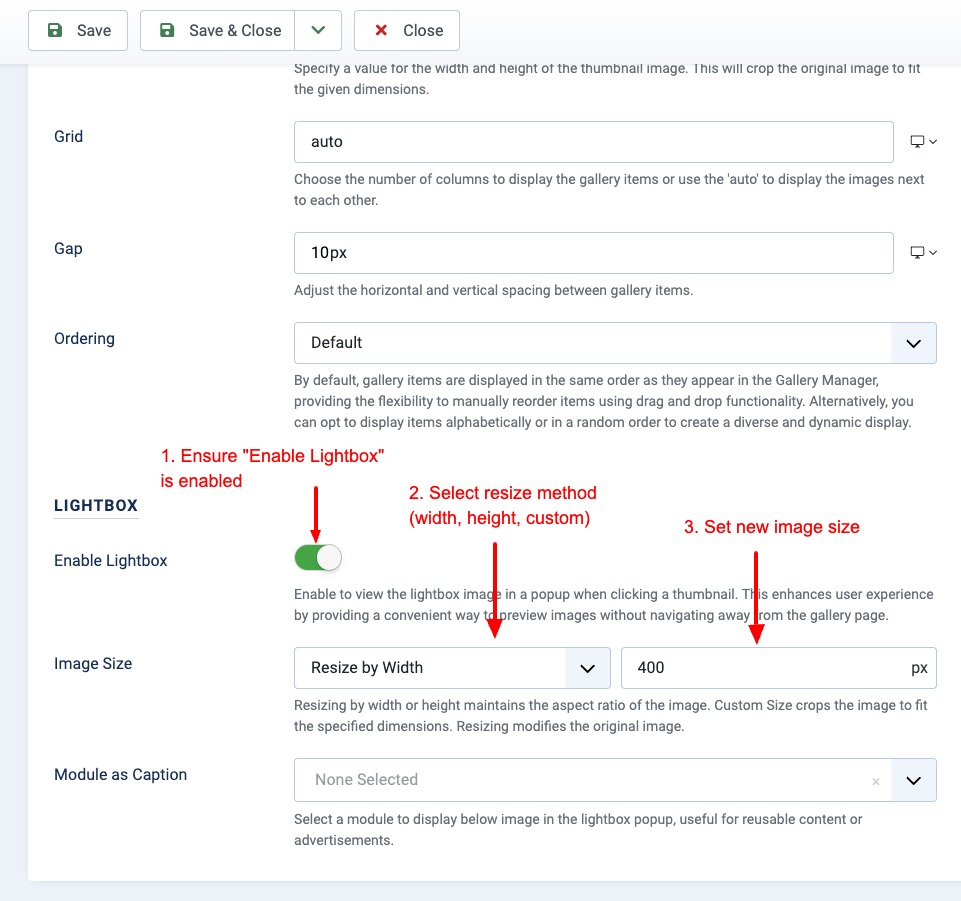
| Lightbox Image Size | Allow to view full-size images in a lightbox popup when clicking thumbnails. This enhances user experience by providing a convenient way to preview images without navigating away from the gallery page. |
| Module as Caption | Select a module to display below image in the lightbox popup, useful for reusable content or advertisements. |
| Gallery | |
| Gallery | Upload via drag 'n' drop your images and create a beautiful gallery on your Joomla! Website. |
| Watermark Images | |
| Watermark Images | Choose whether to apply a watermark text or image to uploaded images. This helps to protect your images, making it more difficult for others to use them without permission. |
| Watermark Text | Set the watermark text. You can either choose a predefined option or enter a custom text. |
| Image | Select the watermark image. It adjusts based on the gallery image's dimensions. For example, if the watermark is 800x800 pixels, it fits correctly on a 1024x1024 gallery image. The watermark scales down proportionally to fit if the gallery image is smaller, like 500x500 pixels. |
| Color | Select the color of the watermark text. |
| Font Size | Select the font size for the watermark specified in pixels. It dynamically adjusts to fit the dimensions of the gallery image. For instance, a font size of 50px suits large images such as 1024x800 pixels. The font size adapts for smaller images like 50x50 pixels to ensure optimal visibility. |
| Position | Select the position of the watermark on the image. |
| Opacity | Adjust the transparency of the watermark image. This helps to strike the right balance between the visibility and subtlety of the watermark. |
| Rotation | Rotate the watermark image clockwise by entering the angle in degrees. |
| Apply on Thumbnails | Choose whether to apply the watermark to thumbnails. |
| Filtering Tags | |
| Filtering Tags | Choose whether to display filtering tags in the gallery. This provides users with an intuitive way to filter gallery items by tags, enhancing navigation and content discovery. Note that this will only work when the Gallery uses the Grid, Masonry, or Justified layout. |
| Sort Tags | Choose the sorting method for your tags. By default, tags are displayed in the order they appear in the Tag component, allowing for efficient reordering. |
| All Tags Label | Enter a label for an 'All' item at the start of the tags filter list to view all gallery items. Leave empty to disable the 'All' item. You can make this multilingual by setting it to a translation string. |
| Text Color | Set the color of the tags' text. |
| Text Color - Hover | Set the text color when hovering over a tag item. |
| Background Color - Hover | Set the background color when hovering over a tag item. |
| Upload | |
| Upload Destination | By default, images are uploaded to /media/spgallery/MODULE_ID directory, where MODULE_ID is the ID of this module. For added security, a random prefix is appended to each file name. Opt for the 'Custom' option to specify your preferred destination folder. |
| Maximum Files Allowed | Set the maximum number of files that can be uploaded. Allows uploading between 1 and 8 images in Free version. |
| File Size Limit | Determine the maximum size (in megabytes) permitted for each uploaded file. Use 0 for no size restriction. |
| Custom Upload Folder | Specify the path relative to your webspace's root where files will be uploaded. Utilize Smart Tags for dynamic folder destinations. The custom Smart Tags available are '{sp module.id}', which returns the module ID. |
| Maximum Files Allowed | Set the maximum number of files that can be uploaded. Use 0 for unlimited uploads. |
| Random Suffix | Add a random suffix to the uploaded image filenames. This helps to prevent conflicts when uploading images with the same name. |
How to display a gallery anywhere using a shortcode
Smile Pack will soon provide a shortcode to display a gallery anywhere on your Joomla website. Whether it is a Grid, Masonry, Justified, or Slideshow, we've got you covered. You'll also be able to customize it fully using the shortcode settings.
Interested in the Gallery Shortcode? Get notified.
How to display a gallery as a custom field
To display your gallery using a Joomla! custom fields, you can use Advanced Custom Fields, which provides a plethora of custom fields, including the Gallery custom field, allowing you to create a Grid, Masonry, Justified, or Slideshow gallery across your Joomla Articles, Users, Contacts, and 3rd-party components.
Read more here: ACF Gallery - Add a Gallery Field in Joomla.
How to display a gallery in a popup
To create a popup that embeds a gallery, you can use EngageBox, which helps you create high-converting popups that help you increase your sales. There are a variety of ways to embed a gallery in your popup:
Method #1: Do you have an existing gallery module? Click here to create a gallery module. You can include it in your EngageBox popup using the Joomla! built-in shortcode {loadmoduleid ID}. Replace the ID with the Module ID.
Method #2: Use the ACF Gallery custom field. Within your EngageBox popup, you can use the Smart Tag {article.field.NAME --id=ID} to embed the ACF Gallery of a specific article in your popup. Replace NAME with the ACF Gallery custom field Name and ID with the Article ID, where the ACF Gallery was set.
Method #3: Use shortcode (Coming Soon).
Frequently asked questions
Can I embed this module in an article?
The gallery module can appear anywhere on your site, even on your Joomla! Articles, using the shortcode {loadmoduleid ID}, where ID is the module's ID, and placing it anywhere you desire on your Joomla! Article.
Can I use this module as a custom field?
Absolutely! You can read more on how to create a gallery field here: How to display your gallery using custom fields
Can I display this module in a popup?
Definitely. You can read more on how to display a gallery module in a popup here: How to display your gallery in a popup
Absolutely not. The Gallery Module is carefully built with performance in mind. We have tested it on extremely high-traffic websites to ensure that it scales without having any performance issues.
Yes, the Gallery Module is both responsive and mobile-ready, which will adapt to the device it is being viewed, ensuring that the photo galleries look great on all devices.
The Lightbox Popup feature of the Gallery Module allows you to click on a thumbnail and display the full image in a Lightbox popup. This feature is enabled by default and is based on Glightbox, a lightweight and dependency-free (no jQuery) lightbox script that is only 11kb gzipped. Additionally, you can choose a module to be displayed below the image’s caption in the lightbox popup and enable the optimization of the original image uploaded by the user to increase loading speed and free up storage space.
The justified layout expects images in different dimensions, such as portraits and landscapes. The logic behind the justified layout is that all images will be resized by a specific height (thus, all images will have different widths but the same height, as set in the "Thumbnail Height" setting). The justified layout will automatically fit all images nicely together.
You may notice that not all justified gallery rows have the same height. The reason is that the height set under "Thumbnail Height" is the lever we use to fit everything nicely. The algorithm will get as close to the target row height as possible.
Also, images will not stretch to fit a single row when there is extra space due to missing images.
Why do some images appear with the "Temporary" badge?
The Gallery module will automatically detect images you have previously uploaded to the Gallery Module and have left unprocessed (didn't save the module, closed the browser tab, etc...) and pre-populate the gallery module with those images so you can continue from where you've left. This ensures no leftover photos are kept on your server.
Troubleshooting
Why do my gallery images not get updated after changing them?
If you're manually updating your gallery images (i.e. reuploading them via FTP or overriding them with changes), and have Cloudflare installed on your Joomla site, you must clear the cache in order to get the latest changes.
How to fix the error "Joomla\Filesystem\File::copy: Cannot find or read file"
This error may appear after saving your Smile Pack Gallery module. The reasons why this appears can be found below:
- Your temp folder doesn't have valid permissions or has been changed to point to an invalid directory. Switching back to the default temp directory should resolve this issue.
- Requirements
- How to add a gallery module to Joomla
- How to add a Grid Gallery module to Joomla
- How to add a Masonry Gallery module to Joomla
- How to add a Justified Gallery module to Joomla
- How to add a Slideshow Gallery module to Joomla
- How to resize the full images
- How to resize the thumbnails
- How to add watermark to your images
- How to filter your images with tags
- How to limit maximum allowed images
- How to set a custom upload folder
- Set image description (alt) for your images
- Set custom caption for your images
- Set tags for your images
- How to generate image descriptions using AI
- Module settings table
- How to display a gallery anywhere using a shortcode
- How to display a gallery as a custom field
- How to display a gallery in a popup
- Frequently asked questions
- Can I embed this module in an article?
- Can I use this module as a custom field?
- Can I display this module in a popup?
- Will it slow down my website?
- Is it responsive and mobile-ready?
- What is the Lightbox Popup feature of the Gallery Module?
- How does the justified layout work?
- Does it support the webp format?
- Can I create a Slideshow Gallery?
- How are images regenerated?
- Why do some images appear with the "Temporary" badge?
- Troubleshooting


 Rated: