How to Simplify and Customize the Joomla Registration Form

Joomla’s registration form works fine for basic needs, but when you require more flexibility, a custom registration form becomes essential. Joomla lacks key features that many websites need, especially when managing memberships or user roles.
The missing features in the Joomla sign-up form can make signing up more complicated than necessary. To simplify the registration form and reduce friction, you can remove unnecessary fields, use email as the username, auto-generate passwords, and apply conditional logic to show or hide fields based on user input.
I help users daily through support tickets, setting up forms that look good and work exactly as they need them to.
In this guide, I will show you how to create a custom Joomla registration form that addresses these issues and makes signing up easier for your users.
- Going Beyond the Standard Joomla Registration Form
- Why Use Convert Forms
- Creating a Custom Joomla User Registration Form
- Remove Username Field / Use Email as Username
- Remove Full Name and Confirm Password Fields
- Auto-Generate Passwords
- Dynamic User Group Assignment
- Conditionally Create User Accounts (Optional Registration)
- Add Email Address Confirm Field
- Display the Registration Form via a Module
- Prevent Access to Joomla Registration Form
- Final Thoughts
Going Beyond the Standard Joomla Registration Form
While Joomla offers a basic user registration form out of the box, it lacks flexibility in several key areas. These limitations can quickly become a problem as your site grows or your user requirements become more specific. Here are some of the most common shortcomings:
- Email Confirmation Field – Joomla includes a confirmation field only for the password, not for the email address. If a user mistypes their email, they’ll never receive the activation link, and there’s no built-in way to prevent this.
- Εmail as Username – Joomla separates the username and email address by default. For many use cases, this is unnecessary. Using the email address as the username simplifies the form and reduces friction for users.
- Automatic Password Generation – Joomla requires the user to create their password, with no option to generate one automatically and email it to them.
- Split Full Name – Joomla only offers a single name field. While some prefer this simplicity, splitting names helps with personalization. Still, it’s not perfect; many names aren’t just two words, which can lead to awkward results.
- Dynamic User Group Assignment – The core form doesn’t support assigning users to different user groups based on their selections during registration.
- Limited Display Options – The default registration form can only be shown through the “Registration Form” menu item. What if you want to display it inside a sidebar module, below an article, or inside a popup?
- Lack of Conditional Logic – The core form doesn’t allow showing or hiding fields based on user input. For example, showing a “Company Name” field only when the user selects “Business” as the account type isn’t possible without custom coding.
Why Use Convert Forms
To build a flexible registration form that covers all the missing pieces of Joomla, you’ll need the right form builder. That’s where Convert Forms comes in.
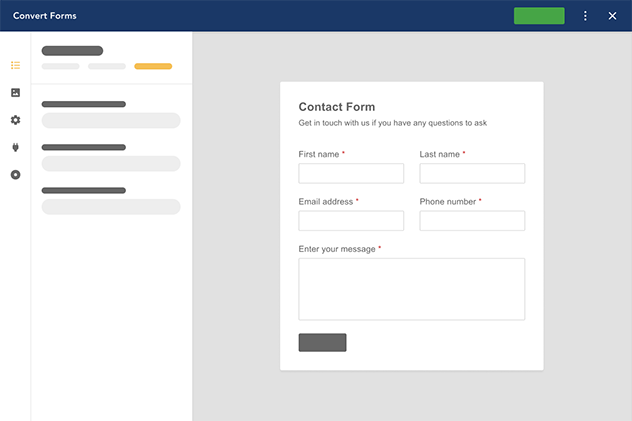
Convert Forms is a user-friendly form builder extension that lets you create contact forms, payment forms, registration forms, and even calculator forms without writing a single line of code. It also has numerous integrations and add-ons that expand what’s possible with Joomla forms.
At the core of this tutorial is the User Account Addon, which is the key feature that makes it all work. This addon transforms any form into a registration form with full control over how user accounts are created. Here’s what it allows you to do:
- Create user accounts upon form submission
- Assign users to specific groups conditionally, based on their input
- Map form fields to core user data like name, email, or password
- Map form fields to user custom fields
- Auto-generate passwords, so users don’t have to create one themselves
- Create accounts conditionally, only when certain criteria are met
The User Account Addon is a Pro feature. To use it, purchase a Convert Forms plan and install it on your Joomla site. Once you’ve done that, you’ll be ready to follow the next section, where I will walk you through creating your custom Joomla user registration form.
Creating a Custom Joomla User Registration Form
Let’s start by building a basic user registration form using Convert Forms. The goal is to replicate the core fields in Joomla’s default registration form: Full Name, Username, Email Address, and Password.
Step 1: Build the Form
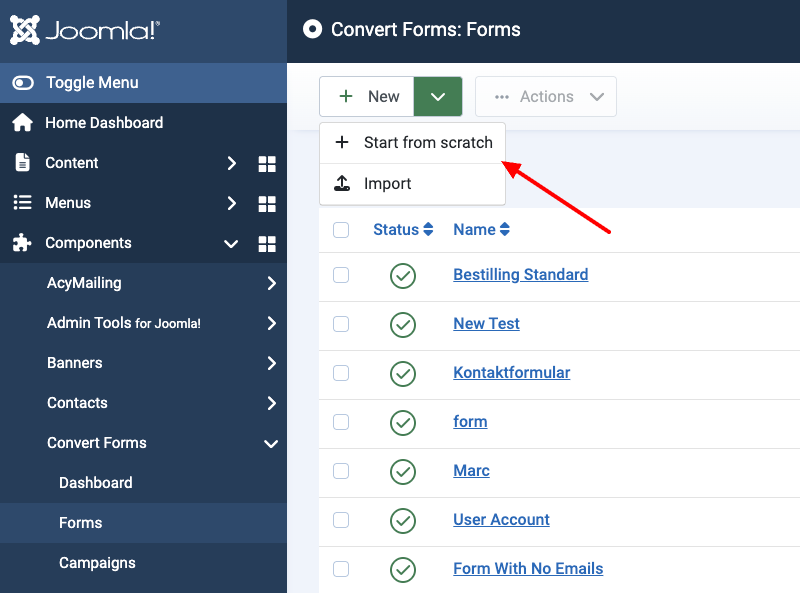
To start, navigate to Components → Convert Forms from the Joomla sidebar. Click New, then select Start from Scratch to create a new form.
By default, the blank form includes two fields: Full Name and Email Address.
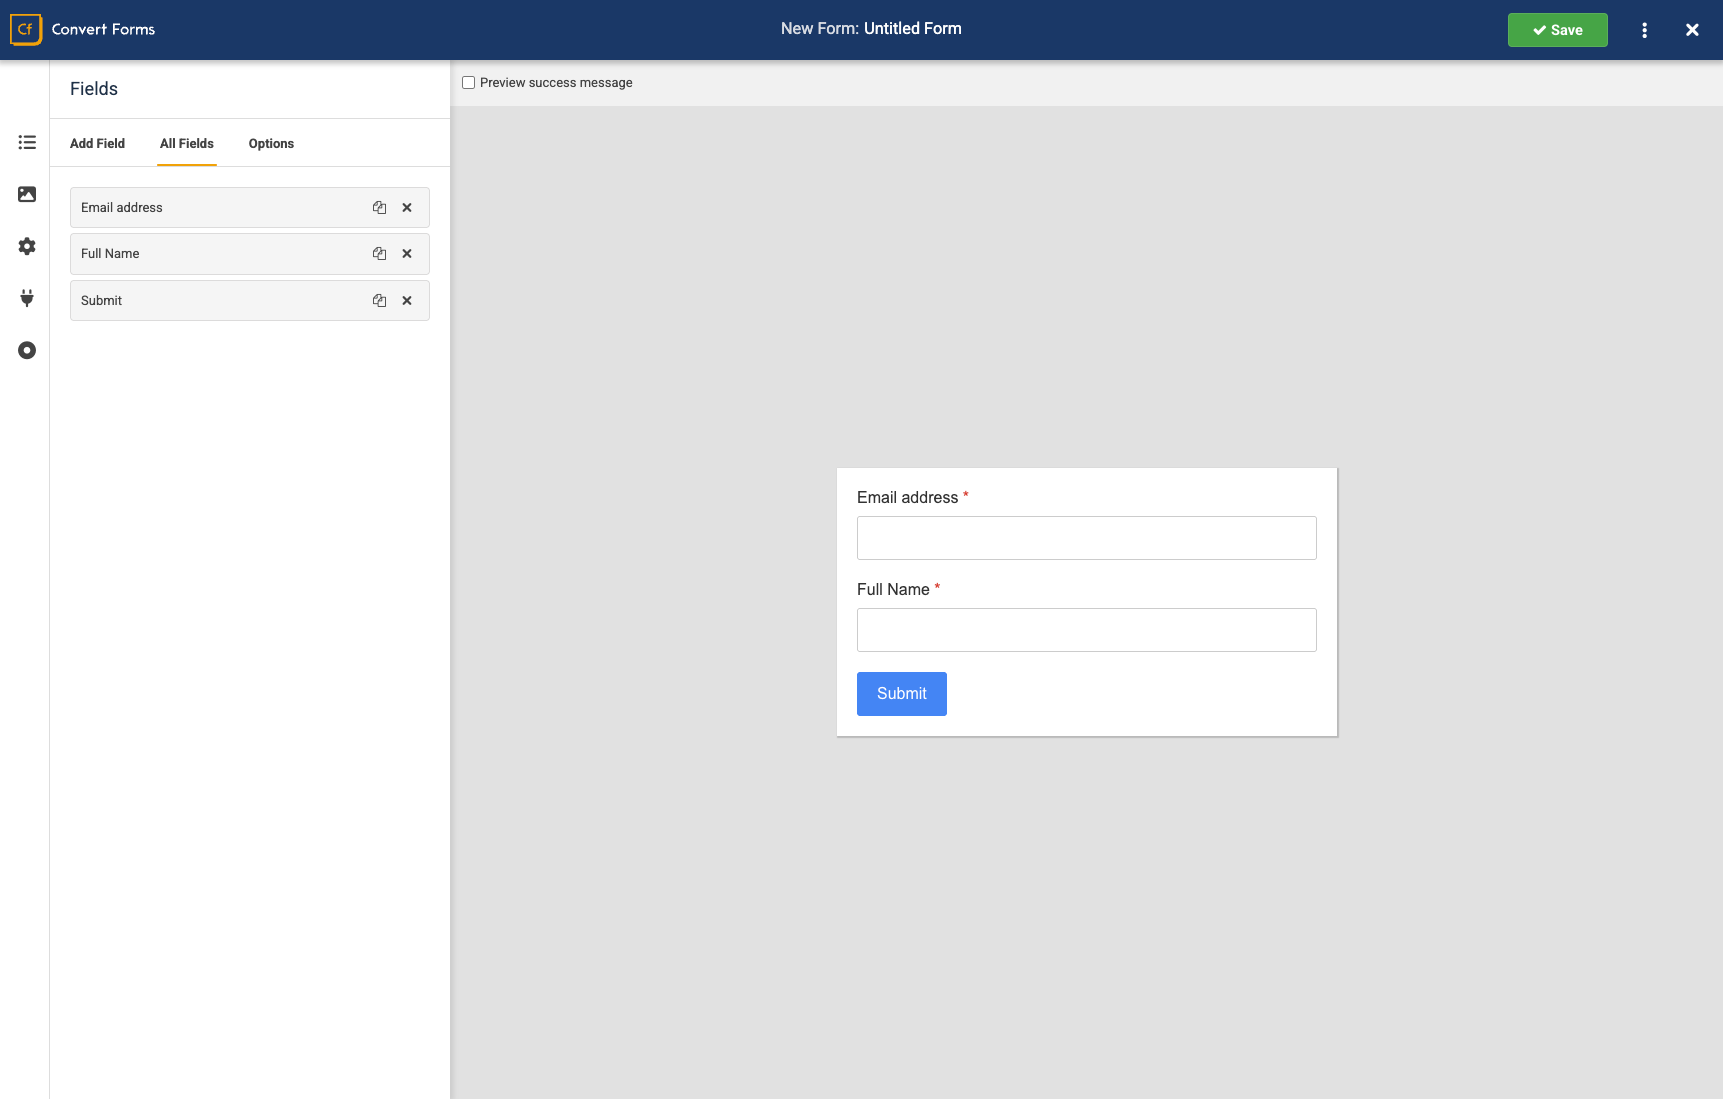
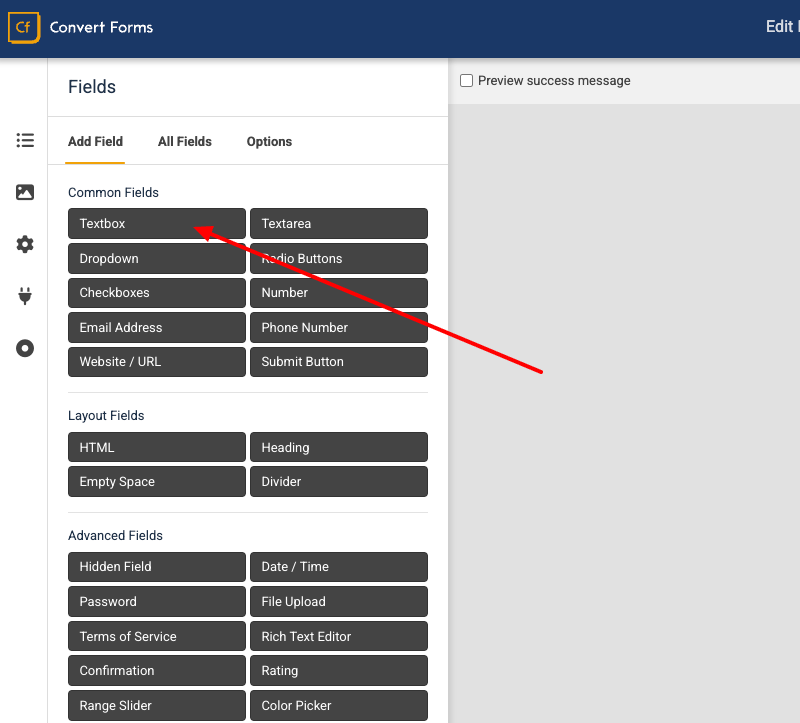
To complete the registration form, you must add two more fields: one for the username and one for the password. To do this, open the Fields panel and click Add Field.
For the username, choose the Textbox field from the list and click to add it to your form.
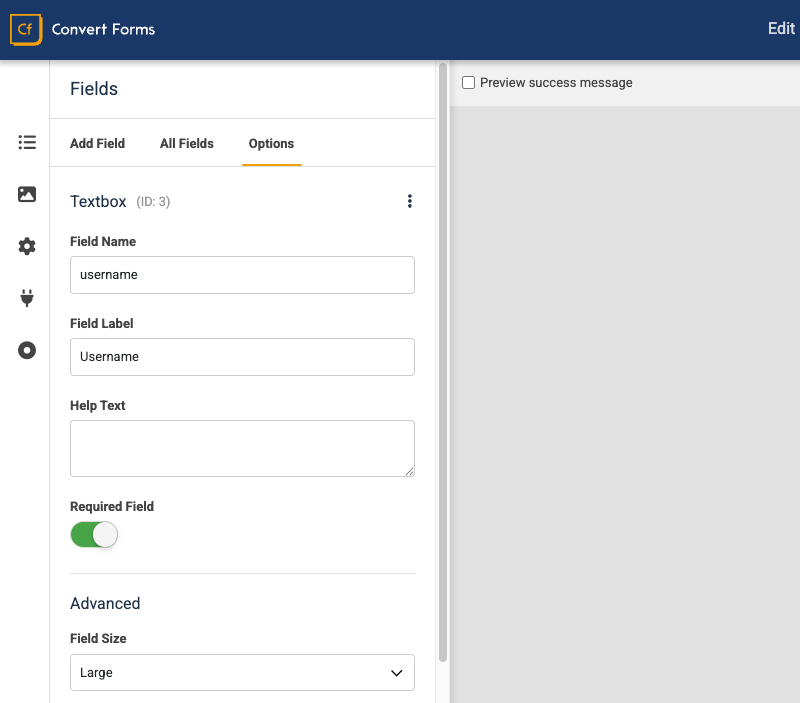
Once the field has been added, update its label and name options to Username.
Next, return to the Add Field tab, locate the Password field type in the list, and click to add it to the form.
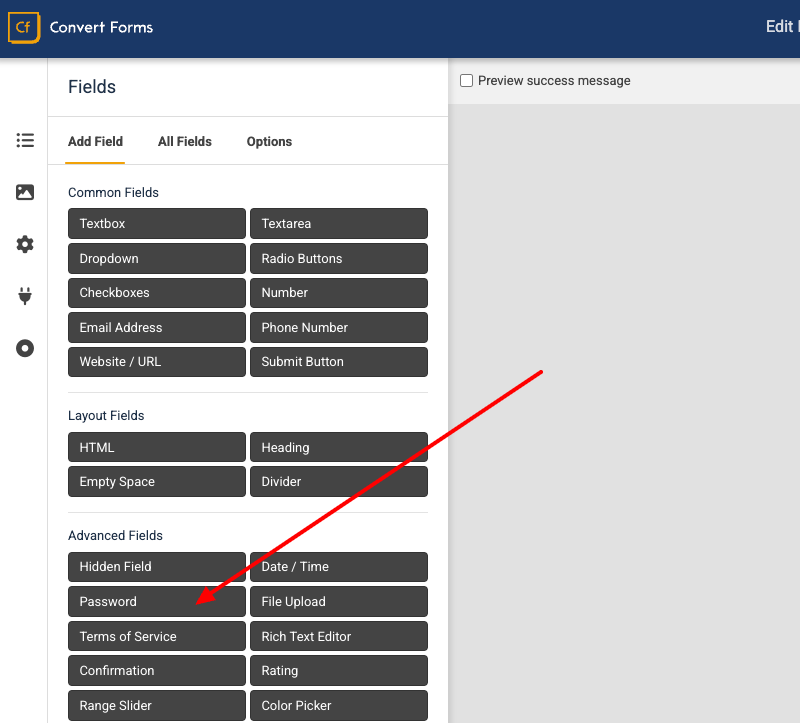
After adding the password field, set its label and name options to Password.

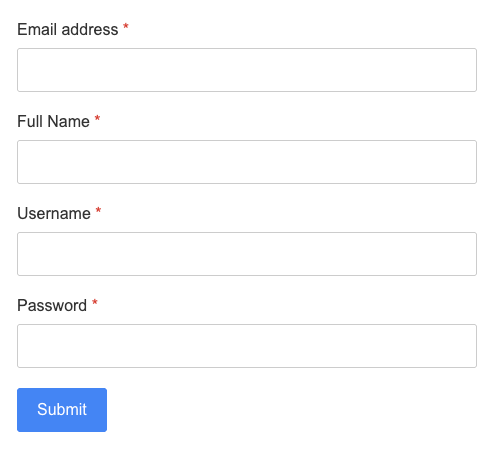
At this stage, your form should include the following fields: Full Name, Username, Email Address, and Password.
Step 2: Enable User Account Creation
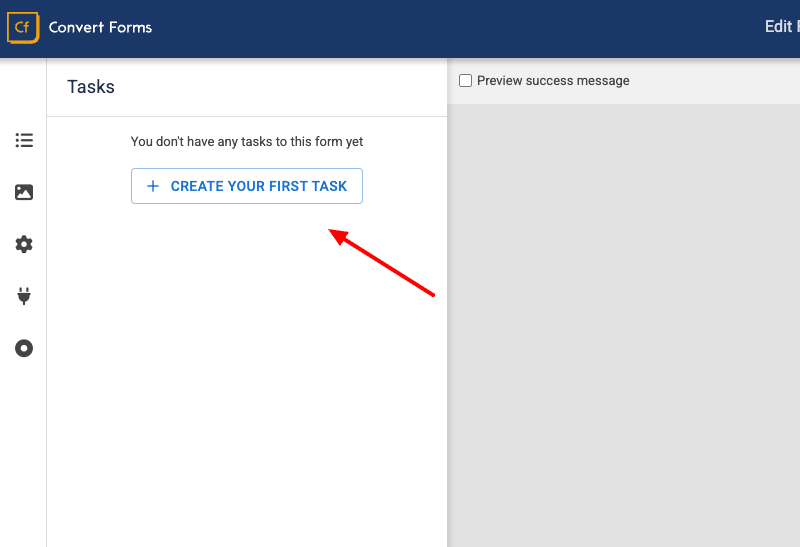
Our form isn’t fully functional yet. If you test it now, it will only store the submission data in the database and it won’t create Joomla user accounts. Let’s fix that by turning it into a custom Joomla registration form. To get started, go to the Tasks tab in the left sidebar and click Create Your First Task.
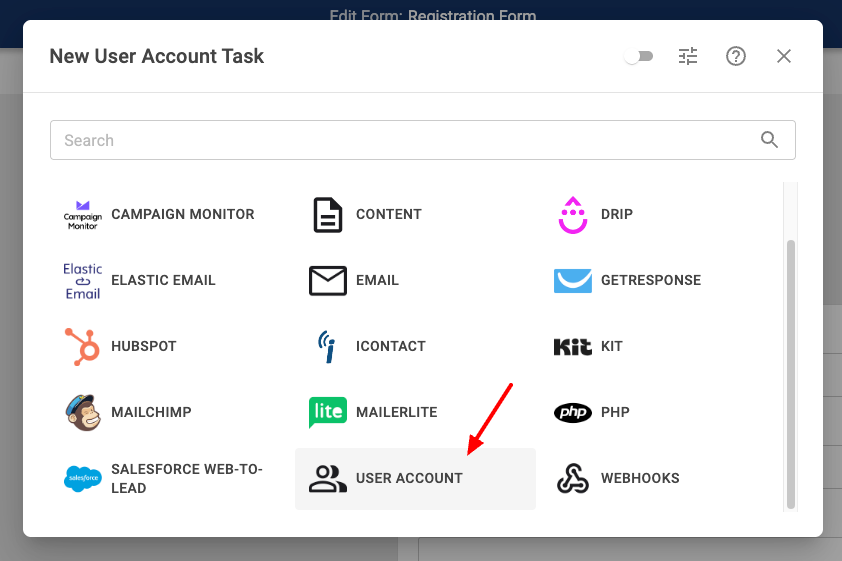
In the pop-up that appears, choose the User Account app.
Next, you’ll notice that the Trigger is already set to New Submission, and the Action is set to Create Joomla User Account — no need to change anything.
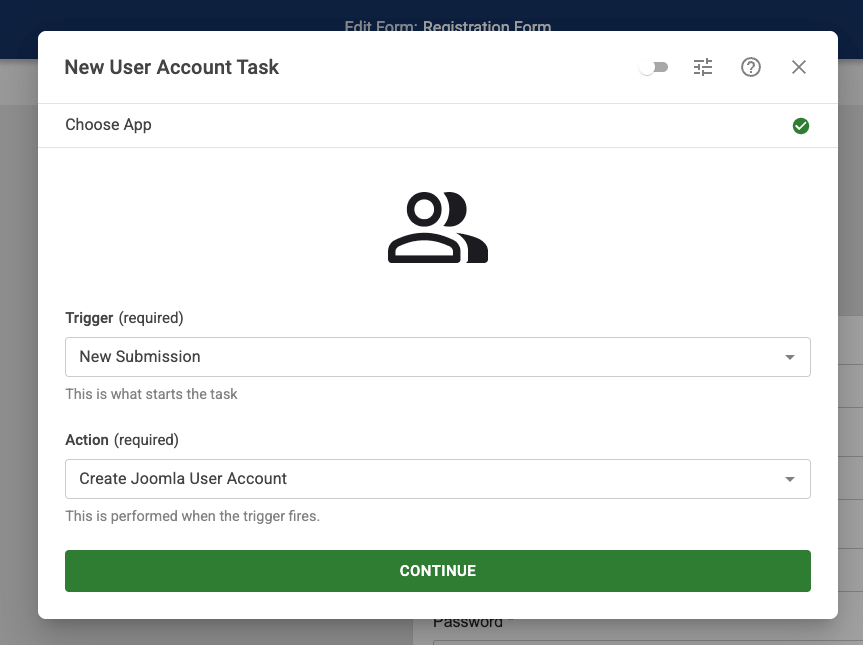
Just click Continue to proceed.
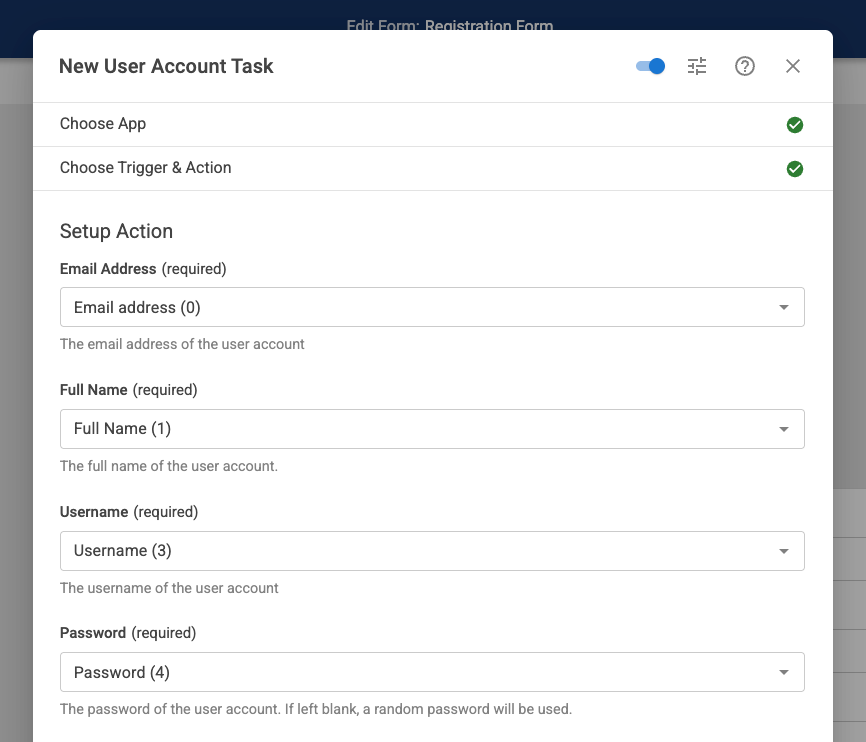
Step 3: Map Form Fields to User Account Data
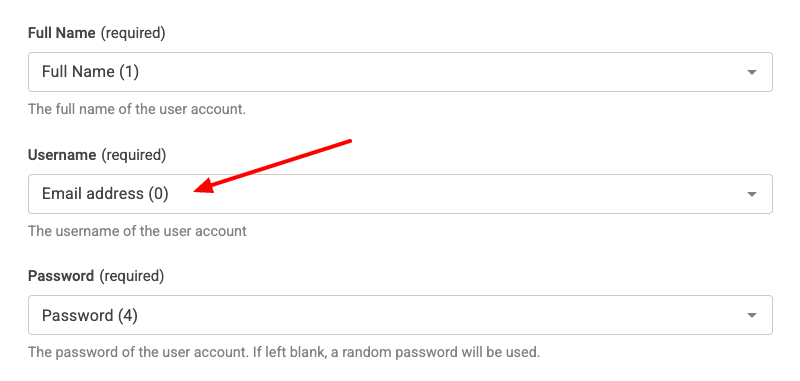
You’ll now need to map each form field to the corresponding Joomla user field. For Email Address, select the email field from your form. For Full Name, choose the full name field. In the Username option, select the username field you added earlier, and for Password, pick the password field from the form.
Under User Groups, choose which group the user should be assigned to. By default, this is Registered. You can select multiple user groups if needed. It’s also possible to assign a user group dynamically based on user input by mapping it to a form field. We’ll cover this in more detail later.
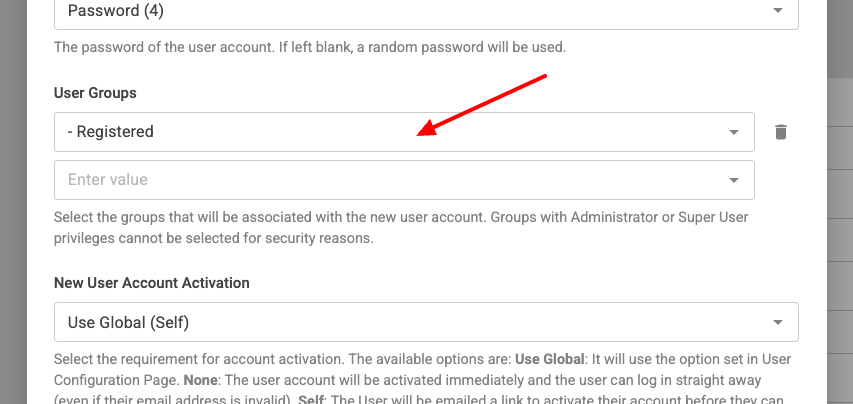
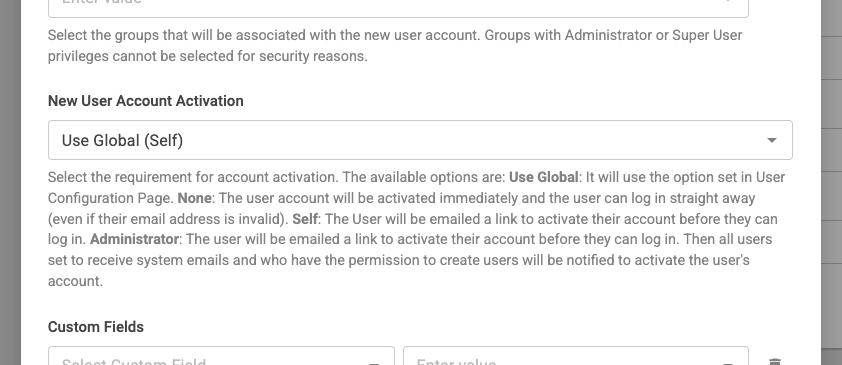
Next, choose how the new user account should be activated under Activation Method. You can either require the user to confirm their account via an email link (Self Activation) or have the administrator manually approve it. You can leave it set to Use Global, which follows the activation method configured in Joomla’s User component, or override it with a specific option.
Remember that regardless of your choice, any emails related to account activation will be handled by Joomla itself, as it is in the default Joomla registration process. Convert Forms relies on the Joomla User component, which triggers the default activation emails. These emails can be customized in the System > Mail > Mail Templates section in the backend.
Finally, enable the task by clicking the toggle switch at the top of the dialog.
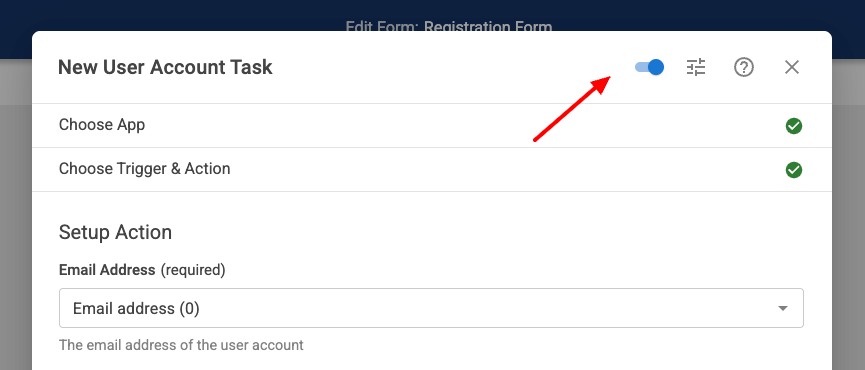
Once it’s active, click Save to store your changes.
Step 4: Test Submission and Verify Account Creation
Now it’s time to test your form. First, publish your form on your site, and then submit the form as a test user.
After submitting, go to the backend to confirm that the user account was successfully created. To do this, go to the User List in the Joomla backend. You should see the newly created account listed. However, note that the account will not be activated immediately since we set the Account Activation to "Self Activation".
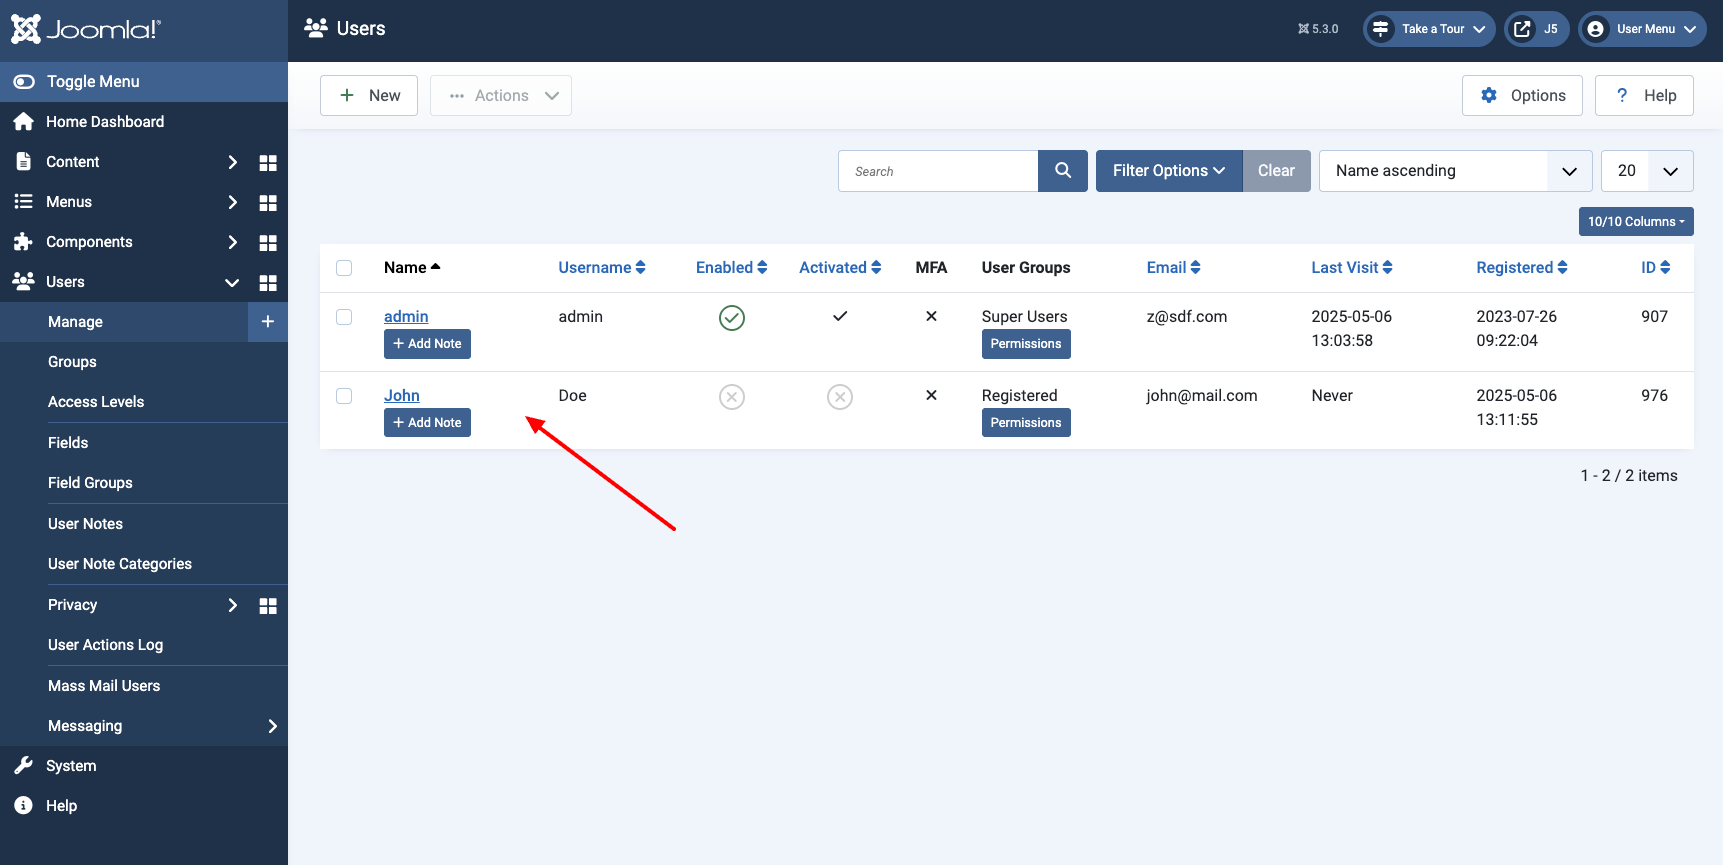
This means the user must click on the activation link sent to their email to activate their account.
That’s it! In just a few minutes, we’ve created a custom Joomla registration form using Convert Forms.
Now, let’s explore how we can enhance and customize this form further in the next sections.
Remove Username Field / Use Email as Username
Joomla's default form requires users to create a separate username during registration—on top of providing their email address. This adds friction to the form and often leads to confusion. Many users forget which username they used or end up reusing their email as the username anyway.
If your site doesn’t rely on a separate username, there’s no reason to ask for one. You can keep things simple by removing the username field from the registration form and using the email address as the username.
This not only reduces one unnecessary field but also improves usability—especially for mobile users or quick signups.
To use the email address as the username, return to the form editor, go to Tasks, and click to edit the User Account task. Under the Username option, change the mapping from the Username field (which you just removed) to the Email Address field instead.
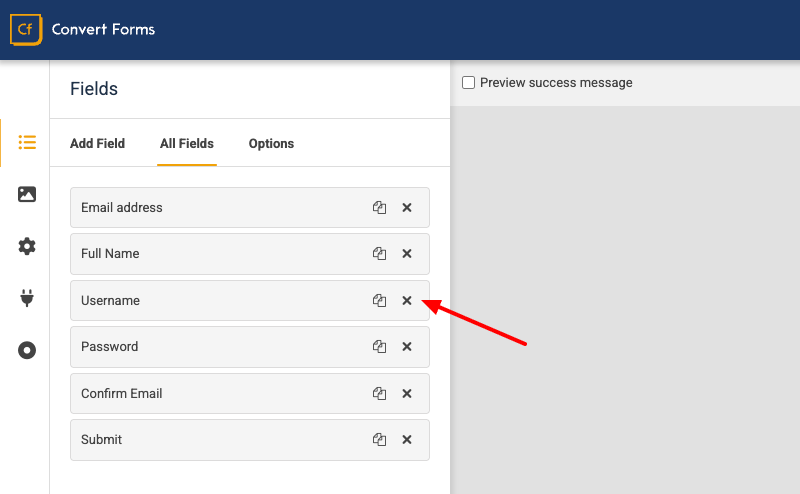
Next, open the Fields → All Fields panel, and remove the Username field.
Now, every new account created through this form will use the email address as both the username and contact email. This creates a cleaner, easier registration experience—and one less thing for users to remember.
Remove Full Name and Confirm Password Fields
Let’s take it a step further and eliminate other points of friction in the form.
As you understand, Joomla’s default registration form lacks flexibility—you’re forced to use fields you might not even need, like Full Name and Confirm Password. These fields are hardcoded and cannot be removed through the user component configuration. But what if you simply don’t care about collecting someone’s real name? Why make it a required step and risk frustrating your users?
With Convert Forms, you have full control over what fields appear on your form. Don’t want to ask for the Full Name? Just remove the field from the form. Since Joomla requires the name property when creating a user, you can easily map the Full Name field in the User Account task to another field—like the Username—which is already required.
The same goes for the Confirm Password field. If you don’t want to include it and prefer to keep the form shorter and simpler, just leave it out. Convert Forms doesn’t force you to add a confirmation field unless you choose to.
In short, you get to decide what makes sense for your registration process—not Joomla.
Ready for the next enhancement? Let’s handle auto-generating passwords.
Auto-Generate Passwords
Another way to reduce friction during registration is to skip the password field altogether and let Convert Forms create one for the user automatically.
This is useful when the user doesn’t need to log in immediately or when you’re trying to keep the form as short and simple as possible—think lead capture or event registrations that create user accounts behind the scenes.
Here’s how to enable auto-generated passwords:
Go back to the form editor, open the Tasks panel, and click to edit the User Account task. Under the Password option, choose Generate Random Password instead of mapping it to a form field.

Additionally, since the user’s password is auto-generated and sent via plain text email, this approach isn’t ideal from a security standpoint. If security is a concern, we recommend enabling the Require Password Reset option. This will prompt users to create their password upon first login, reducing the risk of sending passwords over email.
Next, close the task dialog. Go to the All Fields tab and click to remove the Password field.

That’s it — now Convert Forms will automatically generate a strong password for each user account.
Dynamic User Group Assignment
By default, Joomla assigns new users to a fixed, predefined user group as configured in the User component settings. But what if you need more flexibility, like assigning users to different groups based on their form selections?
With Convert Forms, you can assign a user to one or more fixed groups and also dynamically assign them to a group based on a form field value or conditional logic.
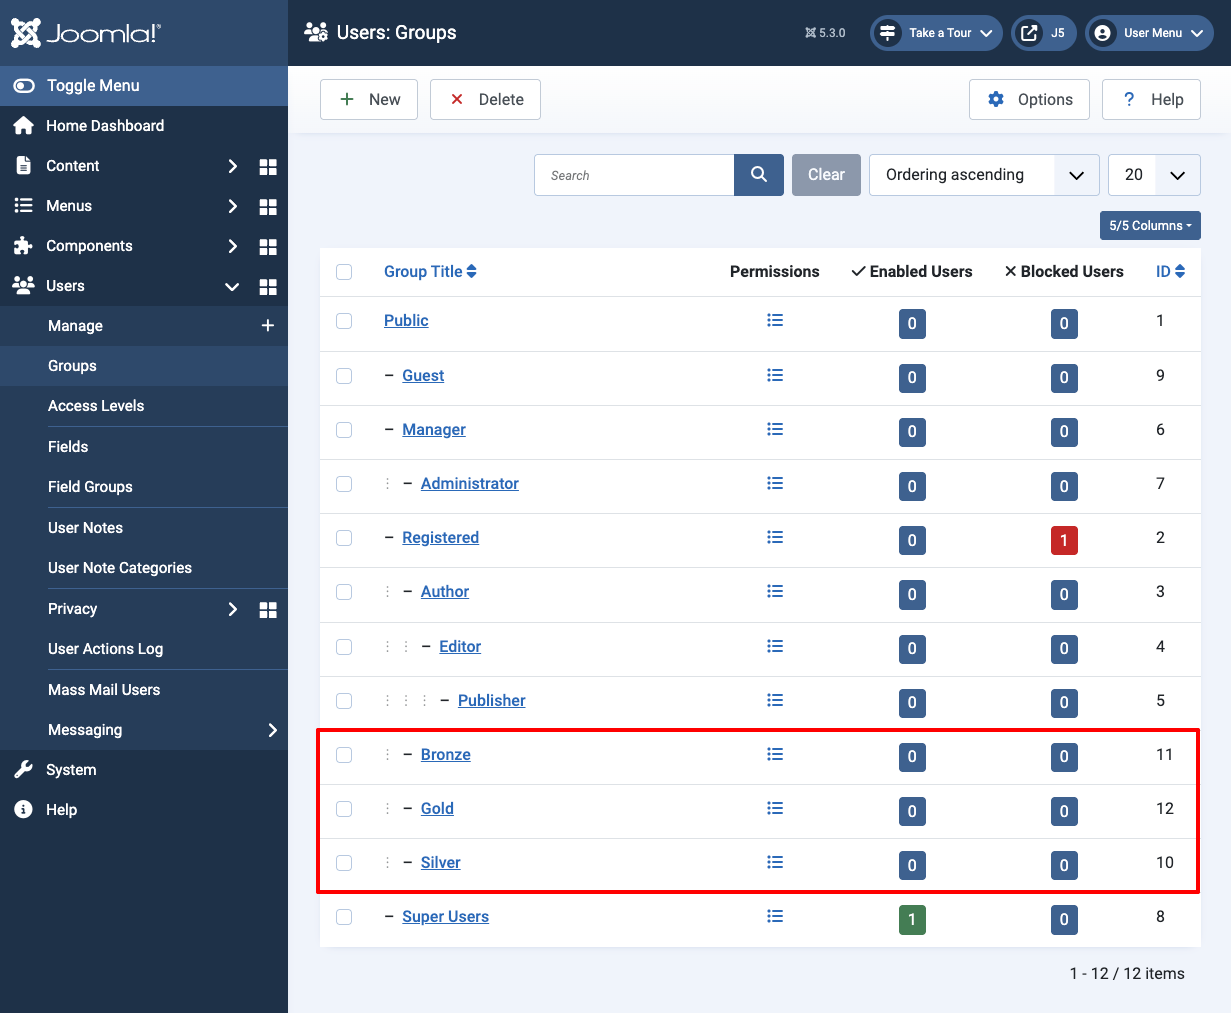
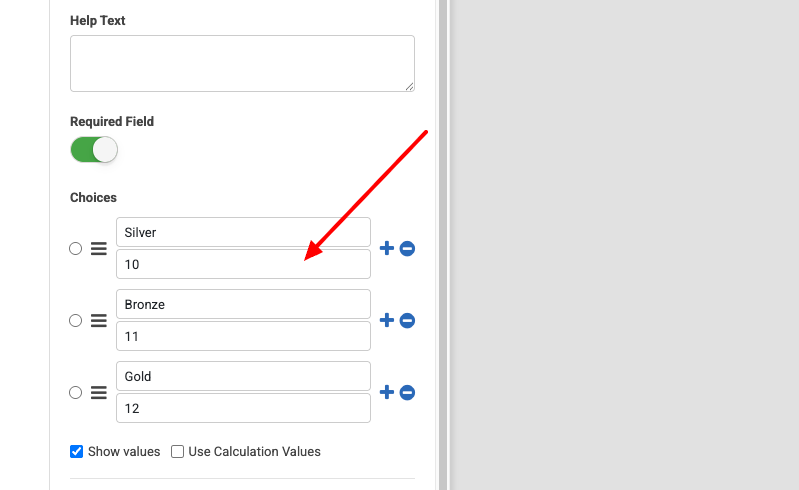
Suppose you’ve the following custom user groups:
- Silver (ID: 10)
- Bronze (ID: 11)
- Gold (ID: 12)
You want to create a new user and assign it to the selected user group in conjunction with the Registered group. Let’s see how you can do it.
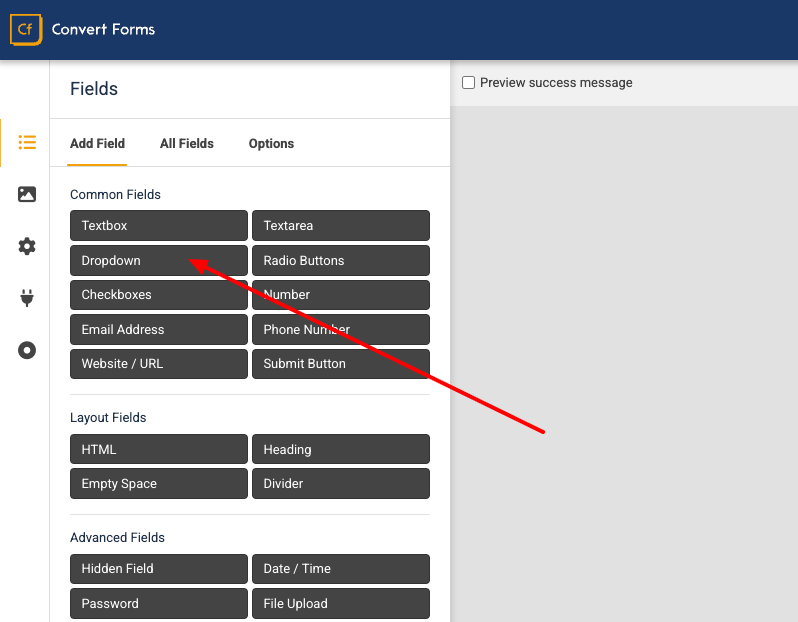
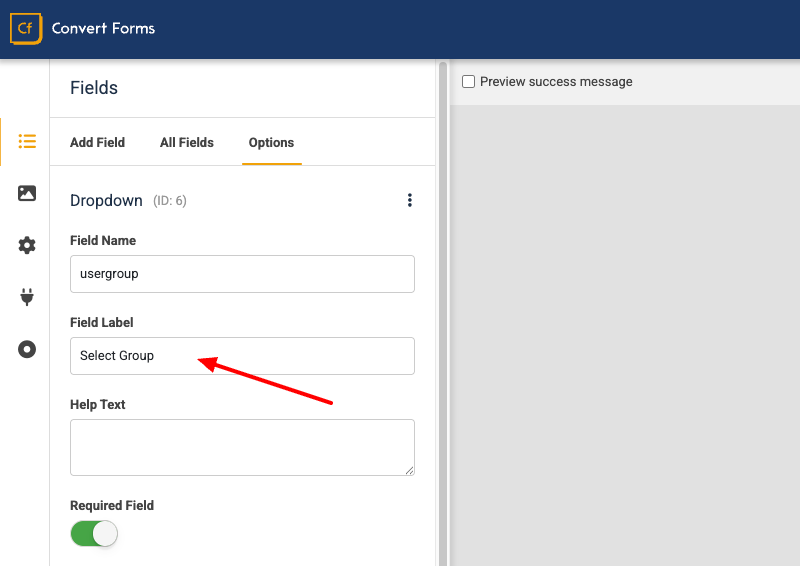
Go back to the form editor, open the Add Field tab, and click to add a Dropdown to the form.
After adding the field to the form, set its name to Select Group.
Next, scroll down to the Choices field and add the three user groups. Click Show Values, configure each choice as shown in the screenshot, and enter the correct user group IDs in the Value fields.
Now, let’s modify our task. Go to the Tasks section and click to edit the User Account task.
In the User Groups setting, select Registered to ensure all users are assigned to the default group. Right below, select the User Group dropdown field to assign the user to an additional group based on their selection.
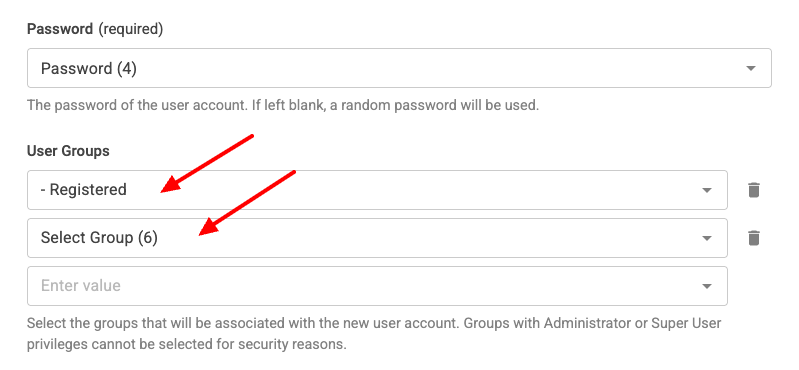
This setup ensures that all new users are added to the Registered group and the group they selected in the form during form submission. (e.g., Registered + Silver).
In the video below, you can see what the form should look like.
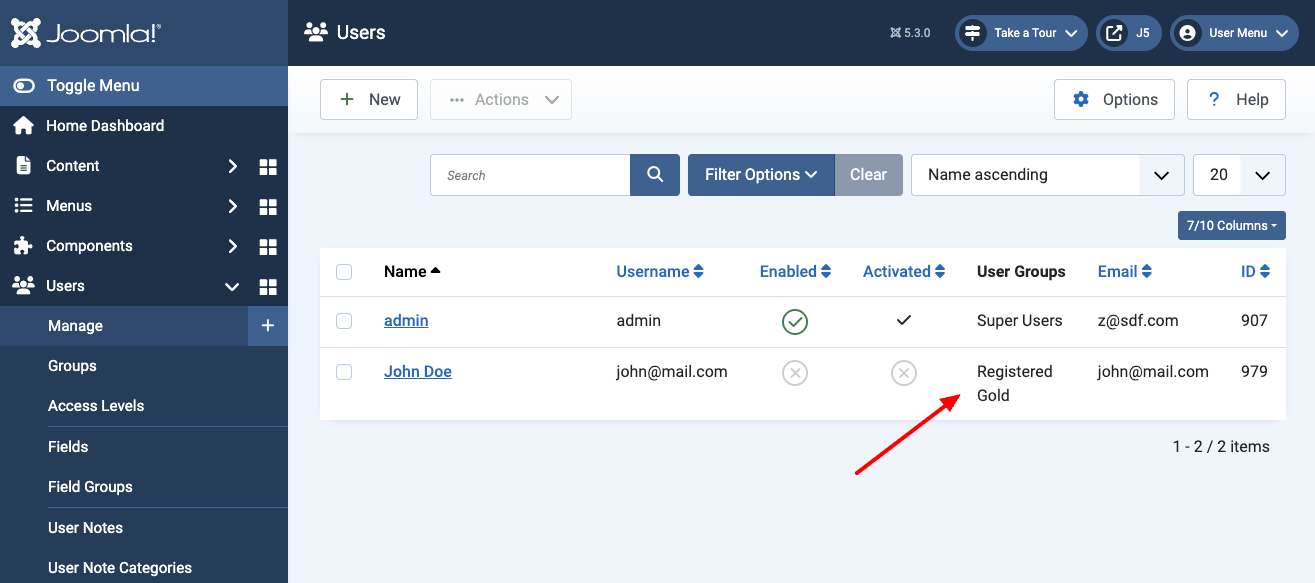
After submitting the form, verify that the newly created user account is assigned to the correct user groups.
Conditionally Create User Accounts (Optional Registration)
Sometimes, you don’t want to create a user account for every form submission. You may want to give users the option to register — but not force them to. This is useful in cases like:
- A newsletter signup form where account creation is optional.
- A contact form that offers to create an account for faster follow-ups.
- A checkout or event registration form where users can choose whether they want to store their info for next time.
With Convert Forms, you can conditionally create user accounts based on user input — using the built-in conditional logic. Here’s how to do so:
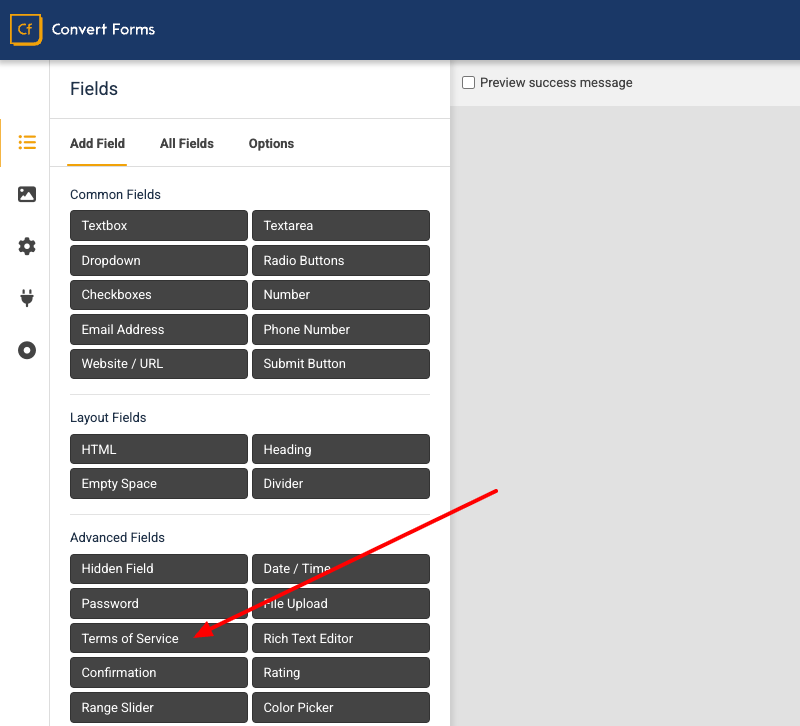
In the form editor, go to the Add Field tab and click to add a Terms of Service field to the form. This type of field, adds a single checkbox to the form to ask the user for their consent.
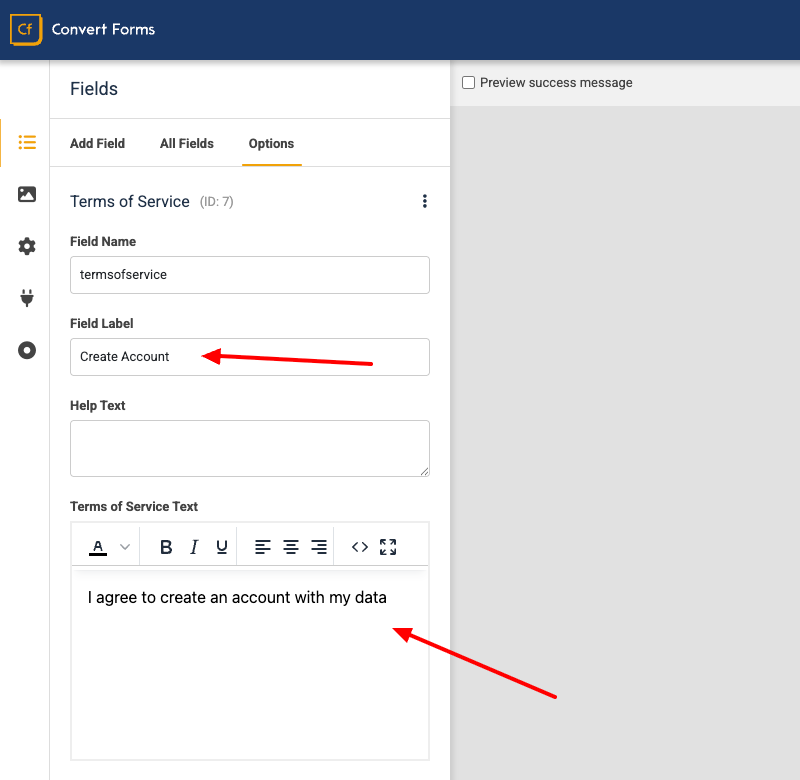
After adding the field to the form, set its label to “Create Account”. Next, change the Terms of Service text to: “I agree to create an account with my data”.
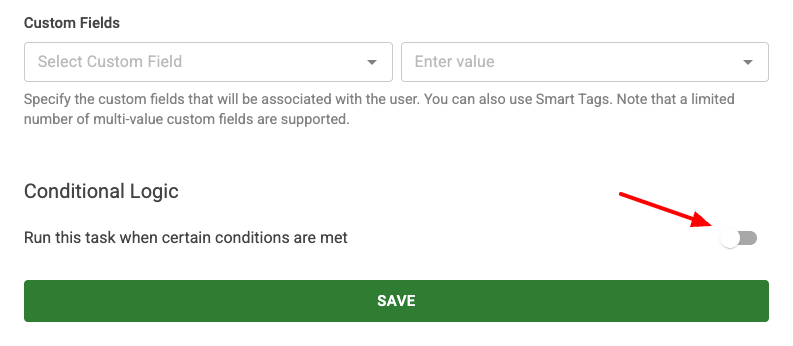
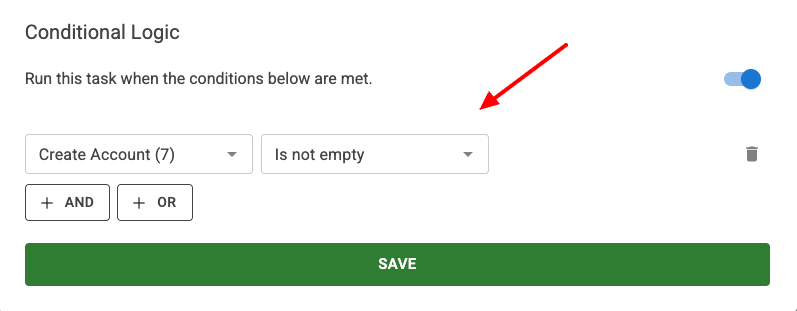
Click to edit the User Account Task once again. Scroll down to the Conditional Logic section and enable it.
After enabling the conditional logic, click “Add your first condition”.
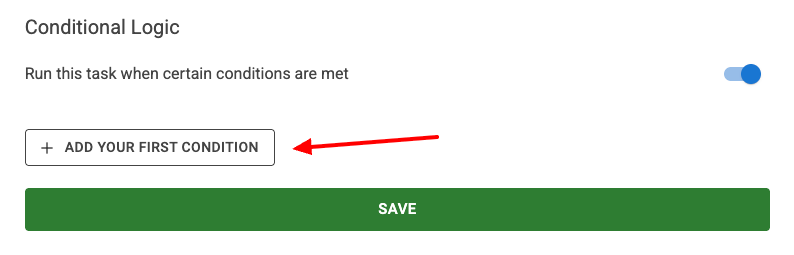
Next, more options appear below. In the first dropdown, select the “Create Account” checkbox you added in step 1, and in the second dropdown, choose “is not empty”. That’s all!
Now, user accounts will only be created if the checkbox is ticked. Otherwise, the form submission will still be saved in Convert Forms as usual — but no Joomla user will be created.
This is a great way to offer flexible registration options without duplicating forms or building complex flows.
Add Email Address Confirm Field
Joomla’s default registration form only supports a confirmation field for the password, but not for the email address. That means if a user mistypes their email, they’ll never receive the activation email (or any other email you plan to send them). Worse, the account might be created with a wrong or unreachable address, causing confusion or support overhead, especially if your site uses email verification for account activation, sends onboarding or welcome emails, or relies on email addresses for integrations with marketing tools and mailing lists.
Here's how you can solve this by requiring the user to verify their email address.
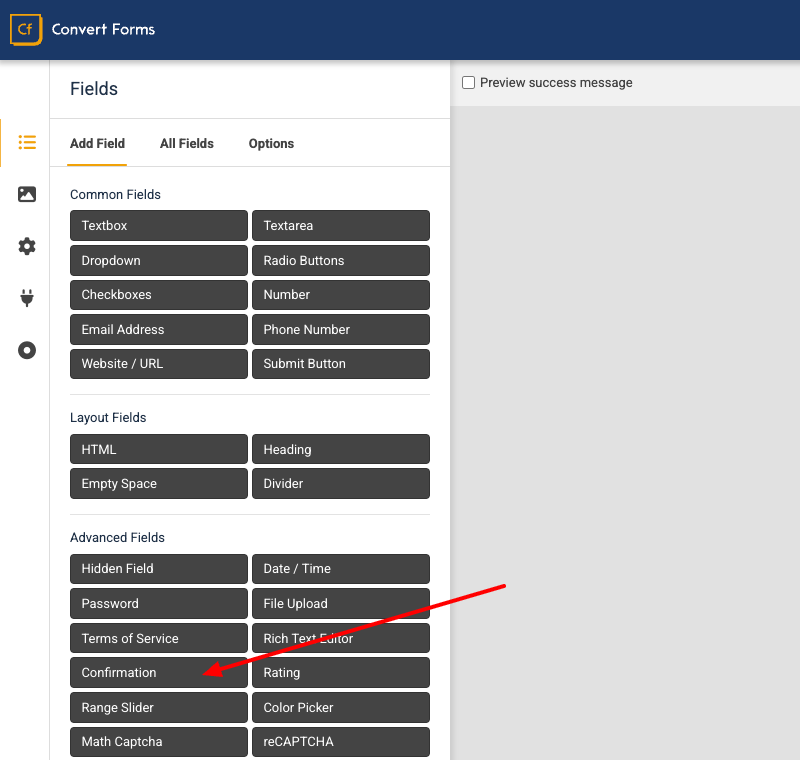
In your form editor, go to the Add Field tab. Find and click in the Confirmation field.
After adding the field, set its label and name options to Confirm Email. Next, set the Match Field option to “email”. This is the name of the Email Address field in our form.
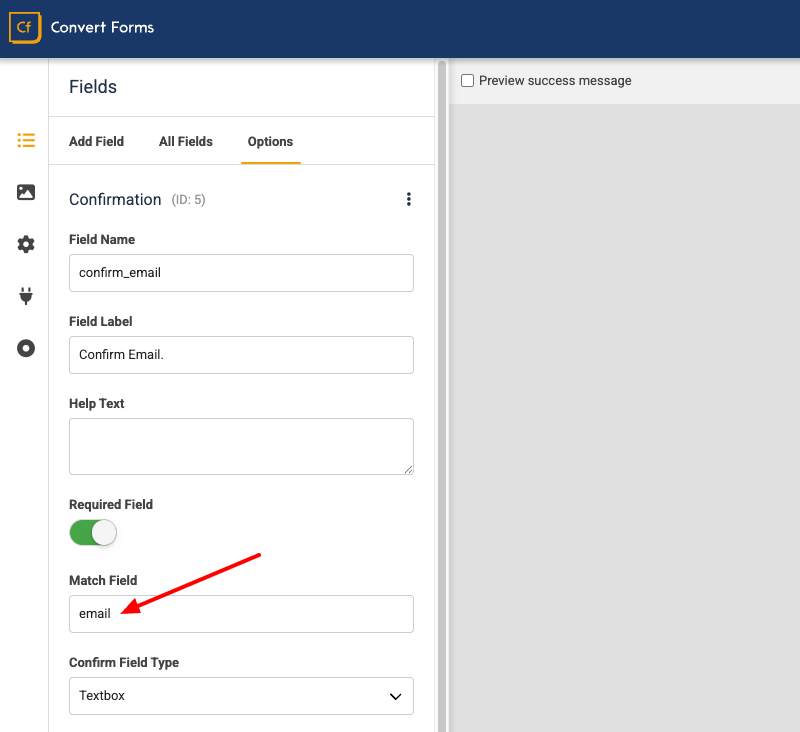
That’s it. Now, the form won’t submit unless the two email fields match. This small addition prevents registration errors and ensures you always capture a valid, working email address.
Display the Registration Form via a Module
A major limitation of Joomla’s core registration form is that it can only be published via the Menu Type "Registration Form". But what if you want to show it inside an article or in a module position? That’s not possible with the default setup.
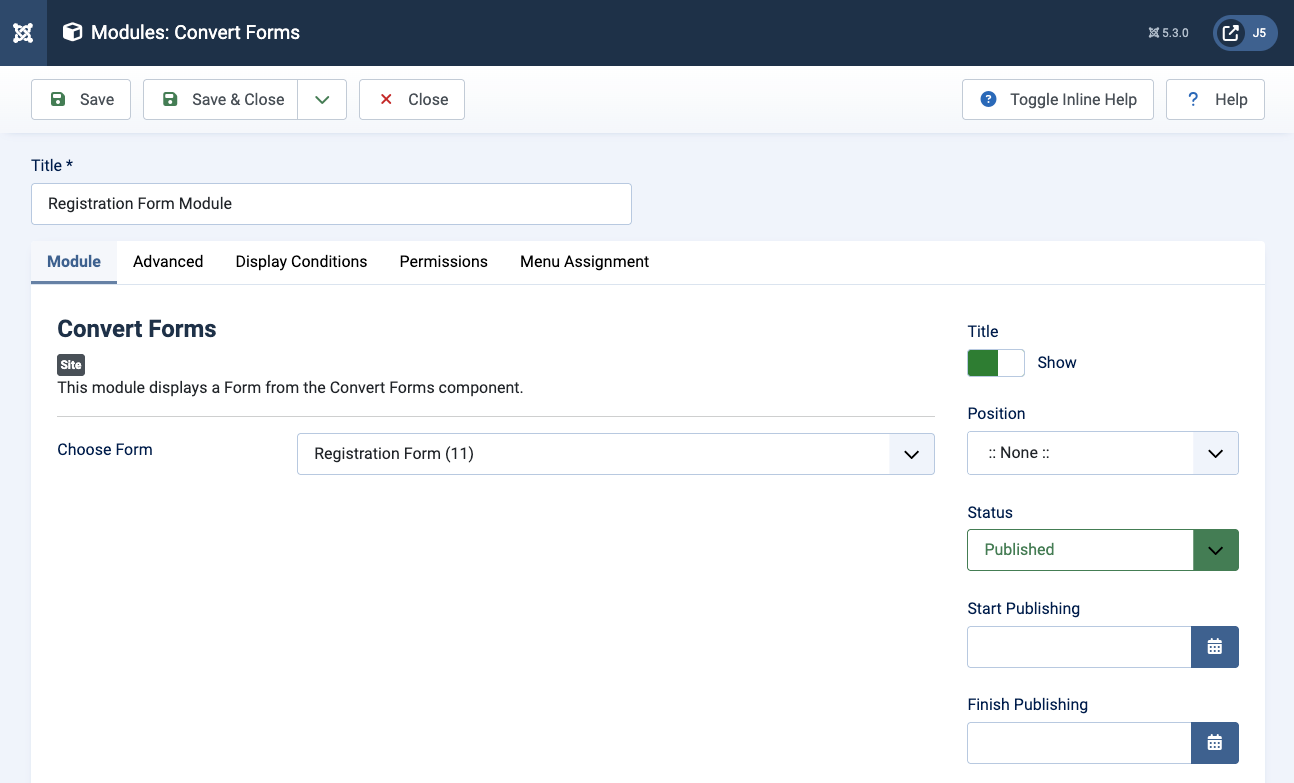
With Convert Forms, you’re not restricted to menu items. You can place the registration form anywhere using the {convertforms XX} shortcode—or, even better, publish it via a module.
Using the module method opens the door to powerful targeting options when combined with Smile Pack’s Display Conditions. For example, you can:
- Schedule the form to display only during specific dates (e.g. a limited-time registration window).
- Target by location, such as only displaying the form to users in a specific country.
- Check for specific cookies, so the form only appears if a user has previously visited a particular page or taken an action.
- Respond to URL query parameters, like showing a different version of the form when the link contains ?campaign=summer.
This gives you complete control over who sees the form, when, and where, all without relying on Joomla’s limited built-in menu system.
Prevent Access to Joomla Registration Form
After building your custom registration form with Convert Forms, you may want to disable Joomla’s built-in registration form or at least prevent users from accessing it. Why? For the same reasons you created a custom form in the first place: the core form is limited in terms of design, flexibility, and functionality. It doesn’t allow you to add custom fields easily, lacks modern validation options, and offers limited control over the user experience.
The best way to achieve this is to set up a redirection from:
https://www.site.com/index.php?option=com_users&view=registrationTo the URL of your Convert Forms registration page, for example:
https://www.site.com/my-registration-formThis ensures that whenever someone attempts to access Joomla’s default registration form, they are automatically redirected to your custom form. Redirection is the recommended approach because it works in all scenarios, including when user accounts require email-based activation handled by Joomla itself.
Disabling the Joomla User Registration Option
You might wonder: why not simply disable Joomla’s core registration option altogether, rather than setting up a redirection? That’s a fair question.
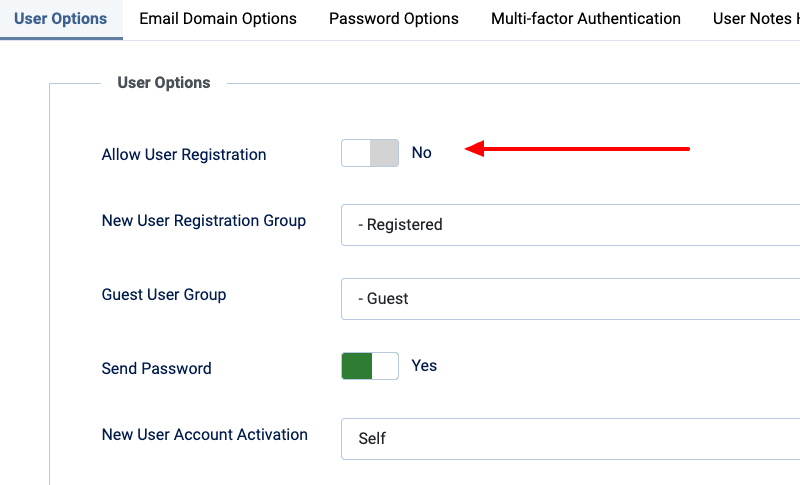
Here’s the important detail: if you disable the option and your New User Account Activation setting is set to either Self or Administrator, users will not be able to activate their accounts. When they click the activation link in their email, they’ll hit a 403 Forbidden error. This happens because Joomla’s user component requires the core registration option to remain enabled in order to process activation links.
The only case where it’s safe to disable the core registration option is if New User Account Activation is set to None. In this scenario, accounts are activated instantly, and your Convert Forms registration form can fully replace Joomla’s built-in one without issues.
Final Thoughts
The right registration form does more than just collect user information—it’s like your site’s handshake. A smoother, friendlier signup process helps make a great first impression, reduces frustration, and encourages more people to stay.
Little tweaks, like using the email as the username or auto-generating passwords, can make a world of difference in how users interact with your site (and how many actually stay).
A custom Joomla registration form lets you break free from the usual limits and add exactly what your site needs. Think custom fields, assigning users to specific groups, and more.
Do you have a feature you think we missed, or a wild idea for the ultimate form? Comment below and let us know. We’re all ears and might even steal your idea for the next update!
Featured Articles


 Rated: