How to create a Photo Gallery in Joomla

Do you need a photo gallery on your Joomla website? Are you unable to find an effortless way to do that? Or perhaps you need more than just a simple photo gallery like a Masonry layout?
In this tutorial, you'll find how to use Joomla Custom Fields to add photo galleries to your website. I'll share the user-friendly steps to enhance your custom fields using the Advanced Custom Fields extension, in order to create elegant photo galleries in no time.
There's no need to panic if you don’t know what custom fields are. We'll get to them as well. If you’re ready to do that, let’s get started.
Why do you need a Photo Gallery?
With a photo gallery, you can create a promising environment for your visitors. It helps them explore different segments of the page, whether products, services, or even the company’s culture, in a much more engaging and robust way.

Photo galleries have the power to capture attention at first sight and present your solutions or ideas as worth investing in. Furthermore, they’re not limited to any profession or business. Thus, having them on your site is always a plus point. For instance,
- A photography blog can display many photos to win different photography gigs.
- Travel blogs or bloggers can showcase images from their recent trips and let people know about their experiences.
- Using galleries, you can show off customer photos or testimonials to build social proof.
- Increased Visitor Engagement = Increased User Session.
- And much more.
With these benefits in mind, let's see how we can add a photo gallery to your Joomla site.
Create Image Galleries with Joomla Fields
Joomla comes with Custom Fields that allow you to add content at a more manageable level. After having Joomla users waiting for this feature for many years, Joomla Fields was first introduced in Joomla 3.7 in 2017. This powerful feature enabled users to use additional attributes on the Articles, Contacts, and Users components.
You can utilize over 15 different field types to add calendars, lists, checkboxes, and more to your pages. Further, it also allows the option to use 3rd party CCK extensions, enabling you to utilize the Joomla Fields to the fullest.
Extend Joomla Fields with more field types
To help Joomla users make the most out of Joomla Fields, a new category called Custom Fields was added to the Joomla Extensions Directory at the beginning of 2018. This opened an excellent way for Joomla developers to create and publish their own plugins to extend Joomla Fields functionality.
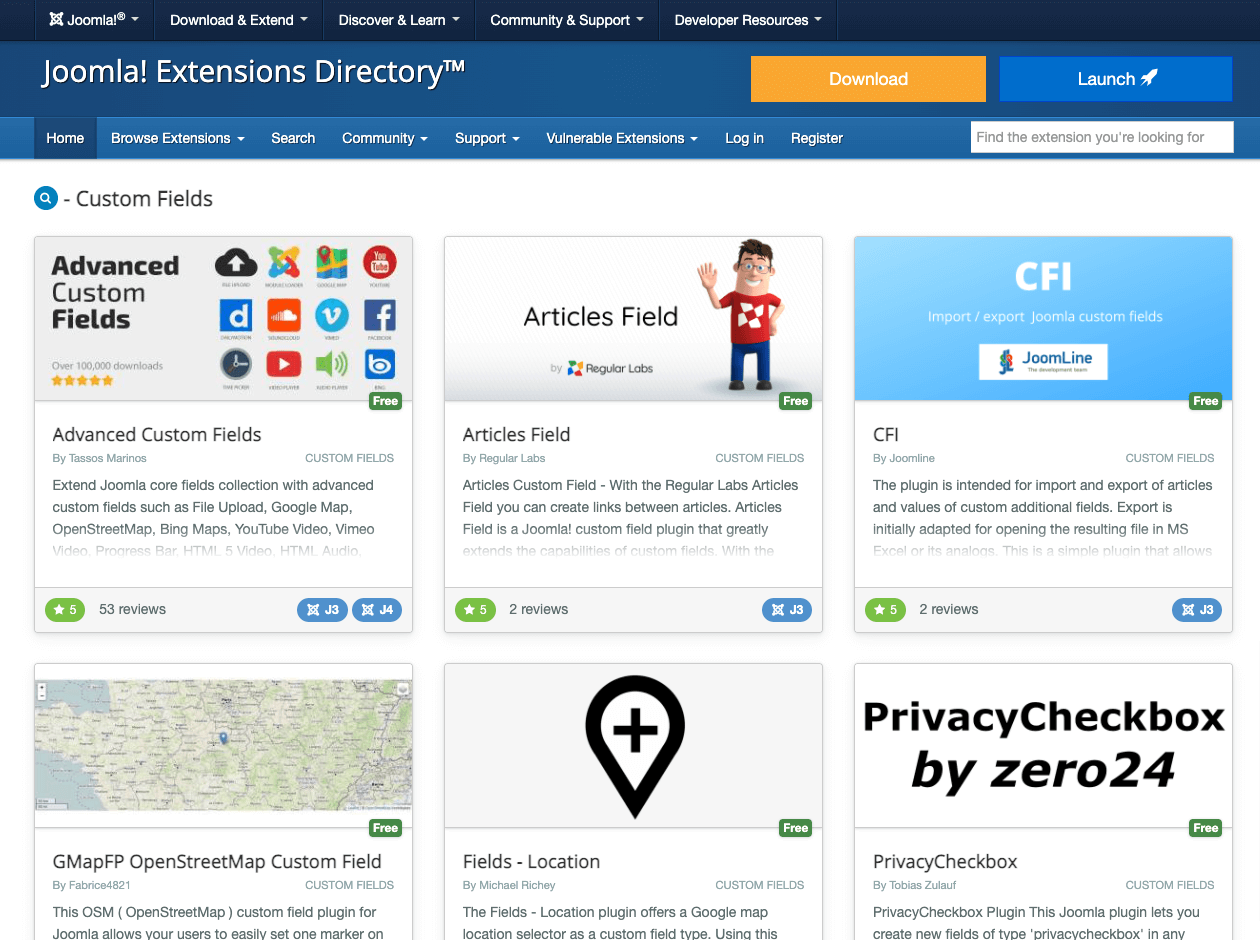
One of the highly popular plugins for fields is Advanced Custom Fields. It's a collection of 20+ field types offering incredible flexibility and profound capabilities to your Joomla Content. With this plugin you can add field for:
- File Upload
- YouTube Video
- Vimeo Video
- Google Maps
- OpenStreetMap
- Progress Bar
- Joomla Module Loader
- PayPal Button
- WhatsApp Button
Besides, what’s interesting about this is that you can also use it to add a Gallery Field. And the following steps will make clear how we can do it.
How to Create a Photo Gallery Using Advanced Custom Fields
The following steps have been carried out on the latest Joomla 4 version. So, if you’re running the old version, make sure you update the site to get the best experience. Although it’s not necessary and only recommended.
Step 1: Get and Install Advanced Custom Fields Pro
To create our Joomla Image gallery, we need to get Advanced Custom Fields Pro as the Gallery field is a Pro-only feature. The paid plans are available starting from €19 for a single site with a 30-day money-back guarantee.

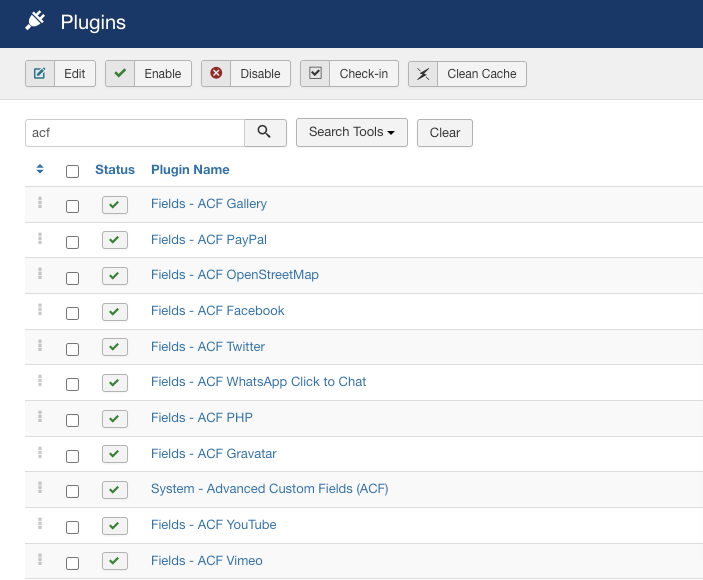
To install the extension while in your backend, go to System → Install → Extensions and install it as you would normally do with any extension. To verify the extension is installed correctly, go to Extensions → Plugins and search for "ACF". You should be able to see a list of Field plugins like in the picture below.
Now move to the next step to see how to create a photo gallery using the ACF Gallery field.
Step 2: Create a new ACF Gallery Field
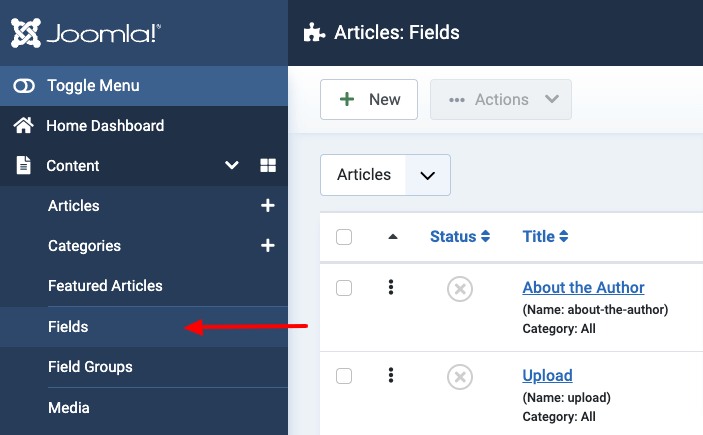
From the main menu at the left, select Content -> Fields and then click New to create a new Field.
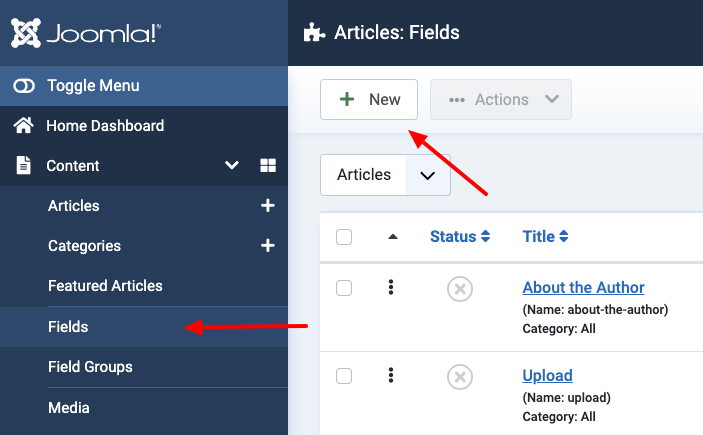
Enter a title for the field and select ACF Gallery in the Type dropdown option as shown in the picture below.
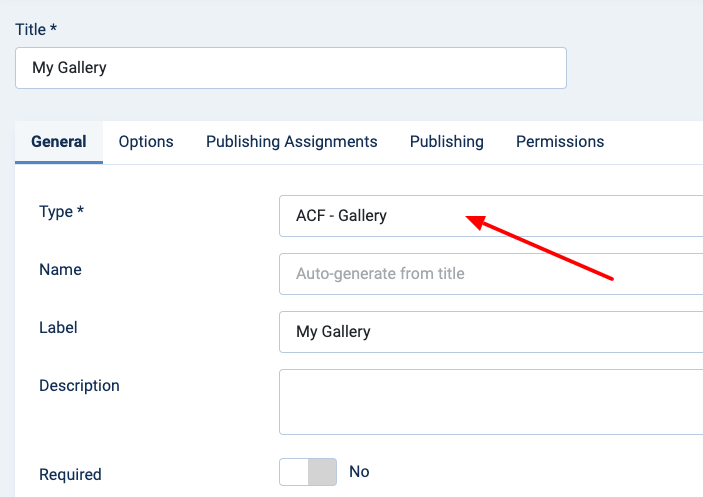
You can now configure the fields' basic settings such as name, label, and description and whether it would be a mandatory field or not.
Step 3: Choose the Gallery Layout - Masonry or Grid
Once we have configured the basic settings of our field, it's time to choose the design layout of our gallery. ACF Gallery comes with 2 layouts, the Masonry and Grid layout. Let's see more details about each one.
A. Create a Masonry Image Gallery in Joomla
A Masonry layout is mainly a layout where elements take positions based on available vertical space as you can see in the following illustration.
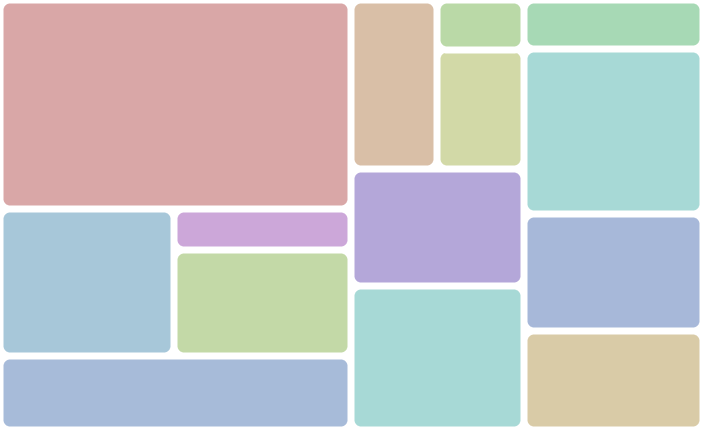
It's a grid layout structured on columns where rows don't have any fixed height.
You can have one small element, then two large elements, followed by another two small elements. When all the space of a frame gets utilized by reducing unnecessary gaps, you get your Masonry layout.
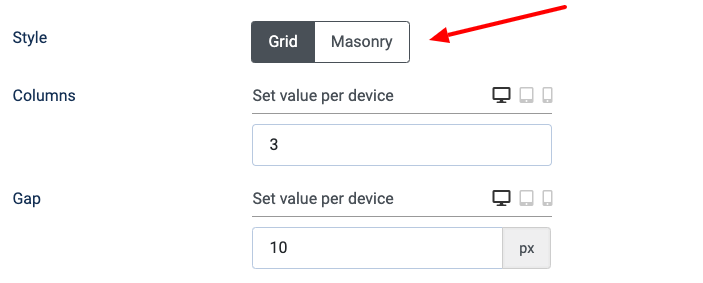
If this is how you would like to present your photos, set the Style option to Masonry.

Here, you can apply some other customizations to your Masonry gallery. For instance, the number of columns, the gap between images and their particular order - Alphabetical, Reverse alphabetical, Random and Default.
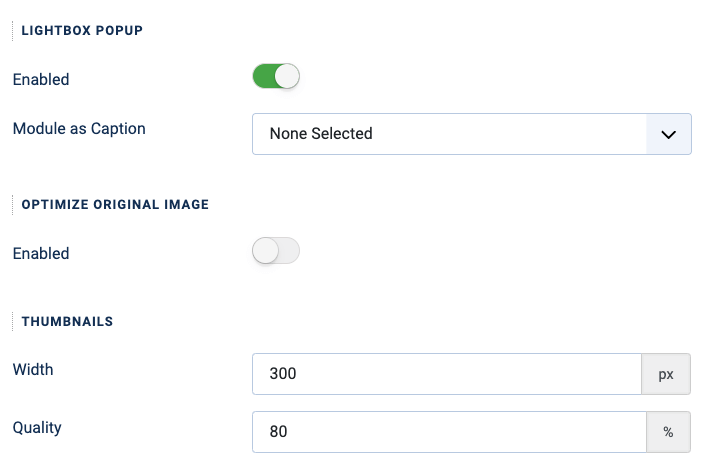
Furthermore, you get the option to make the gallery a lightbox gallery. Additionally, it includes the option to optimize the original image and thumbnail with modifications like fixed Width and Quality.
B. Create a Grid Image Gallery in Joomla
When you divide a particular frame into several equal columns and rows, you get a Grid layout. It has the elements as Columns, Rows, Modules, Gutters (space between Row and Column), and Margins.

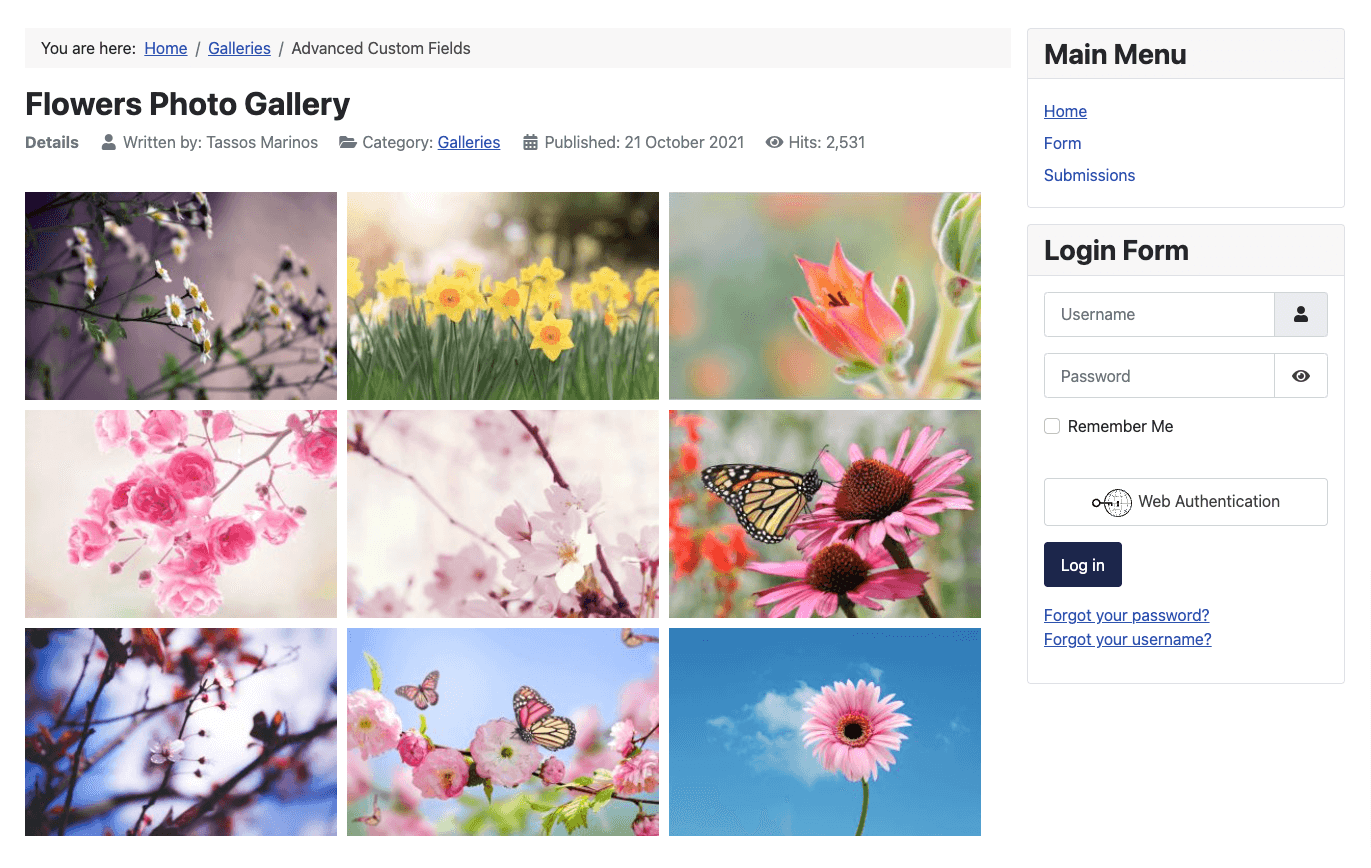
In a grid gallery, images are placed in sequential columns and rows patterns.
If you have 3 columns and 2 rows, then the first 3 images out of 5 would be placed in the modules of the first row. And the remaining 2 images would take place in the 1st and 2nd module of the 2nd row.
If this is how you would like to present your photos, set the Style option to Grid.
Likewise Masonry layout, you get options to enhance the grid gallery. It includes options like Lightbox Popup, Optimize Original Image, and Thumbnails Resize Method as Crop, Stretch, and Fit.
Once you have finished setting up your Gallery field, click Save & Close.
Step 4: Upload Photos
You’ve successfully configured your Gallery Field. Now, all we need to do is add images. Thus, open the article, go to the Fields tab and click Add Images to upload pictures for your photo gallery.
Once added the images, don’t forget to set a brief description for all of them. You’ll see a small caption area to add your text. This text is used in the Lightbox preview popup as well as in the image's ALT attribute.
Step 5: Publish the Article
After adding descriptions to your images, simply publish the article by clicking the Save & Close button. Then, visit the front end and see how good your pictures are looking.
If you’ve optimized them well before uploading, then they would provide more benefits than only looking good.
Don’t know how to optimize images? Then jump right into the next section.
Tips to Optimize Your Gallery Images for SEO and Performance
Apart from enhancing the look and engagement of the site and its content, images can provide more benefits. They can help an article look more readable, informative, as well as rankable content.
But before you add them, you should follow some optimizations like,
- Use concise and direct image names before uploading.
- Add captions to your images carefully.
- Choose the Right File Format (PNG, JPEG, GIF).
- Resize images to optimize page speed and appearance.
- Optimize your thumbnails.
These will make your gallery fast, appealing, and highly engaging. So, why not optimize them, correct?
Wrapping Up
Intuitive & effective tools make things easy and fun. And the same is true with Joomla Fields which become more functional when you add Advanced Custom Fields.
Not only does it enable you to add galleries, but it also allows you to apply customizations like Masonry and Grid layout. Further, it doesn’t include any complex procedures. Besides, you get more options other than the Gallery field to make the most out of your Joomla Fields.

Featured Articles


 Rated: