How to Accept PayPal Payments in Joomla

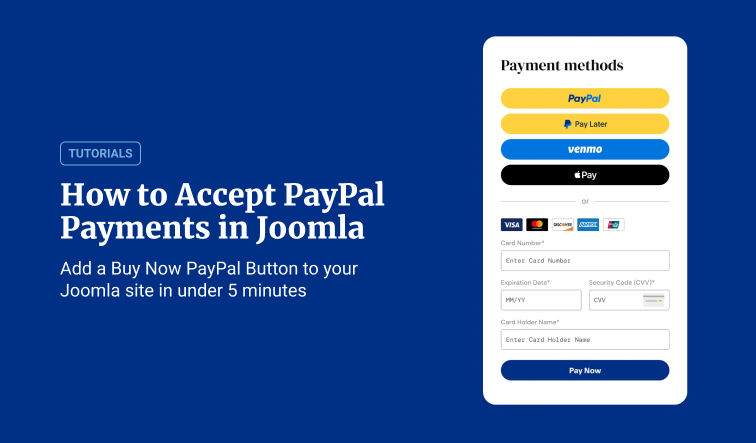
Are you considering accepting PayPal payments on your Joomla site? It's a smart decision! PayPal, a leading online payment platform trusted by millions worldwide, makes sending and receiving money online a breeze. On the other hand, Joomla provides a robust foundation for easily building your site or online store.
This comprehensive guide will equip you with the knowledge to integrate PayPal with your Joomla site. By following these steps, you can accept one-time payments, set up recurring payments for subscriptions, or even allow customers to donate to your cause through a simple donations button. Including a "Pay Later" payment method caters to budget-conscious customers, potentially boosting your sales conversions.
Ready to unlock the power of PayPal with your Joomla website? Let's explore the integration process!
Why Accept PayPal Payments in Joomla?
Let's not underestimate the power of a smooth checkout process. It's a game-changer for your customers, and that's where PayPal steps in. This online payment giant has earned its reputation for being synonymous with 'easy money.' It's not just a buzzword - a whopping 88% of the top 100 online stores use PayPal. Why? It's a must-have for your Joomla site because it's secure, reliable, and incredibly user-friendly.
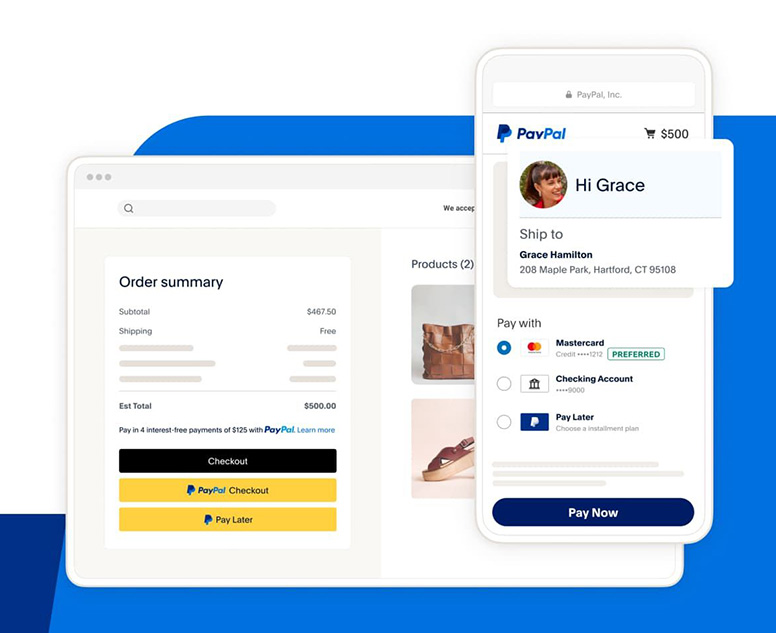
Imagine this scenario: a customer is browsing your online store, finds the perfect product, and proceeds to checkout. No more fumbling with credit cards or tediously entering billing information. With PayPal, they can pay using their email address and password—details they likely already have. It's almost magic, but with the robust security of PayPal's cutting-edge encryption technology.
Here's the best part: with the new PayPal Checkout API, you can seamlessly integrate it into your Joomla website, allowing your customers to complete their purchases without leaving your site. It's straightforward, convenient, and creates a smoother shopping experience.
So ditch the checkout headaches and let PayPal be your secret weapon for boosting sales on your Joomla website. It's the easy button for online success!
How to Accept PayPal Payments in Joomla
Ready to begin? In this tutorial, I'll show you how to create a Joomla PayPal Button using Smile Pack.
I'll assume you already have a PayPal account. If not, visit the PayPal website to create a free account. Be sure to select the correct account type for your needs. The PayPal Business account offers additional features and flexibility for businesses.
Step 1: Get Smile Pack
Sometimes, a simple PayPal button is all you need. The best way to sell your products and services quickly with PayPal is to use Smile Pack.
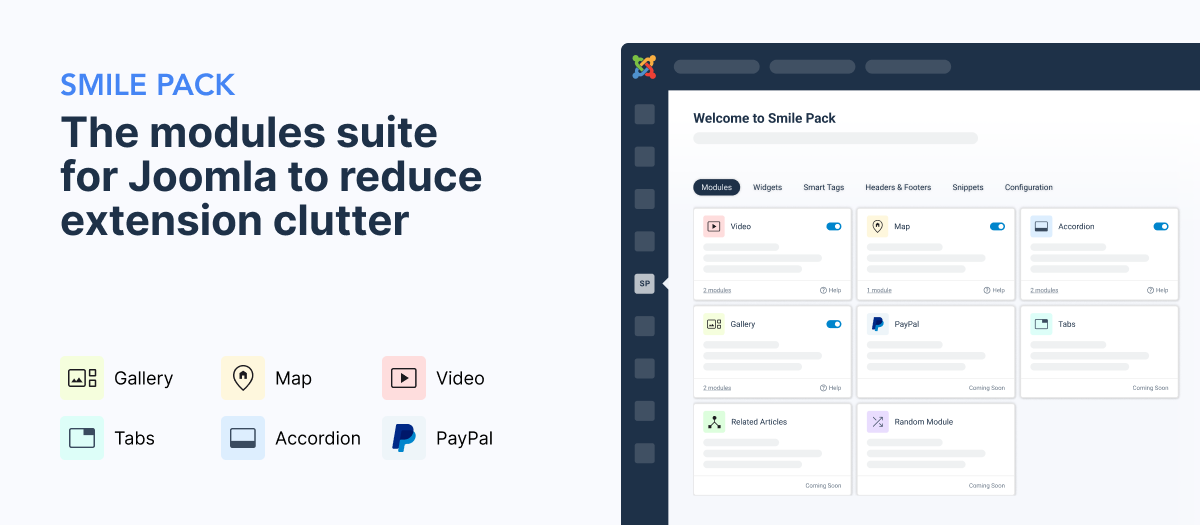
Smile Pack is an all-in-one extension designed to simplify your Joomla setup by reducing extension clutter. This all-in-one extension includes modules for Photo Galleries, Google Maps, OpenStreetMap, YouTube Videos, Accordions, Tabs, and — most importantly — PayPal Buttons!
It’s an extension built for beginners; you need zero technical knowledge and don’t have to touch a single line of code.
Whether you sell physical or digital products and services, offer subscriptions, or want to accept donations, this extension enables you to add a PayPal button to your pages, articles, or even website sidebar, which takes less than five minutes.
Here's why Smile Pack is a game-changer:
- Built on the PayPal Checkout API: The integration ensures a smooth and secure payment experience without redirecting users away from your site. Payments happen within a user-friendly modal window for an enhanced user experience.
- Customizable PayPal Button: Design the button to match your website's branding, with five pre-designed color options.
- One-Time or Recurring Payments: Offer customers the flexibility of single or recurring payments (subscriptions), with recurring options ranging from weekly to annually or on a custom schedule.
- Charge Additional Costs: Handle extra charges like shipping and tax directly during checkout.
- Post-Payment Actions: Define what happens after payment, such as redirecting to a success page or displaying a custom message.
- Payment Methods: You can enable or disable specific payment methods, including credit cards, Venmo (US only), or region-specific gateways like iDEAL for the Netherlands.
- Reusable PayPal Buttons: Use Smart Tags to add a single button across multiple Joomla pages or articles. These tags dynamically adjust product details like name and price based on your content, making it easier to sell various products with one button.
The free version of Smile Pack includes the basic functionality of the PayPal module. For additional features, including recurring payments, consider upgrading to Smile Pack Pro. For a comparison between the free and pro versions, click here.
To get started with Smile Pack, download it from your account dashboard. Then, add it to your Joomla site through the following steps: from your Joomla admin, go to System → Extensions → Upload Package File.
For additional assistance setting up Smile Pack on your site, check out the guides on Getting Started with Smile Pack and Using the PayPal Button.
Step 2: Connect PayPal With Your Website
Before setting up the PayPal Button, add your API Keys to Smile Pack. Let's see how to do it.
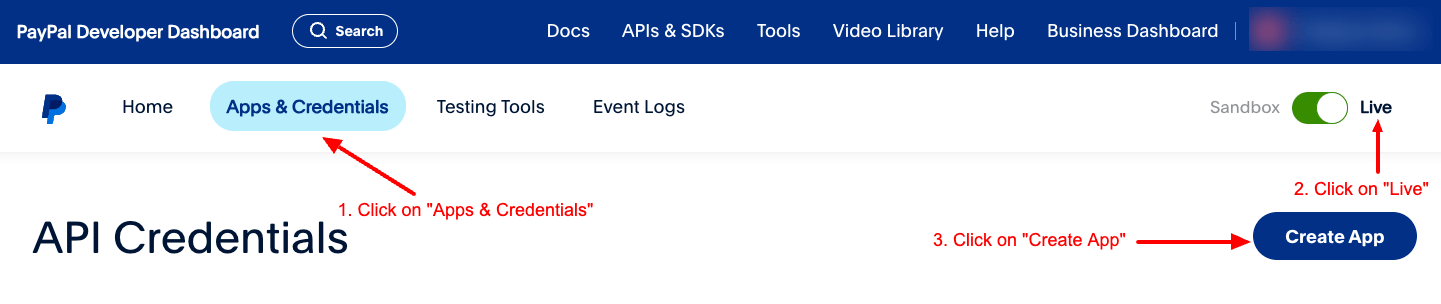
- Visit developer.paypal.com/dashboard
- Click on Apps & Credentials
- Select Live
- Click Create App.
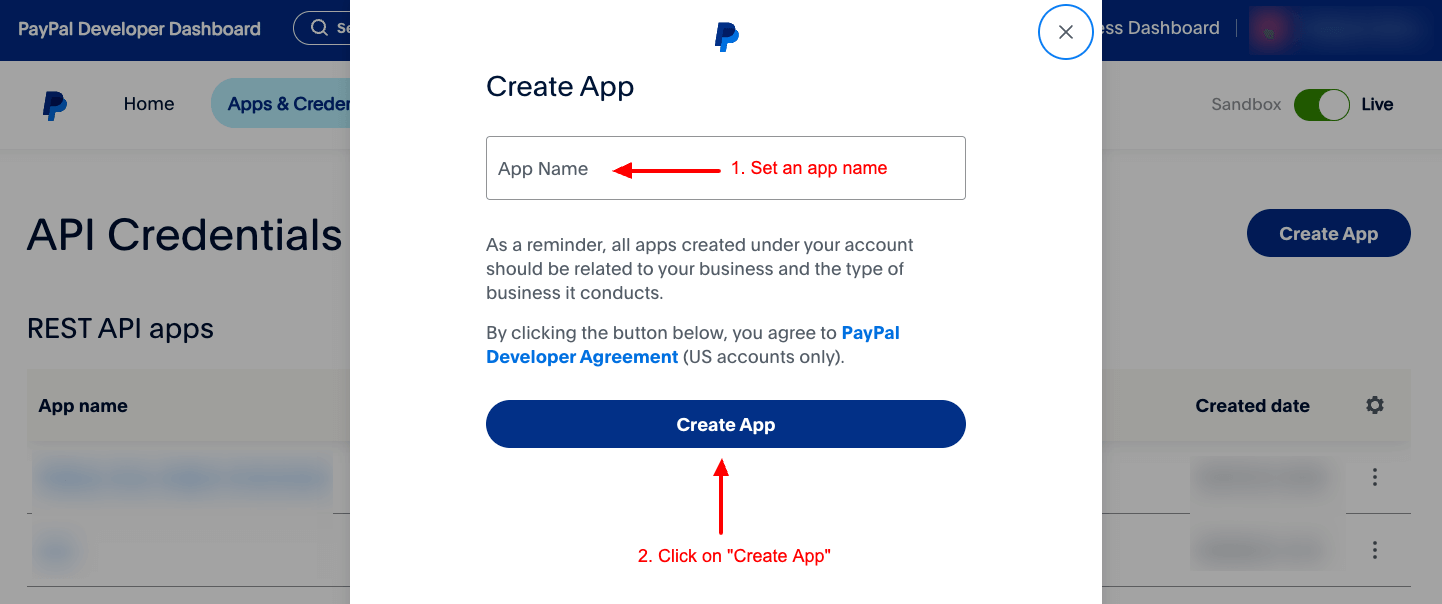
Once you've clicked on "Create App", a modal will appear asking you to fill in the application name and click on the Create App button.
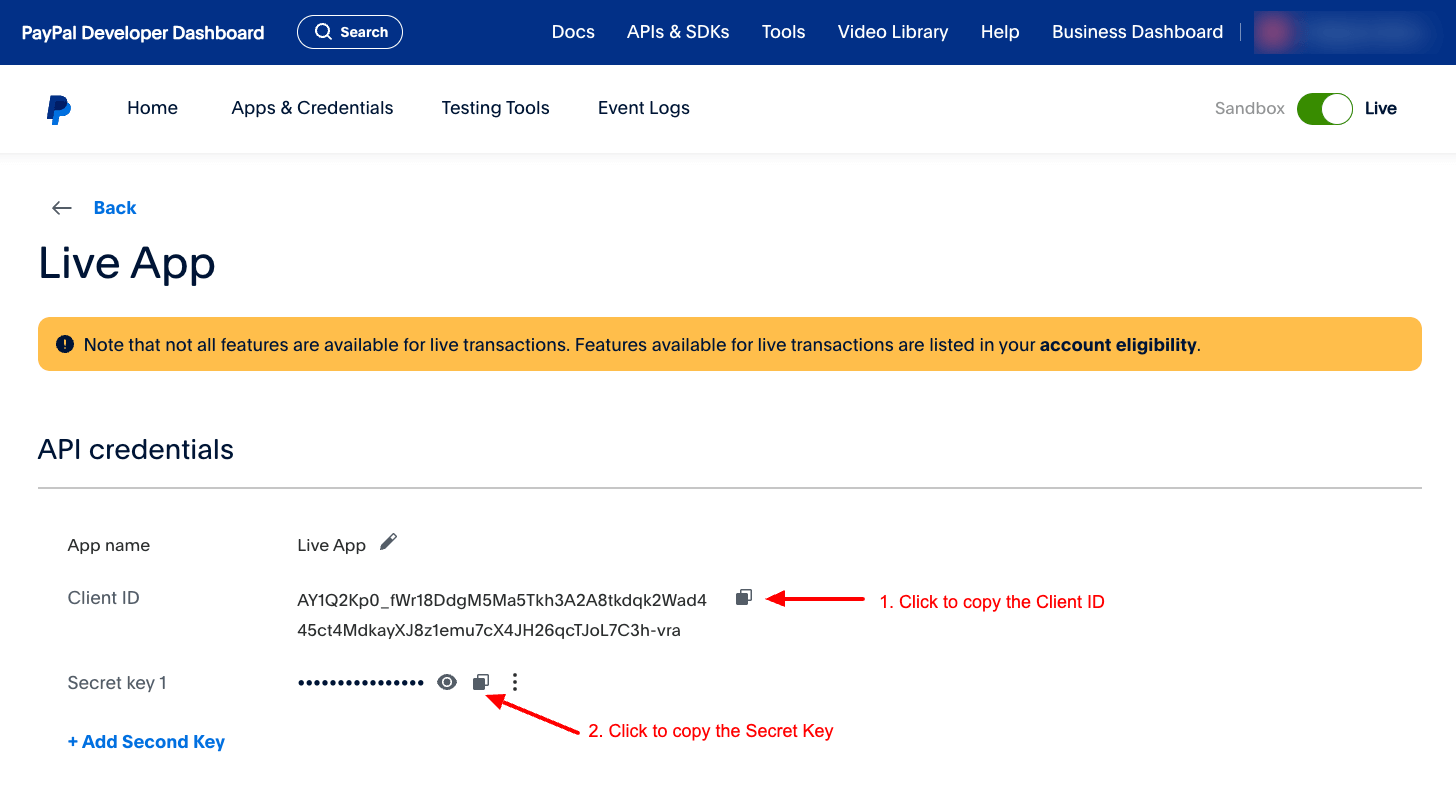
Once you've created your app, copy the Client ID and Client Secret keys as shown in the screenshot below.
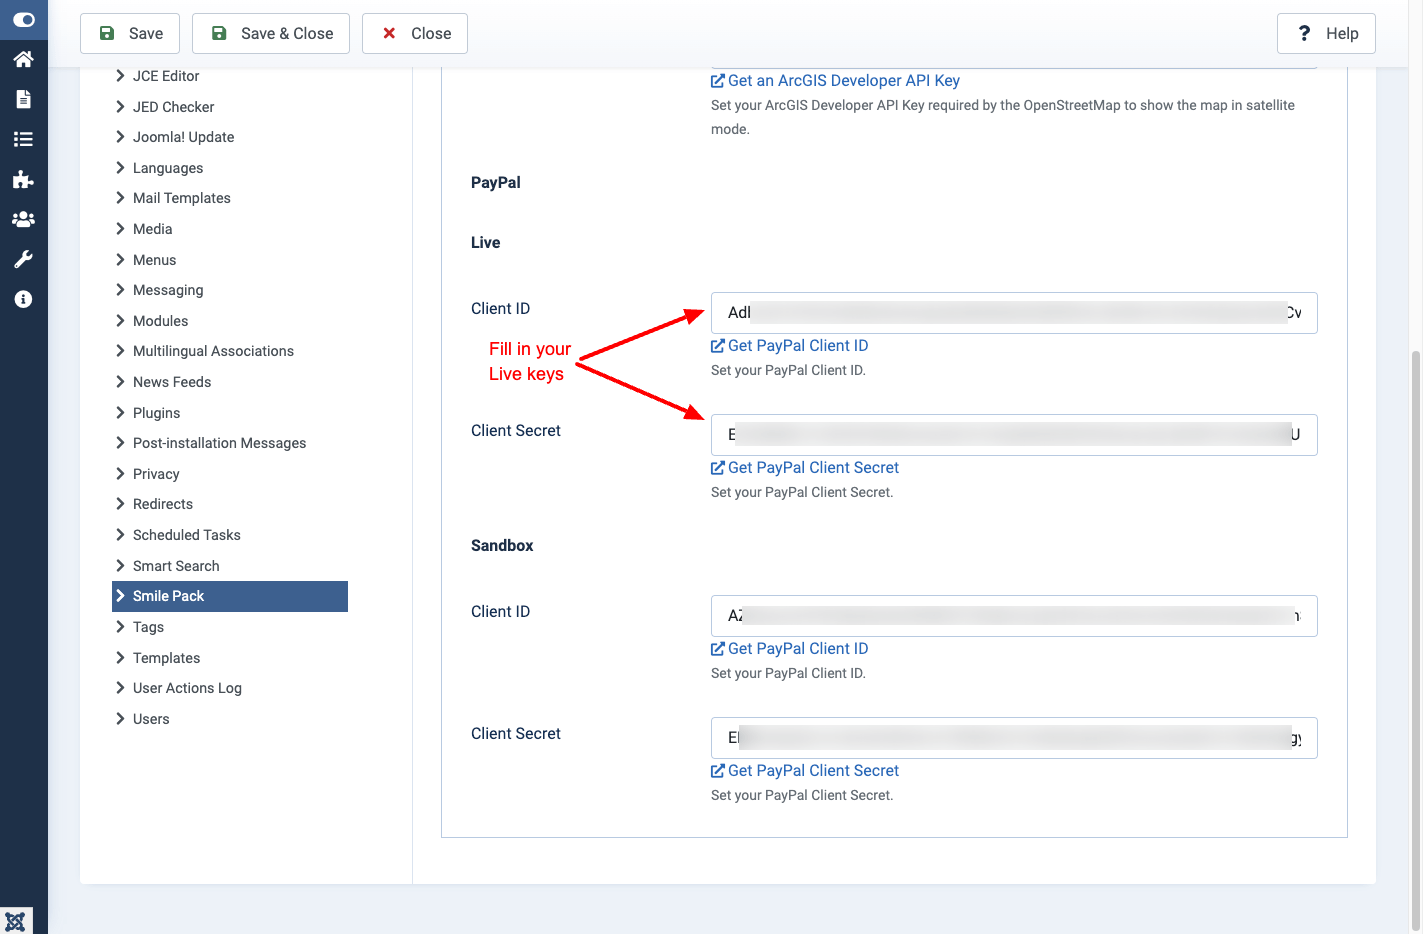
Visit your site’s backend and go to System → Global Configuration. From the components list on the left, click Smile Pack. Then, click the Keys tab and scroll down the PayPal section. Paste the Client ID and Secrety Key you copied in the previous step in the respective options in the Live section and click Save.
Step 3: Create a PayPal Button Module
To create a PayPal Joomla module, follow the steps below while in your Joomla dashboard:
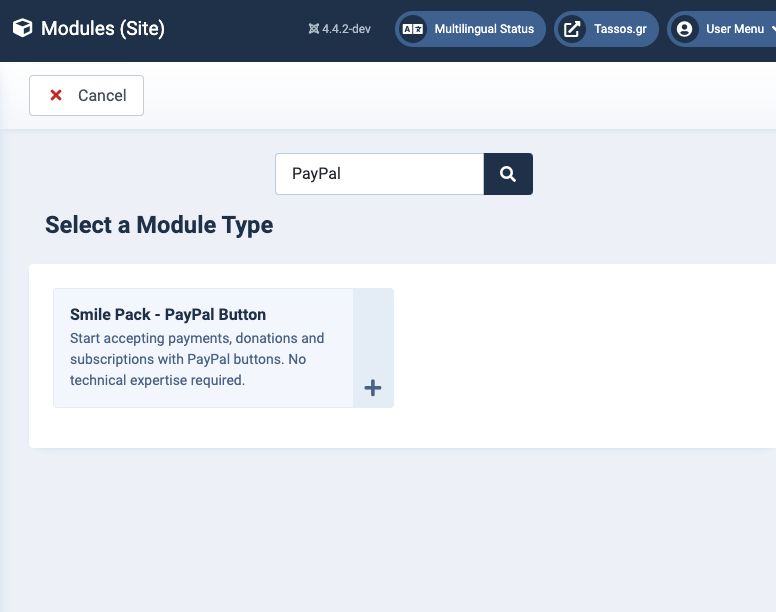
- Go to Content → Site Modules
- Click New to create a new module.
- Search for "Smile Pack - PayPal Button Module” and click it.
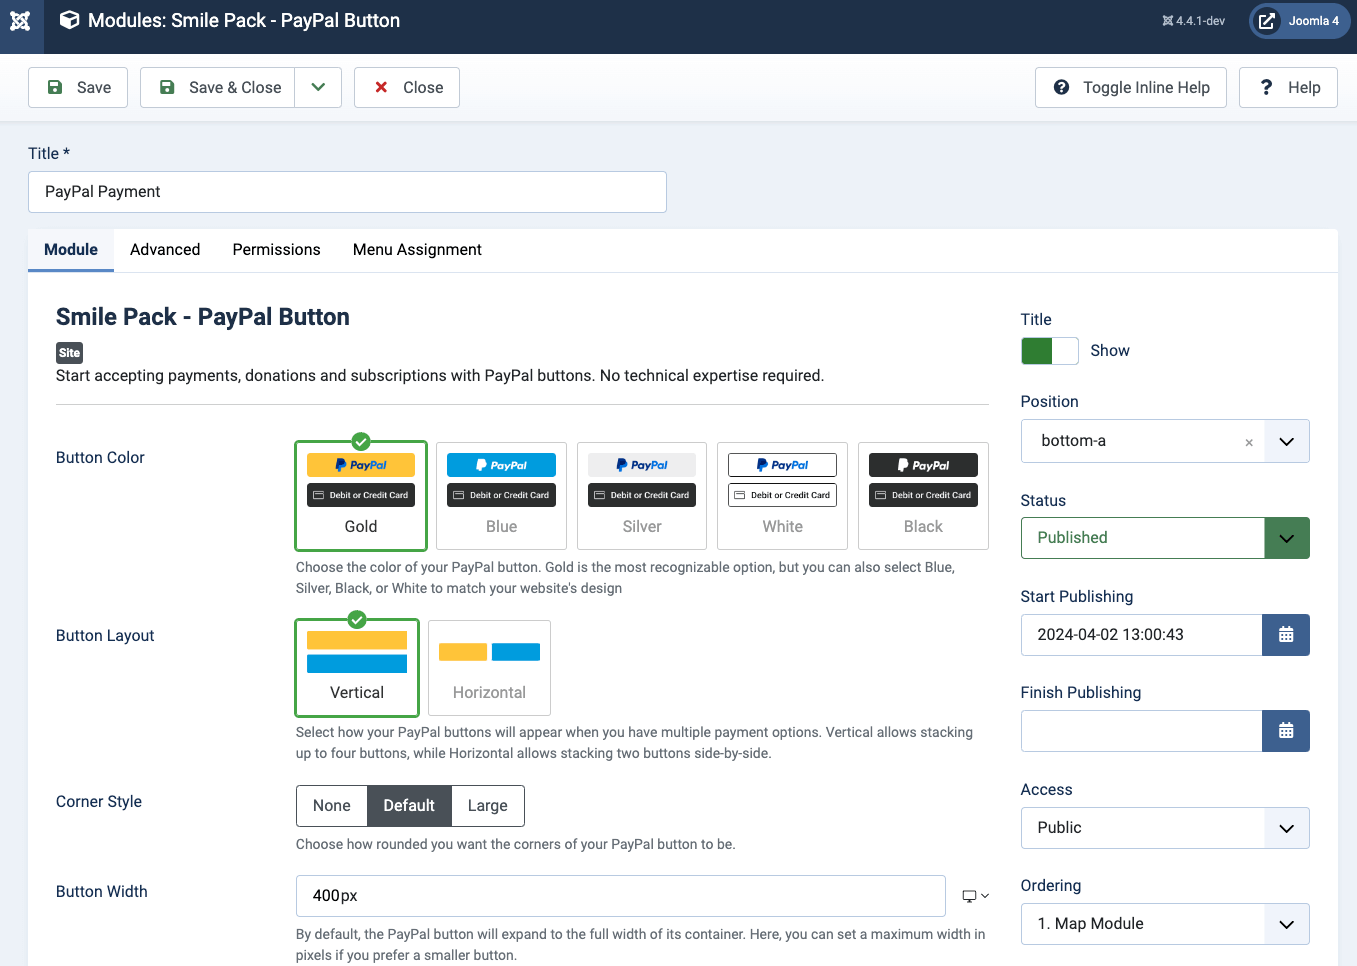
On the next page, you will configure the PayPal module settings. The first set of options allows you to customize the appearance of your button, including its color, layout, corner style, and width.
Product Details
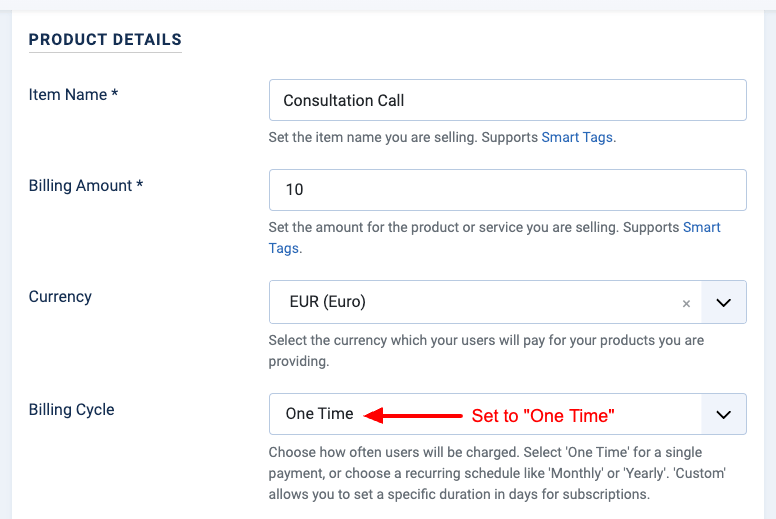
Next, you'll set up the product details using your payment button. If you're offering a one-time service like a consultation call, here's what options you will need:
- Item Name: Enter “Consultation Call”.
- Billing Amount: Specify the fee for your service.
- Billing Cycle: Select "One Time".
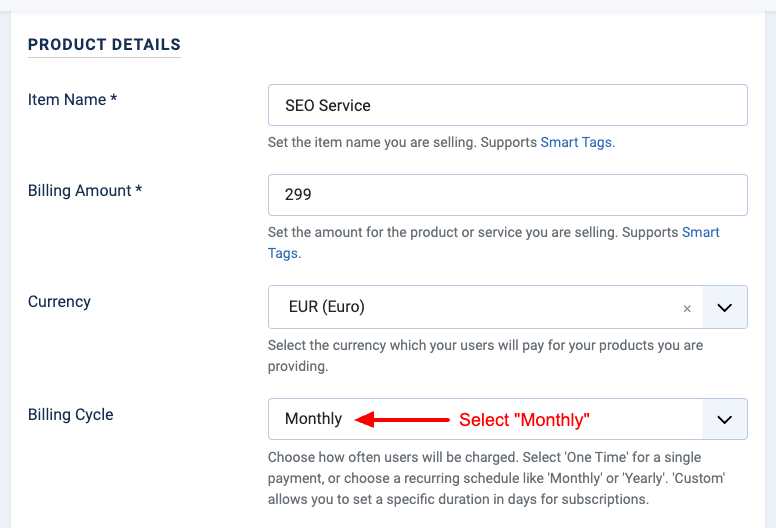
If you are offering a subscription-based service, such as a monthly SEO package, here's how to set up a recurring payment:
- Item Name: Enter “SEO Service”.
- Billing Amount: Specify the monthly fee.
- Billing Cycle: Select "Monthly".
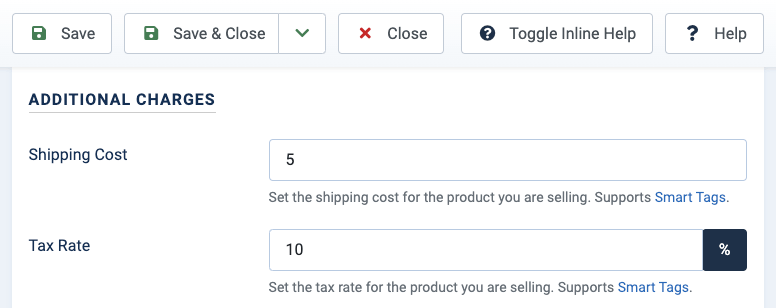
Additional Charges
The Smile Pack PayPal Module lets you set up additional charges for your product or service, such as shipping fees and tax rates. For example, if shipping costs 10 EUR and your country's tax rate is 20%, enter these values in the corresponding fields as indicated below.
After Payment Action
Next, you must decide what happens after a successful payment. With the Smile Pack PayPal Module, you can display a custom message above the payment buttons or redirect users to a custom landing page.
To display a custom success message, choose Show Message in the Action option and enter your message in the Message field. You can use Smart Tags to add personalized details — for instance, Smart Tags like {this.product_name} and {this.billing_amount} will automatically insert the product's name and price.
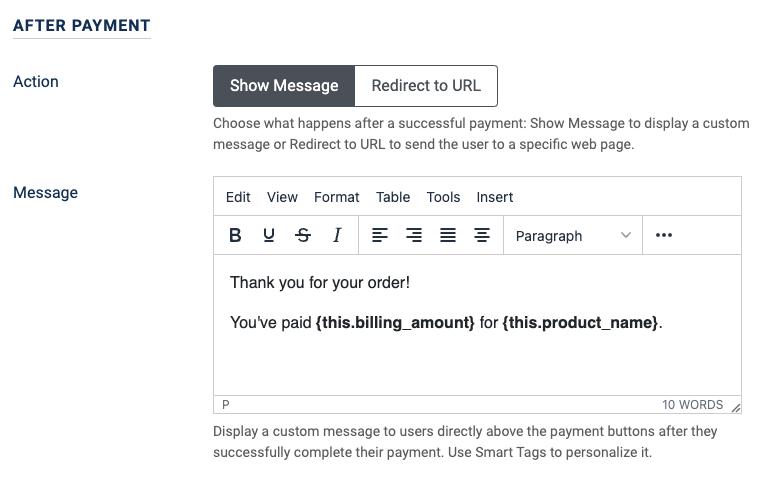
Here's a preview of how it works:
If you want to redirect users to a custom landing page after a successful payment, select Redirect to URL in the Action option and enter the target URL in the URL field. With this option, users will be automatically redirected to the specified URL once the transaction is complete.
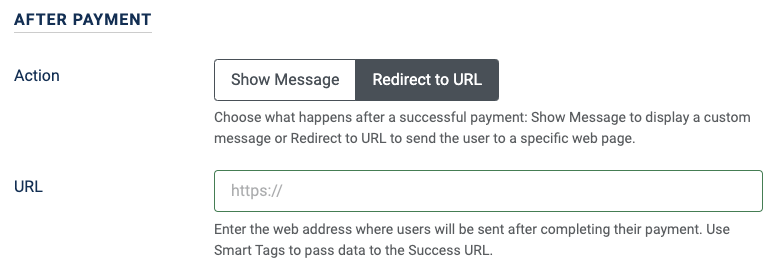
Here's a preview of how it works:
Disable / Enable Payment Methods
PayPal supports many popular payment options, including PayPal Credit, Pay Later, Visa, Mastercard, Venmo (US), Discover, iDEAL, American Express, Bancontact, BLIK, Giropay, MyBank, EPS, and Przelewy24. This gives users the flexibility to pay in their preferred way. By default, the PayPal module is configured to let PayPal determine which payment methods to display to visitors based on various factors.
However, if you want more control over this behavior, you can enable or disable specific payment methods by following these steps:
- In the Payment Methods option, select Custom.
- To allow particular payment methods, use the Include Payment Methods field.
- To disable specific payment methods, use the Exclude Payment Methods field.
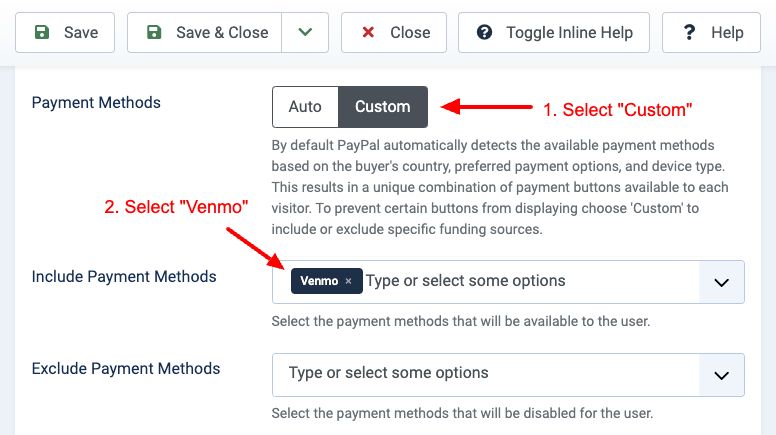
This flexibility allows you to tailor the payment experience to your customer's needs, ensuring they can access the methods you want while excluding those you don't.
Step 4: Publish & Test PayPal Payments
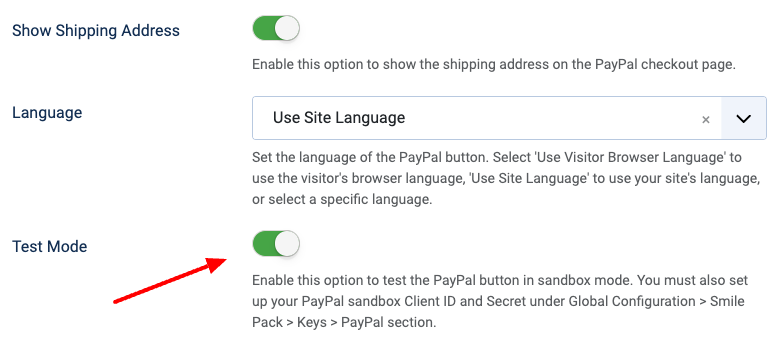
To publish the PayPal button on your site, give the module a title to help you identify it later. Next, set the module's position using the corresponding option in the right sidebar, then click Save.
Switching to Sandbox mode is best for testing the PayPal button without making real transactions. This allows you to create test payments without affecting your actual PayPal account, and you can avoid using real credit cards or payment details.
For detailed instructions on switching to Sandbox mode, refer to the relevant guide in the module's documentation here.
Additional Ways to Use PayPal with Joomla
In the previous section, we discussed adding a PayPal button to your Joomla site using modules, which is the most common method. However, there are other ways to integrate PayPal with Joomla. In this section, let's explore some alternative approaches.
Adding a PayPal Button with Custom Fields
If you prefer using custom fields and rely on them for content management, you can render a PayPal button directly within your Joomla articles using custom fields. This method allows you to assign a PayPal button custom field to multiple articles, providing flexibility to set the item name and price for each product or service at the article editing stage. You can sell different products or services at unique prices within other articles.
To create a "Buy Now" PayPal button using custom fields, you will need the Advanced Custom Fields extension. This extension offers lightweight and feature-packed Joomla custom fields, including File Upload, Gallery, Video, Map, FAQ, Address Autocomplete, and PayPal Button.
To start using Advanced Custom Fields, you must purchase the Pro version, as the PayPal custom field is available exclusively in the Pro version.
For more information on setting up Advanced Custom Fields on your site, refer to the Getting Started with Advanced Custom Fields and Using the PayPal Custom Field guides for detailed instructions.
Displaying a PayPal Button in a Popup
Displaying a PayPal button in a popup can effectively grab user attention and drive conversions. Unlike fixed-position modules, popups offer the flexibility to appear at optimal moments, making them perfect for time-sensitive offers, exit-intent prompts, or specific user interactions.
EngageBox is the best Joomla popup extension for creating and managing popups. It allows you to trigger popups in various ways. You can set a popup to appear when a page loads, when users show exit intent (like moving their cursor towards the browser's close button), or even on a specific user action such as clicking a link or button. This flexibility means you can strategically choose when to display your Joomla PayPal button, maximizing the chance of user engagement.
Another advantage of EngageBox is its targeting capabilities. You can configure popups to appear on specific pages, allowing you to tailor your messages and PayPal buttons to match the content or context of each page.
To display a PayPal button in a popup with EngageBox, you'll need to combine the functionality of Smile Pack and EngageBox. Here's how you can do it:
- Create your PayPal button module using Smile Pack by following the instructions in this section.
- Take note of the module ID.
- In EngageBox, create a new popup and add the module's shortcode to the popup's content. Use {loadmoduleid XX}, where "XX" is the module ID for the PayPal button.
- In the Trigger tab, configure the popup's triggers based on your needs—page load, exit intent, click, or other interactions.
- Set the pages where you want the popup to appear using the Display Conditions tab.
Frequently Asked Questions
Can I accept credit card payments through PayPal?
Yes, you can accept credit card payments through PayPal. With Smile Pack, you can integrate the PayPal Checkout API into your Joomla site, allowing customers to pay with credit cards or other methods without leaving your site. PayPal supports various credit cards like Visa, Mastercard, Discover, and American Express.
Can I offer "Pay in 4" installments through PayPal?
Yes, you can offer "Pay in 4" through PayPal, which allows customers to split payments into four installments. This feature provides flexibility for your customers and is included as part of PayPal's Pay Later options. To enable this feature, ensure it's supported in your region and configure it accordingly in the PayPal Button Module settings.
Can I use PayPal for recurring payments?
You can use PayPal to make recurring payments on your Joomla site. Smile Pack's PayPal integration allows you to set up one-time or recurring payments (subscriptions) with billing cycles ranging from weekly to annually. This is useful for subscription-based services, memberships, or ongoing product deliveries.
Can I accept donations through PayPal?
Yes, you can accept donations through PayPal. Smile Pack's PayPal Button Module provides an easy way to add a donation button to your Joomla site, allowing visitors to contribute to your cause. You can customize the donation button's appearance and set additional options, such as post-payment actions and payment methods.

Featured Articles


 Rated: