-
- Redirect to a Menu Item After Form Submission
- Tracking Form Lead Source
- Show a Form Only to Logged-In Users
- How to Increment a Count on Each Form Submission
- Adding an “Other” Option
- Adding a Unique ID to Each Form Submission
- Show or Hide Form Fields Based on User Joomla User Group
- Disabling Browser Autocomplete for Form Fields
- Scroll the Page to the Top When a Long Form is Submitted
- Display Submissions Count for a Specific Form
- Populate Drop Down, Radio Buttons or Checkboxes with a CSV File
- Automatically Delete Submissions Older Than X Days
- Silently POST Submitted Data to Any API or URL
- Automatically Save Each Submission to a JSON file
- Create a Custom Login Form
- Auto-Populate Fields with Article Data
- Add a placeholder text to a Dropdown field
- Create Multilingual Forms in Joomla
- Redirect User to a URL After Form Submission
- Importing and Exporting Forms
- Exporting Form Submissions
- Display Convert Forms in a popup
-
- How to Create a Quiz Form
- Show Confirmation Popup After Submission
- Using the Conditional Content Shortcode in Convert Forms
- Copy Value From One Field to Another
- Submission Tasks
- Exporting Form Submissions with a Webhook URL
- Conditional Fields
- PDF Generator
- Input Masking
- Calculations
- Populate Fields Using Query String
- Smart Tags
-
- Minimum Time to Submit
- Restrict Form Submissions Based on IP
- Enforcing a Custom Password Policy in Convert Forms
- Add Cloudflare Turnstile to your Joomla Form
- Implement the Iubenda Consent Database in Joomla with Convert Forms
- Add Custom Validations to Fields and Forms
- Add Math Captcha to your Form
- Prevent a Field From Saving in the Database
- Add hCaptcha to your Form
- Enable Double Opt-in
- Allow Form Submissions in Specific Date Range
- Ensure a Unique Value is Entered Into a Field
- Block Form Submissions Containing Profanity (Bad Words)
- Block Email Addresses or Email Domains
- Honeypot
- Setting Up Google reCAPTCHA
- Create GDPR Compliant Forms
Radio & Checkbox Images Field
Use images instead of plain radio and checkboxes for a more visual selection experience.

Did you know that with some simple tweaks you can replace Radio Buttons or Checkboxes with images in your Joomla forms? This tutorial will show you how to make that happen with Convert Forms and make your Joomla forms look amazing!
Replace radio buttons with images
First, create a form (or edit an existing) and insert a Radio Buttons field in your form and add the number of options that you would like.
Step 1 - Set the Image HTML in the Label option
While you're in the Choices section of the Field, insert the code that contains the image URL for each option in the Choice Label option. You may need to resize your images so they fit your form perfectly.
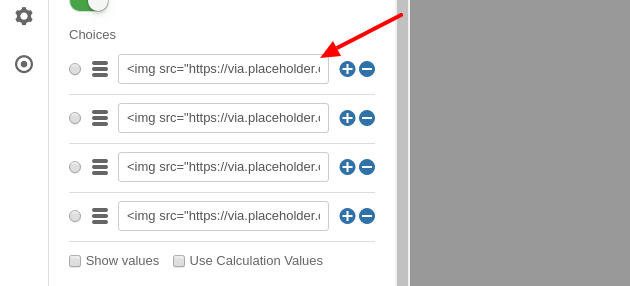
The code in your Label options should look something like this:
<img src="/your-image-url.png">Step 2: Use separate values in a radio button
Since the option label is used to display the image, we should configure the form to use a separate value that will be saved in the database once the form is submitted. This help you identify the options at a glance, and gives a text value that can be sent in email notifications.
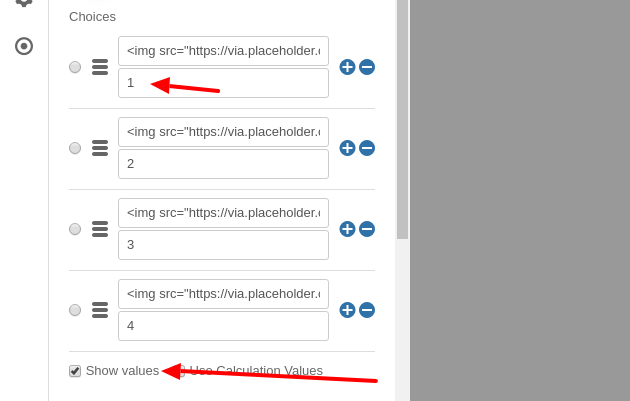
To do so, click on the Show Values option and add a unique value to each choice as shown in the picture above.
Make your radio button images beautiful!
The steps above are fairly straight-forward and echo the documentation for this feature. But your radio button images can be even more eye-catching! Here's how:
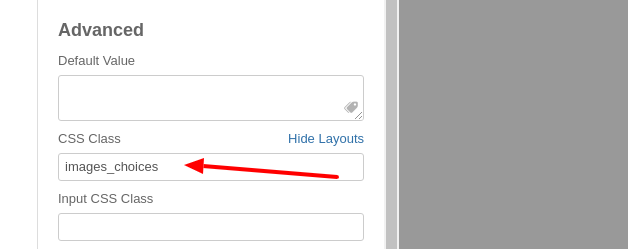
In the CSS Class option of the Radio Field (found in the Advanced Panel) add the images_choices CSS class as shown in the picture below.
Then, go to Design » Advanced and place the following CSS into the Custom CSS option.
.convertforms .images_choices .cf-input {
    position: absolute;
    width: 1px;
    height: 1px;
    margin: 0;
    padding: 0;
    opacity: 0;
    pointer-events: none;
    clip: rect(0 0 0 0);
    clip-path: inset(50%);
    border: 0;
}
.images_choices .cf-list label {
    padding-left: 0 !important;
    border:solid 2px #ccc;
    transition: all 100ms ease-in-out;
}
.images_choices .cf-list > div:hover label {
    border:solid 2px #888;
}
.images_choices .cf-list input:checked + label {
    border:solid 2px green;
}
What the above CSS does is to hide the actual input part of the field and provide a proper visual style to the user so they can identify which image is selected.


 Rated: