Unlock this and dozens of other powerful features by upgrading to Convert Forms Pro.
Unlock this feature
-
- Managing Form Submissions
- Searching and Filtering Submissions
- Submission Tracking Data
- Customizing Submission Columns
- Editing Submissions
- Deleting Submissions
- Importing Submissions
- Exporting Submissions
- Exporting Submissions with a Webhook URL
- Tracking the User's IP Address
- Disable Submission Storage
- Auto-Delete Old Submissions
- Auto-Save Each Submission to a JSON file
- Increment a Count on Each Submission
- Add a Unique ID to Each Submission
-
- Set up Auto-Responder Emails
- Email the Person Who Filled Out the Form
- Send an Email Only When a Checkbox Is Checked
- Attach the Submission PDF to Emails
- Send Email Based on Drop Down Selection
- Send Different Email Content Based on Form Responses
- Styling Emails with CSS
- Sending Plain-Text Alternative Body Emails
- Troubleshooting Email Delivery
- Tracking Sent Emails
- Resending Emails
-
- Browser Autocomplete for Form Fields
- Redirect to a Menu Item After Form Submission
- Show a Form Only to Logged-In Users
- Adding an “Other” Option
- Show or Hide Form Fields Based on User Joomla User Group
- Scroll the Page to the Top When a Long Form is Submitted
- Display Submissions Count for a Specific Form
- Populate Drop Down, Radio Buttons or Checkboxes with a CSV File
- Silently POST Submitted Data to Any API or URL
- Create a Custom Login Form
- Auto-Populate Fields with Article Data
- Add a placeholder text to a Dropdown field
- Create Multilingual Forms in Joomla
- Redirect User to a URL After Form Submission
- Importing and Exporting Forms
- Display Convert Forms in a popup
-
- Minimum Time to Submit
- Restrict Form Submissions Based on IP
- Enforcing a Custom Password Policy in Convert Forms
- Add Cloudflare Turnstile to your Joomla Form
- Implement the Iubenda Consent Database in Joomla with Convert Forms
- Add Custom Validations to Fields and Forms
- Add Math Captcha to your Form
- Prevent a Field From Saving in the Database
- Add hCaptcha to your Form
- Enable Double Opt-in
- Allow Form Submissions in Specific Date Range
- Ensure a Unique Value is Entered Into a Field
- Block Form Submissions Containing Profanity (Bad Words)
- Block Email Addresses or Email Domains
- Honeypot
- Setting Up Google reCAPTCHA
- Create GDPR Compliant Forms
HubSpot Integration
Create HubSpot forms in Joomla. Sync form submissions with HubSpot CRM to manage leads and automate workflows.
HubSpot Integration is available in Pro
Are you interested in adding users to your HubSpot lists through your Joomla forms? Are you seeking a solution to integrate Convert Forms with HubSpot and automate lead generation effortlessly? With the HubSpot app for Convert Forms, you can easily subscribe users in your HubSpot account each time someone submits your form.
This tutorial will guide you through using and configuring the HubSpot addon in Convert Forms.
Setting Up HubSpot Task
To set up the HubSpot task and sync your submissions to the HubSpot service, go into your form, and follow the steps listed below:
Select App
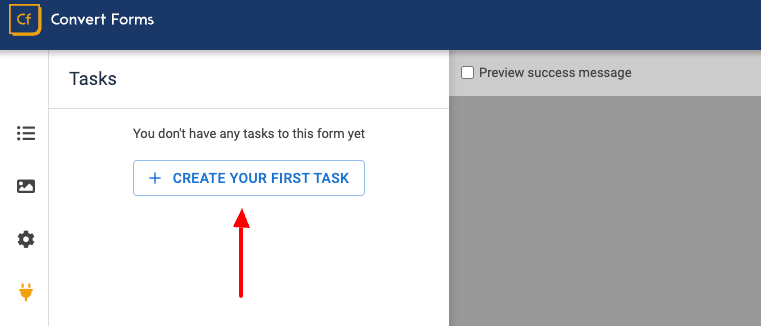
From within your form, click on Tasks > CREATE YOUR FIRST TASK.
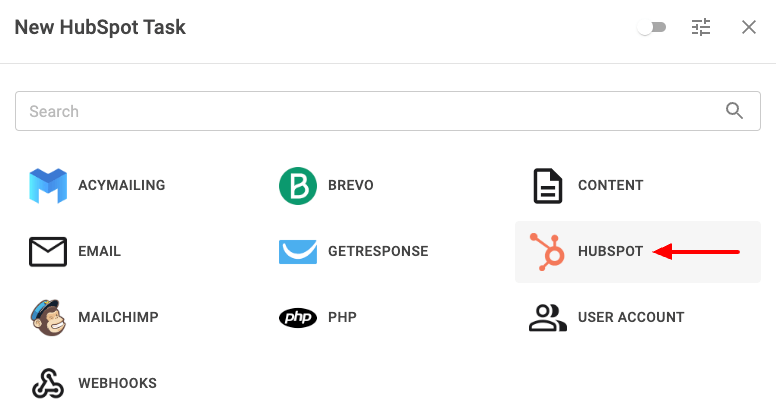
On the modal that will open, select the HubSpot task.
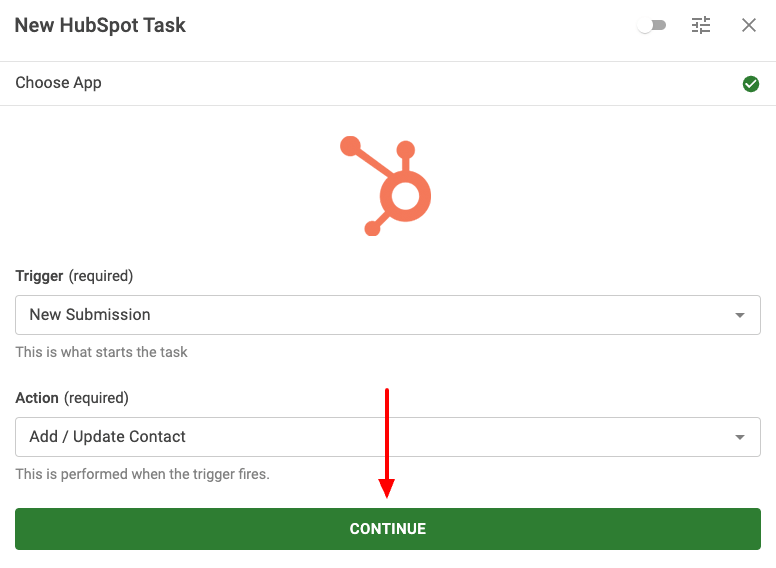
Select New Submission under Trigger and Add/Update Contact under Action on the next screen, and click CONTINUE.
Create Connection
A connection is essential to be able to connect to a 3rd-party service, such as HubSpot. Let's see how to create a new connection that will allow us to connect to HubSpot.
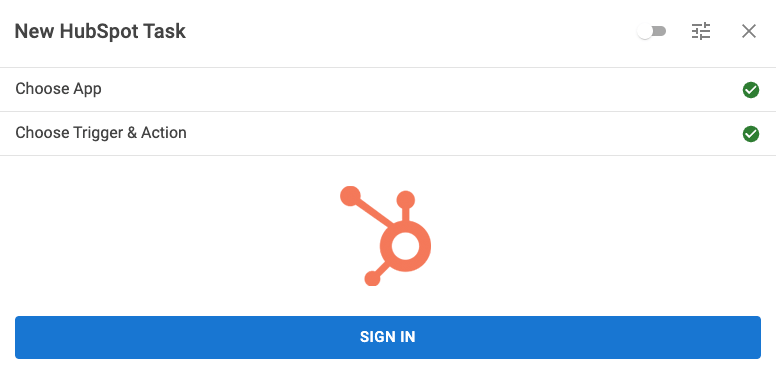
On the next step, click SIGN IN to create our HubSpot connection.
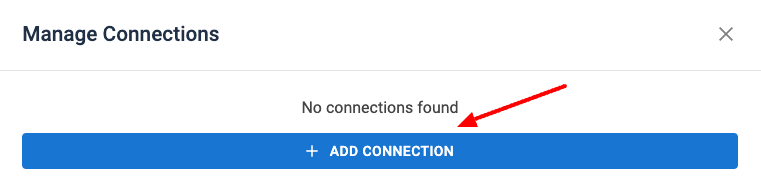
To create our connection with HubSpot, Click ADD CONNECTION to get started.
Get your HubSpot API Key
Before connecting to HubSpot, we need to create a HubSpot API Key. To grab your API Key, follow the steps listed below:
To obtain your HubSpot API Key you need to log into your HubSpot Account, select your account > on the top right on your Name > Profile & Preferences > Select Integrations from the left menu sidebar > Integrations > Private Apps > Click on Create a private app.

Once you have clicked the button, a new screen will appear to create the new private app. Start by entering a name under "Name" and click on the "Scopes" tab.

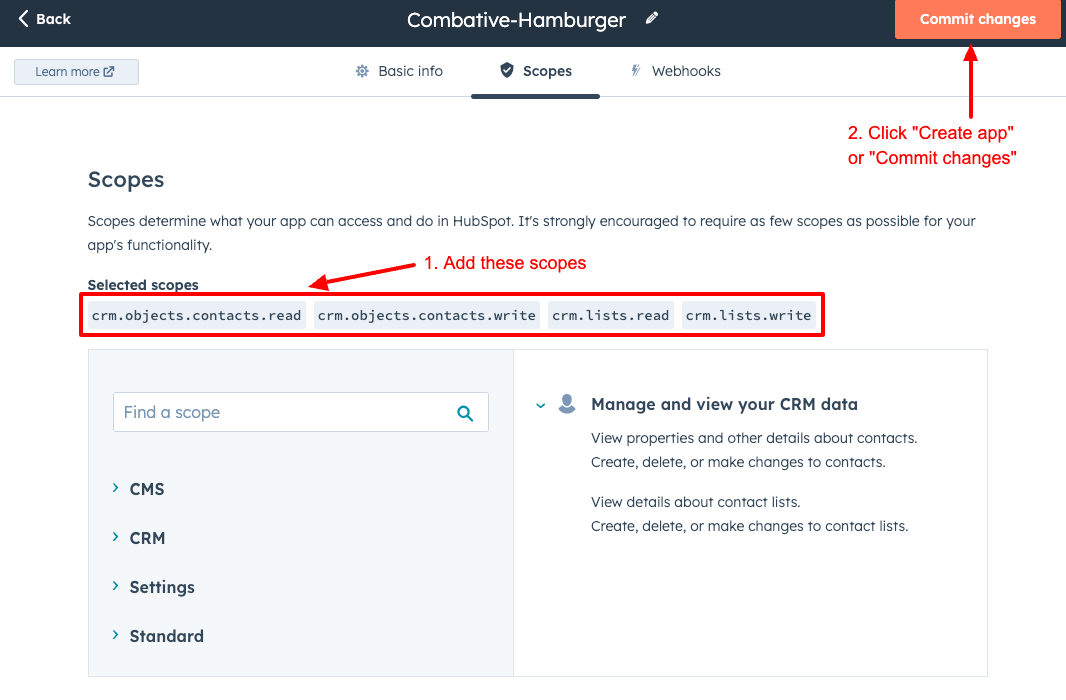
In this step, you must enter all required scopes as seen below:
- crm.objects.contacts.read
- crm.objects.contacts.write
- crm.lists.read
- crm.lists.write
Once you have added all scopes, click on Create app.
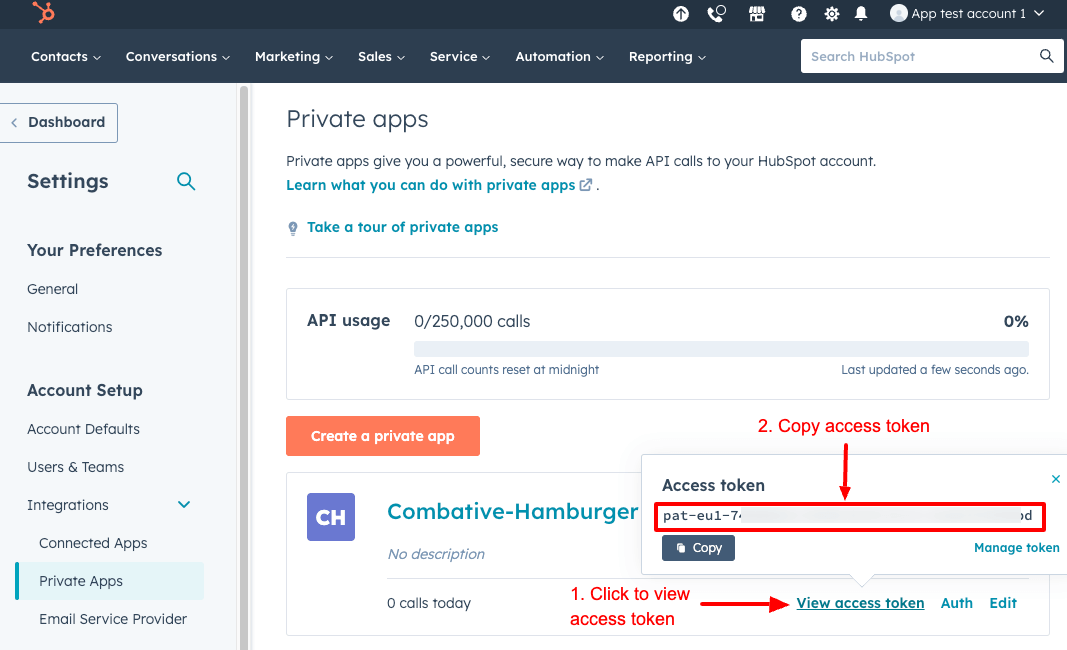
Your private app is now created and you can now obtain your HubSpot API Key.
To get your API Key click on "View access token" and copy it.
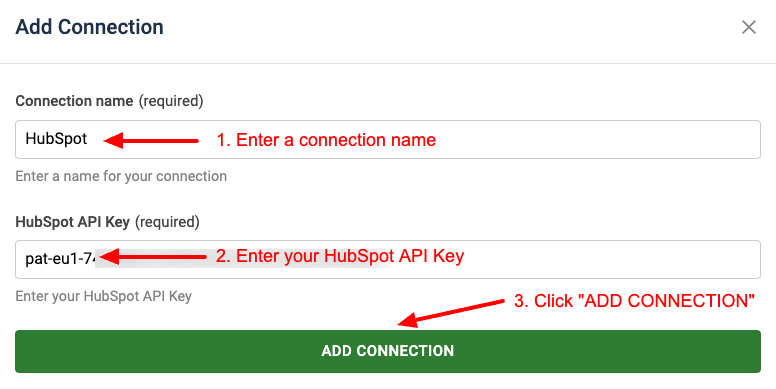
Now that we have created our HubSpot API Key, we can continue setting up the connection with HubSpot. Enter a connection name and paste your HubSpot API Key in the fields Connection Name and HubSpot API Key, respectively. Then click ADD CONNECTION.
The connection has been added, and you can close the connections window.
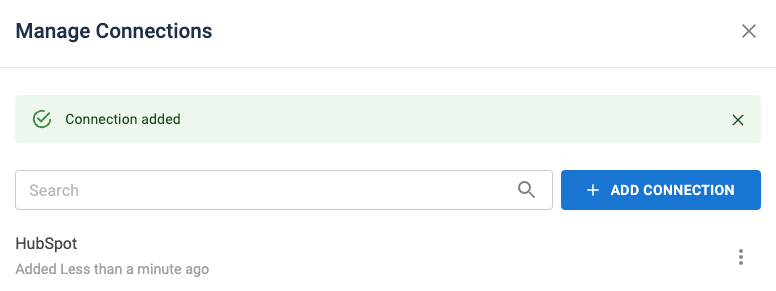
If you see the "Connection added" message, your connection with HubSpot has been established, and you can continue with the next step. If you see any error message, please review your API Key.
Select the newly created connection from the list and click CONTINUE.
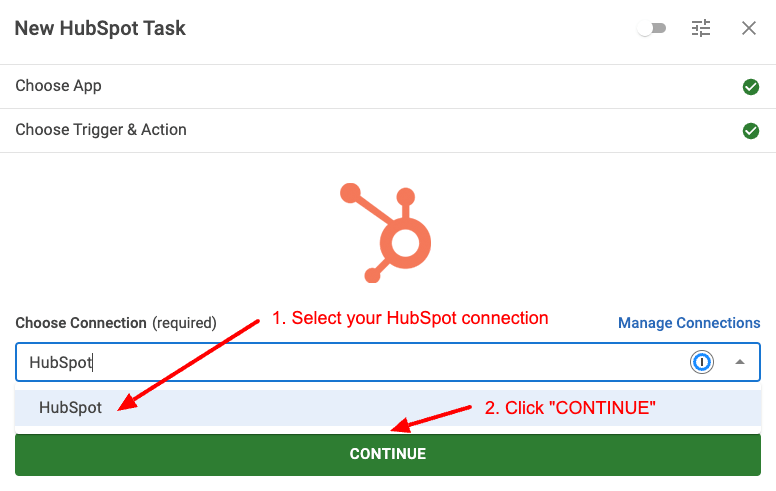
Ensure that your newly created HubSpot connection is selected in the dropdown.
Tip: Connections are reusable across your Tasks; read more on the Working with Tasks documentation page.
Setup Action
After you've set up the trigger, action, and connection, it's time to set up the action itself and define what information to send to HubSpot. In this step, you can view all available settings and map each option with a fixed or dynamic value using Smart Tags.
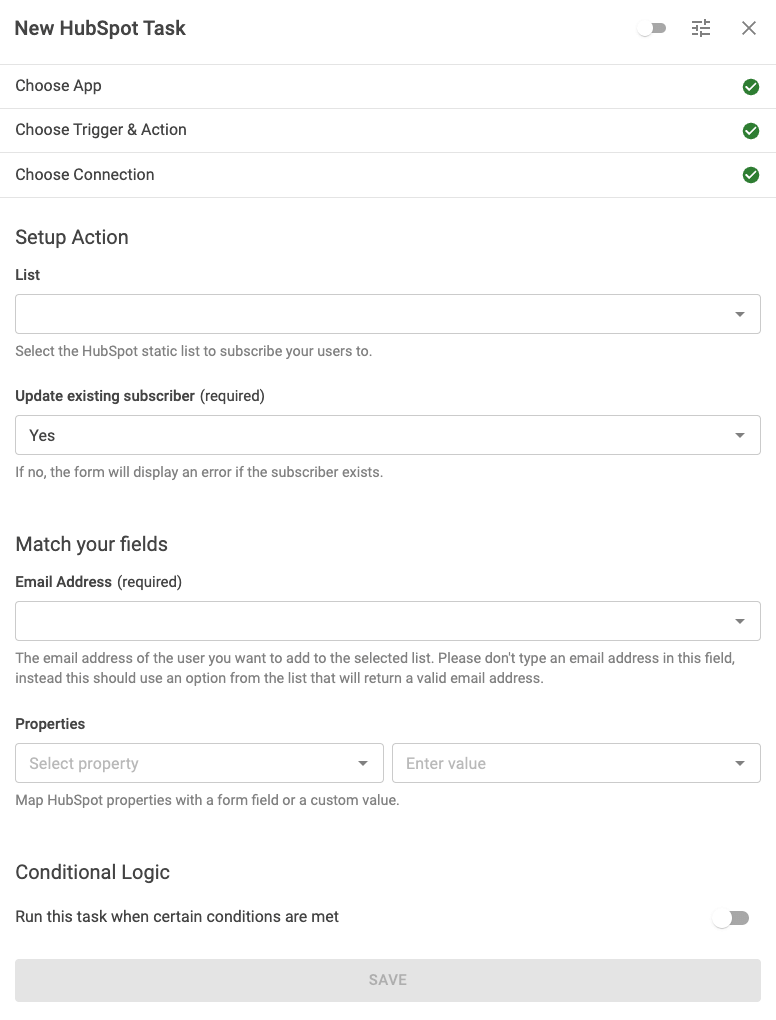
Let's see all available settings:
List
Select the list to which all subscribers will be saved in your HubSpot account. A complete list of all your HubSpot lists will be available, and choose from any form field, or Smart Tag.
Update existing subscriber
Enable to update existing subscribers' information on your HubSpot account. Disabling this will result in your users seeing an error message when the form is submitted, which prevents already subscribers from re-subscribing to your lists.
Email Address
Select the email address of the submitter. This is the user that will be subscribed to your HubSpot list. Choose the Email field in your form.
Properties
HubSpot provides Properties, which allows you to store additional information when a subscriber is saved on your HubSpot account, such as their name, age, company info, and more!
When you click on the Properties dropdown, you will automatically be shown a list of existing custom fields from your HubSpot account, and you will be able to map them with an existing form field, or Smart Tag.
To create or edit your HubSpot custom fields please click here: How to create and use HubSpot properties.
That's it! Your custom field can now be used in your HubSpot task.
Add Conditional Logic
Conditional logic makes it possible to run tasks only if specific criteria are met, like a user’s email address matching a certain domain, the user being associated with a certain Joomla User Group, or a form submission having a specific value.
While editing the HubSpot task, go to the Setup Action step and scroll down to the Conditional Logic section to set up Conditional Logic. Here's where you define all the rules the task should meet to run.
For example, let's say we need to sync submissions to HubSpot, only if the email is coming from a specific domain: @domain.com.
- Click to enable the Run this task when certain conditions are met.
- Click Add Your First Condition.
- Select the Email field in the Trigger dropdown.
- Select Contains in the Operator dropdown.
- Enter @domain.com in the value. Replace this with your domain name.
The condition should look like this:

You can read more on Conditional Logic on the Working with Tasks documentation page.
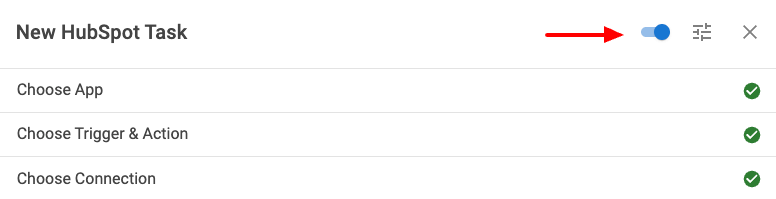
Activate Task
The final step is to enable our task. To do so, click the toggle on the dialog’s top right corner, as shown in the screenshot below.
Finally, click Save to save the task, close the dialog, and then click Save from the top right corner of the form builder to save the changes on the form.
Congratulations! You’ve successfully created a form that syncs new submissions to HubSpot!
HubSpot Integration is available in Pro
Unlock this and dozens of other powerful features by upgrading to Convert Forms Pro.
Unlock this feature
Last updated on Apr 2nd 2025 13:04
Tassos offers a premium suite of Joomla extensions with 7 products and over 2.2 million downloads, providing reliable solutions since 2014.


 Rated:
Copyright © 2014 - 2026 - Smile Motive Development LP. All Rights Reserved.