Unlock this and dozens of other powerful features by upgrading to Convert Forms Pro.
Unlock this feature
-
- Browser Autocomplete for Form Fields
- Disable Submission Storage in Convert Forms
- Redirect to a Menu Item After Form Submission
- Tracking Form Lead Source
- Show a Form Only to Logged-In Users
- How to Increment a Count on Each Form Submission
- Adding an “Other” Option
- Adding a Unique ID to Each Form Submission
- Show or Hide Form Fields Based on User Joomla User Group
- Scroll the Page to the Top When a Long Form is Submitted
- Display Submissions Count for a Specific Form
- Populate Drop Down, Radio Buttons or Checkboxes with a CSV File
- Automatically Delete Submissions Older Than X Days
- Silently POST Submitted Data to Any API or URL
- Automatically Save Each Submission to a JSON file
- Create a Custom Login Form
- Auto-Populate Fields with Article Data
- Add a placeholder text to a Dropdown field
- Create Multilingual Forms in Joomla
- Redirect User to a URL After Form Submission
- Importing and Exporting Forms
- Export Submissions
- Display Convert Forms in a popup
-
- How to Create a Quiz Form
- Show Confirmation Popup After Submission
- Using the Conditional Content Shortcode in Convert Forms
- Copy Value From One Field to Another
- Submission Tasks
- Exporting Form Submissions with a Webhook URL
- Conditional Fields
- PDF Generator
- Input Masking
- Calculations
- Populate Fields Using Query String
- Smart Tags
-
- Minimum Time to Submit
- Restrict Form Submissions Based on IP
- Enforcing a Custom Password Policy in Convert Forms
- Add Cloudflare Turnstile to your Joomla Form
- Implement the Iubenda Consent Database in Joomla with Convert Forms
- Add Custom Validations to Fields and Forms
- Add Math Captcha to your Form
- Prevent a Field From Saving in the Database
- Add hCaptcha to your Form
- Enable Double Opt-in
- Allow Form Submissions in Specific Date Range
- Ensure a Unique Value is Entered Into a Field
- Block Form Submissions Containing Profanity (Bad Words)
- Block Email Addresses or Email Domains
- Honeypot
- Setting Up Google reCAPTCHA
- Create GDPR Compliant Forms
Zoho Campaigns Integration
Create Zoho forms in Joomla. Add form submissions to Zoho Campaigns and automate email marketing.
Zoho Campaigns Integration is available in Pro
The Convert Forms Zoho Campaigns Integration is based on the ZohoCRM API v1 which has been deprecated since 31, Dec 2018 and it doesn't work anymore. We're currently working on a fix but there's no projected date yet when the will be available.
Until then, we recommend using Zapier to connect your forms with Zoho Campaigns and continue pushing your submissions. Learn How to connect Convert Forms with Zapier.
Convert Forms offers seamless integration with Zoho Campaigns. Connecting Convert Forms to your Zoho mailing list is very easy. Follow our step by step guide on how to connect Convert Forms with Zoho.
1. Addon Installation
- Navigate to Components > Convert Forms > Addons
- Click the Cog button for the Zoho Campaigns Addon. A popup will appear where you can enable the addon.

- Click on the Status and select Enabled.
- Now you can click on Save & Close button to save the enabled addon.

2. Campaign Setup
To setup a Campaign with Zoho, follow the steps below.
- Navigate to Components > Convert Forms > Campaigns
- Create a new Campaign by clicking New
- Type a name for your Campaign. This name can not be seen by anyone else but you.
- For the Sync Leads > Choose Service selectbox choose Zoho. If you can not find the Zoho option then you do not have the Zoho Addon installed and activated. In that case, please go back to the top of the article and see how to install the mandatory addon.
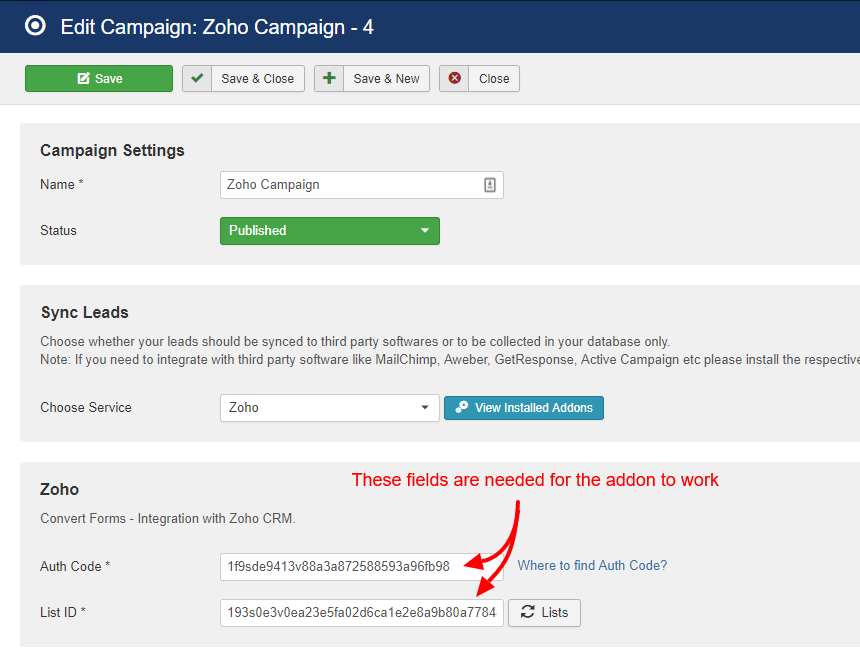
- Save the Campaign for the special Zoho fields to show up.
- Zoho needs:
- An Auth Code: How to generate it
- A List ID: Once you click the Lists button as shown in the screenshot above, a dropdown of your available Lists will appear and you can select the List you are interested in populating.
- Click Save & Close
3. Disable Zoho Double-Optin
Zoho does not allow disabling Double-Optin when using their API.
5. Email Field and available Zoho Fields
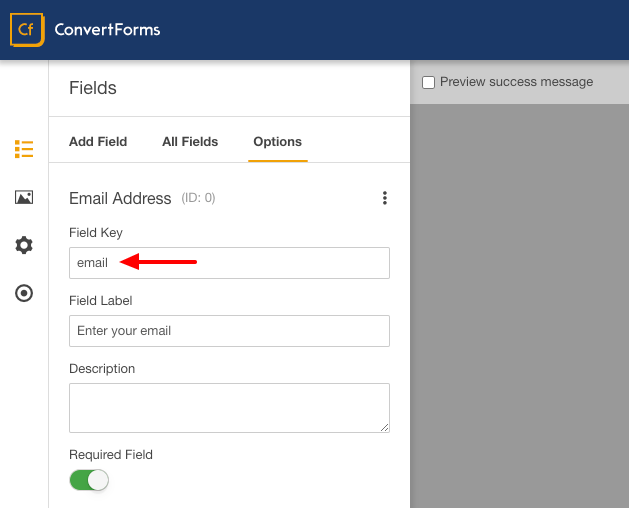
For a Convert Form to successfully store an email address to your Zoho account it needs to have an email field. This field is already set up at the time of creating the form and you don't have to change its input value as it is already configured for you.
On top of the email field, Zoho provides by default an extensive list of optional fields for you to use. These are the following:
- First Name
- Last Name
- Company Name
- Phone
- Address
- City
- State
- Zip Code
- Country
- Website
- Note
- Title
- Job Title
- Secondary Email
- Mobile
- Twitter Handle
- Facebook Handle
- Linkedin Handle
- Lead Score
- Lead Source
- Is Converted
To be able to use them inside your ConvertForm you need to use them as they are in a Field Name.
6. Zoho Custom Fields
In order for you to store more user data, you must utilize Zoho's Custom Fields.
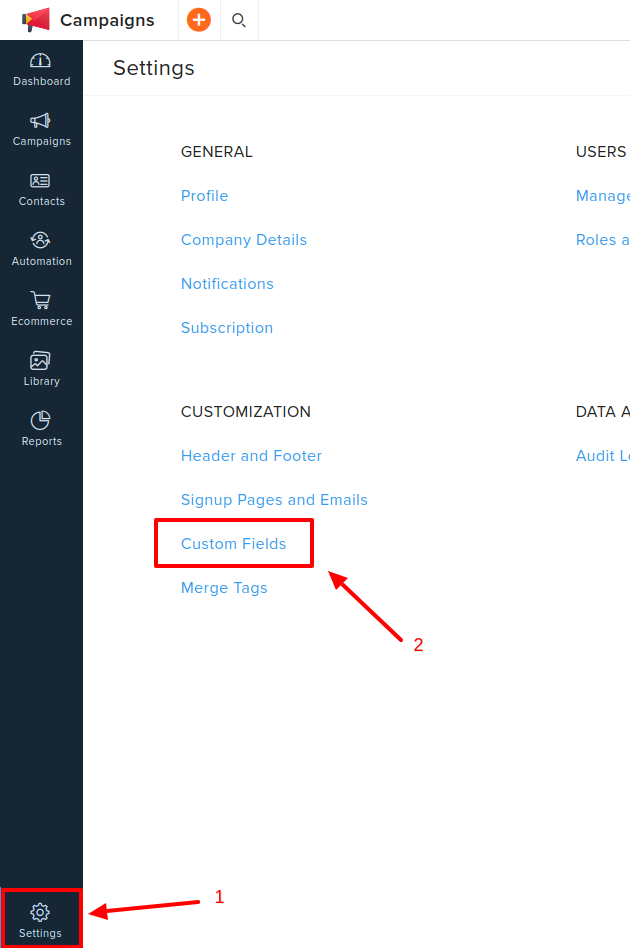
You can configure your Custom Fields through your Zoho Settings. To do that, click on the bottom left "Settings" button and then click on "Customization" > "Custom Fields" option.
Once there, you'll see a screen like the one below in which you are able to identify the extra fields you have created or will create. As you can see in the screenshot below, as an example, we have the fields Age and Country of origin to collect the Age and the Country of origin of the user respectively.
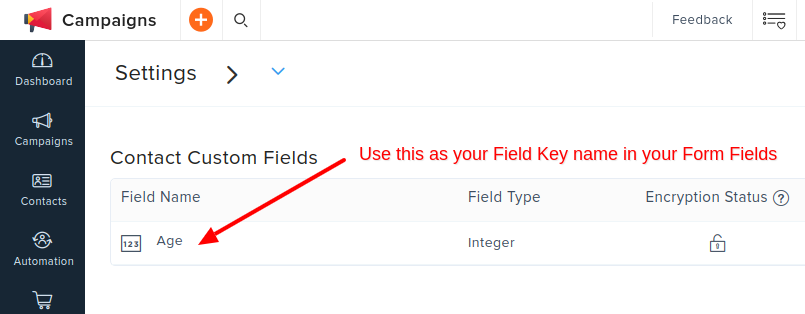
With the fields you have configured on your Zoho Account, you can now proceed and use the same ones in your Convert Form. For example, we used the Age field in our Form in the screenshot below.

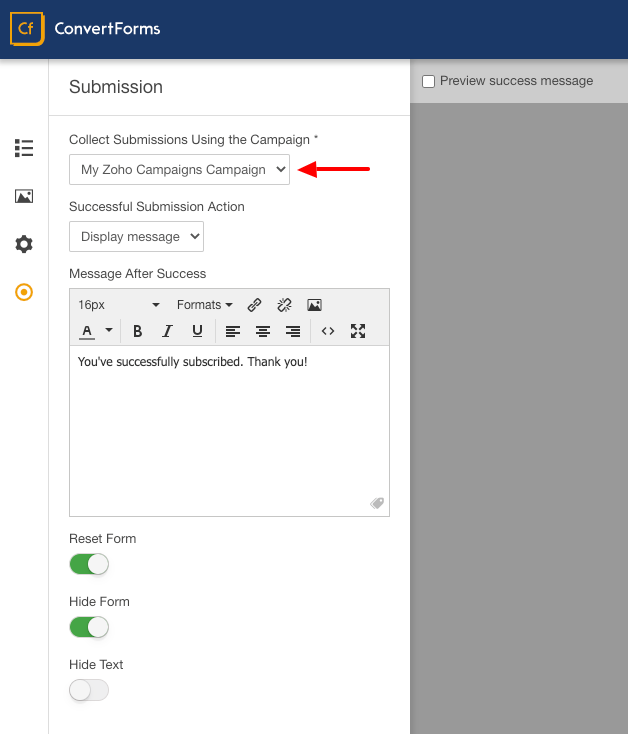
7. Assign form to Campaign
Of course don't forget to assign the form to our newly created Campaign! See the screenshot below to understand where to assign it.
Zoho Campaigns Integration is available in Pro
Unlock this and dozens of other powerful features by upgrading to Convert Forms Pro.
Unlock this feature
Last updated on May 12th 2025 13:05
Tassos offers a premium suite of Joomla extensions with 7 products and over 2.2 million downloads, providing reliable solutions since 2014.


 Rated:
Copyright © 2014 - 2026 - Smile Motive Development LP. All Rights Reserved.