

-
- Managing Form Submissions
- Searching and Filtering Submissions
- Submission Context Tracking
- Customizing Submission Columns
- Editing Submissions
- Deleting Submissions
- Importing Submissions
- Exporting Submissions
- Exporting Submissions with a Webhook URL
- Tracking the User's IP Address
- Tracking the User's Country
- Disable Submission Storage
- Auto-Delete Old Submissions
- Auto-Save Each Submission to a JSON file
- Increment a Count on Each Submission
- Add a Unique ID to Each Submission
-
- Email the Person Who Filled Out the Form
- Send an Email Only When a Checkbox Is Checked
- Attach the Submission PDF to Emails
- Send Email Based on Drop Down Selection
- Send Different Email Content Based on Form Responses
- Set up Auto-Responder Emails
- Styling Emails with CSS
- Sending Plain-Text Alternative Body Emails
- Troubleshooting Email Delivery
- Tracking Sent Emails
- Resending Emails
-
- Browser Autocomplete for Form Fields
- Redirect to a Menu Item After Form Submission
- Show a Form Only to Logged-In Users
- Adding an “Other” Option
- Show or Hide Form Fields Based on User Joomla User Group
- Scroll the Page to the Top When a Long Form is Submitted
- Display Submissions Count for a Specific Form
- Populate Drop Down, Radio Buttons or Checkboxes with a CSV File
- Silently POST Submitted Data to Any API or URL
- Create a Custom Login Form
- Auto-Populate Fields with Article Data
- Add a placeholder text to a Dropdown field
- Create Multilingual Forms in Joomla
- Redirect User to a URL After Form Submission
- Importing and Exporting Forms
- Display Convert Forms in a popup
-
- Does Convert Forms Use Cookies?
- Minimum Time to Submit
- Restrict Form Submissions Based on IP
- Enforcing a Custom Password Policy in Convert Forms
- Add ALTCHA Proof of Work to your Joomla form
- Add Cloudflare Turnstile to your Joomla Form
- Implement the Iubenda Consent Database in Joomla with Convert Forms
- Add Custom Validations to Fields and Forms
- Add Math Captcha to your Form
- Prevent a Field From Saving in the Database
- Add hCaptcha to your Form
- Enable Double Opt-in
- Allow Form Submissions in Specific Date Range
- Ensure a Unique Value is Entered Into a Field
- Block Form Submissions Containing Profanity (Bad Words)
- Block Email Addresses or Email Domains
- Honeypot
- Setting Up Google reCAPTCHA
- Create GDPR Compliant Forms
Use custom Google Font in your form
While Convert Forms offers a plethora of widely used Google Fonts to choose from and use as your main form font, you may still want to use a specific font from Google Fonts that we don't yet support. In this guide, I'll show you how to use any Google Font and load it on your Convert Forms form.
Step 1: Pick your font on Google Font
Head over to Google Fonts and search for the font you want to use. For this example, we'll use the font Outfit.
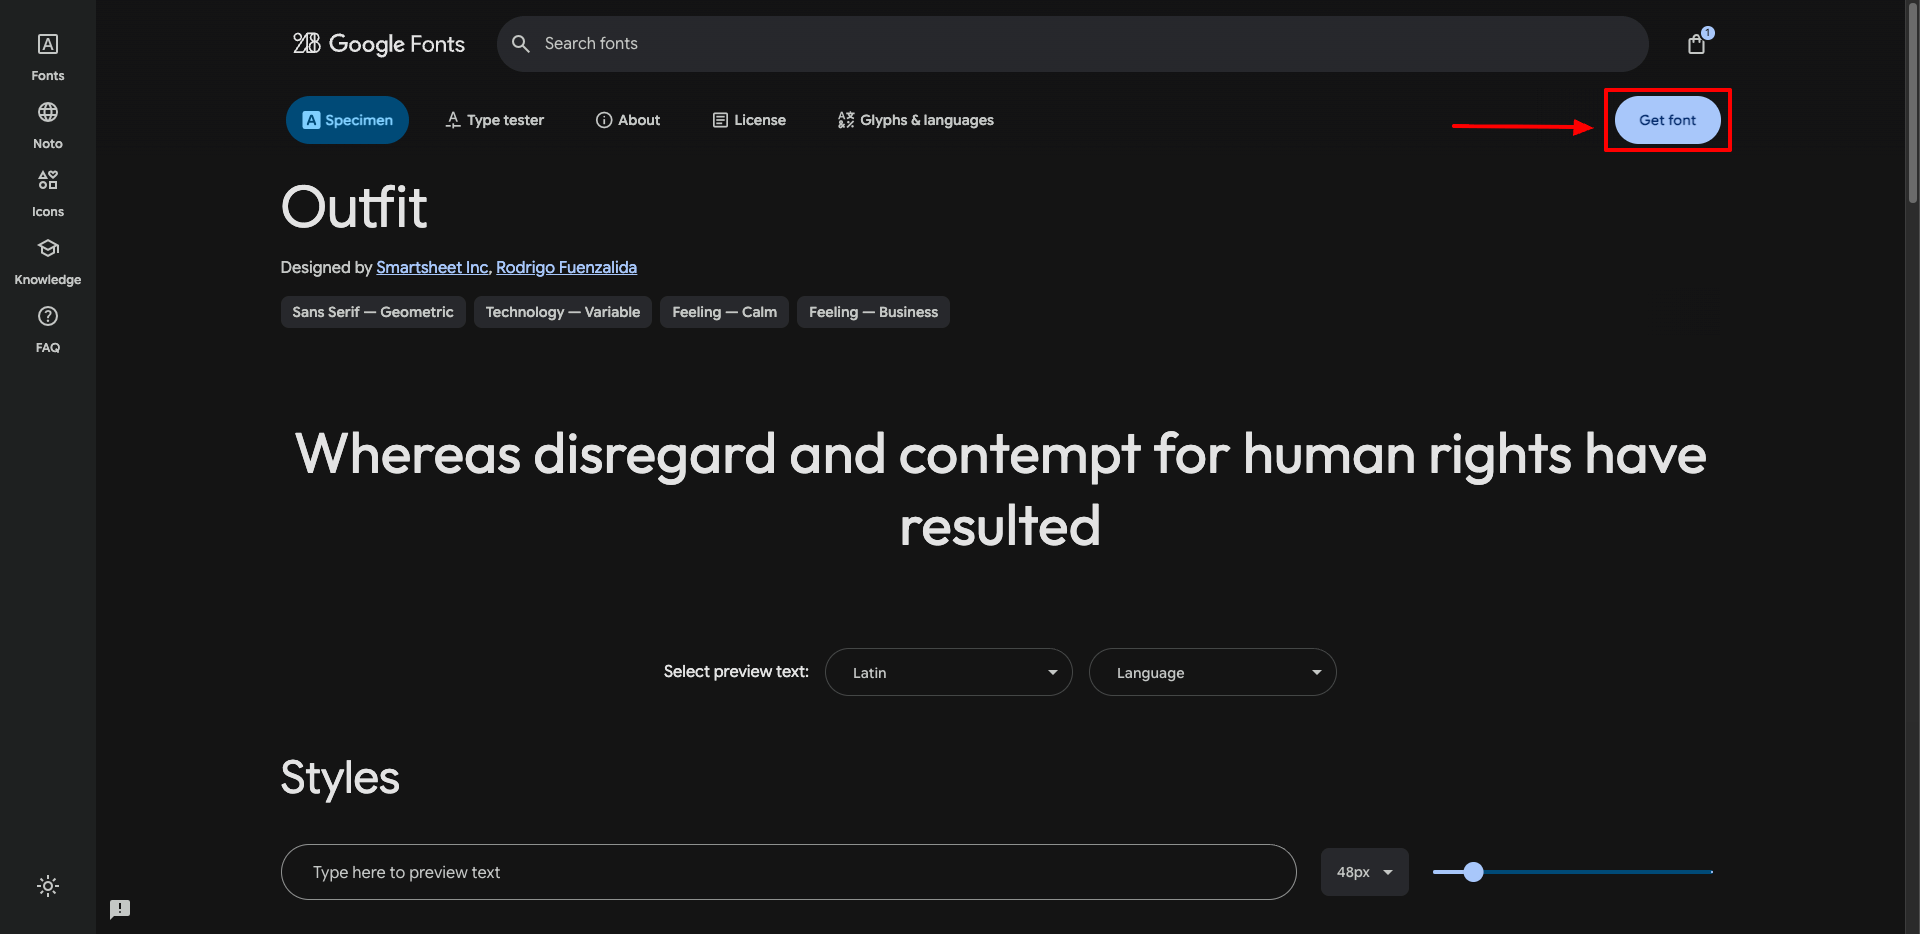
Once you've selected the Google Font, click on the "Get Font" button on the top right of the page.
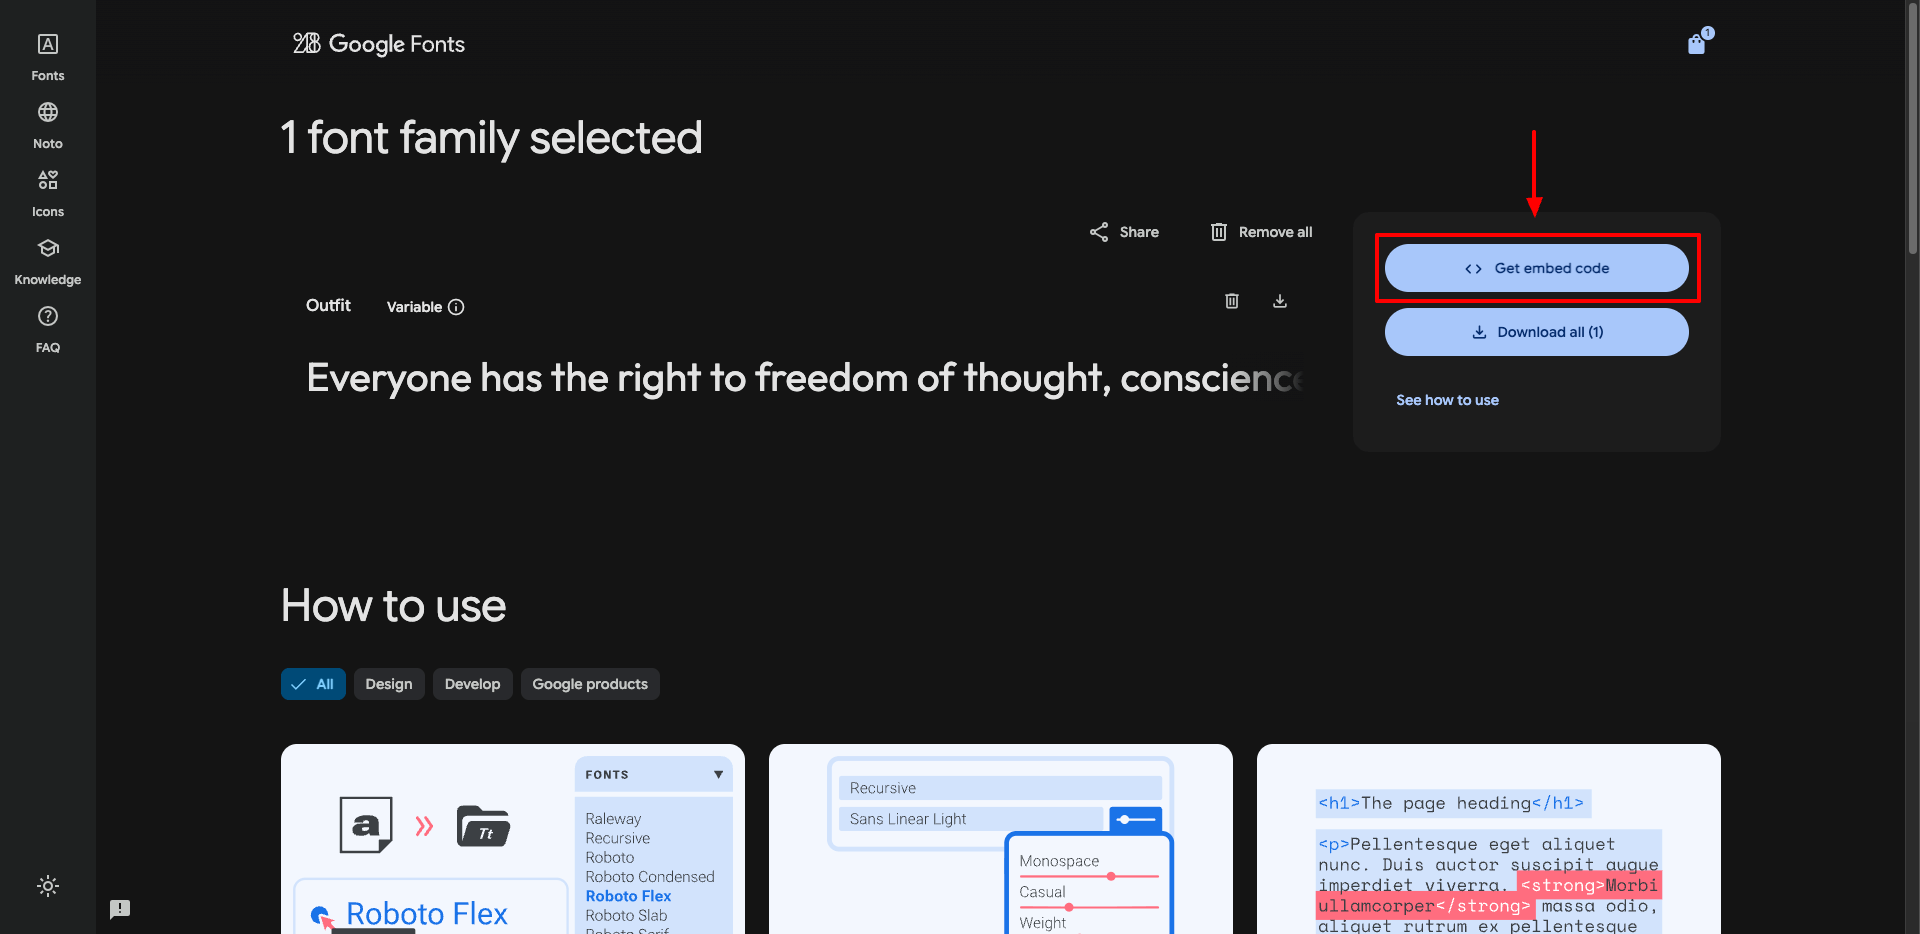
Next, click on the "Get embed code" button.
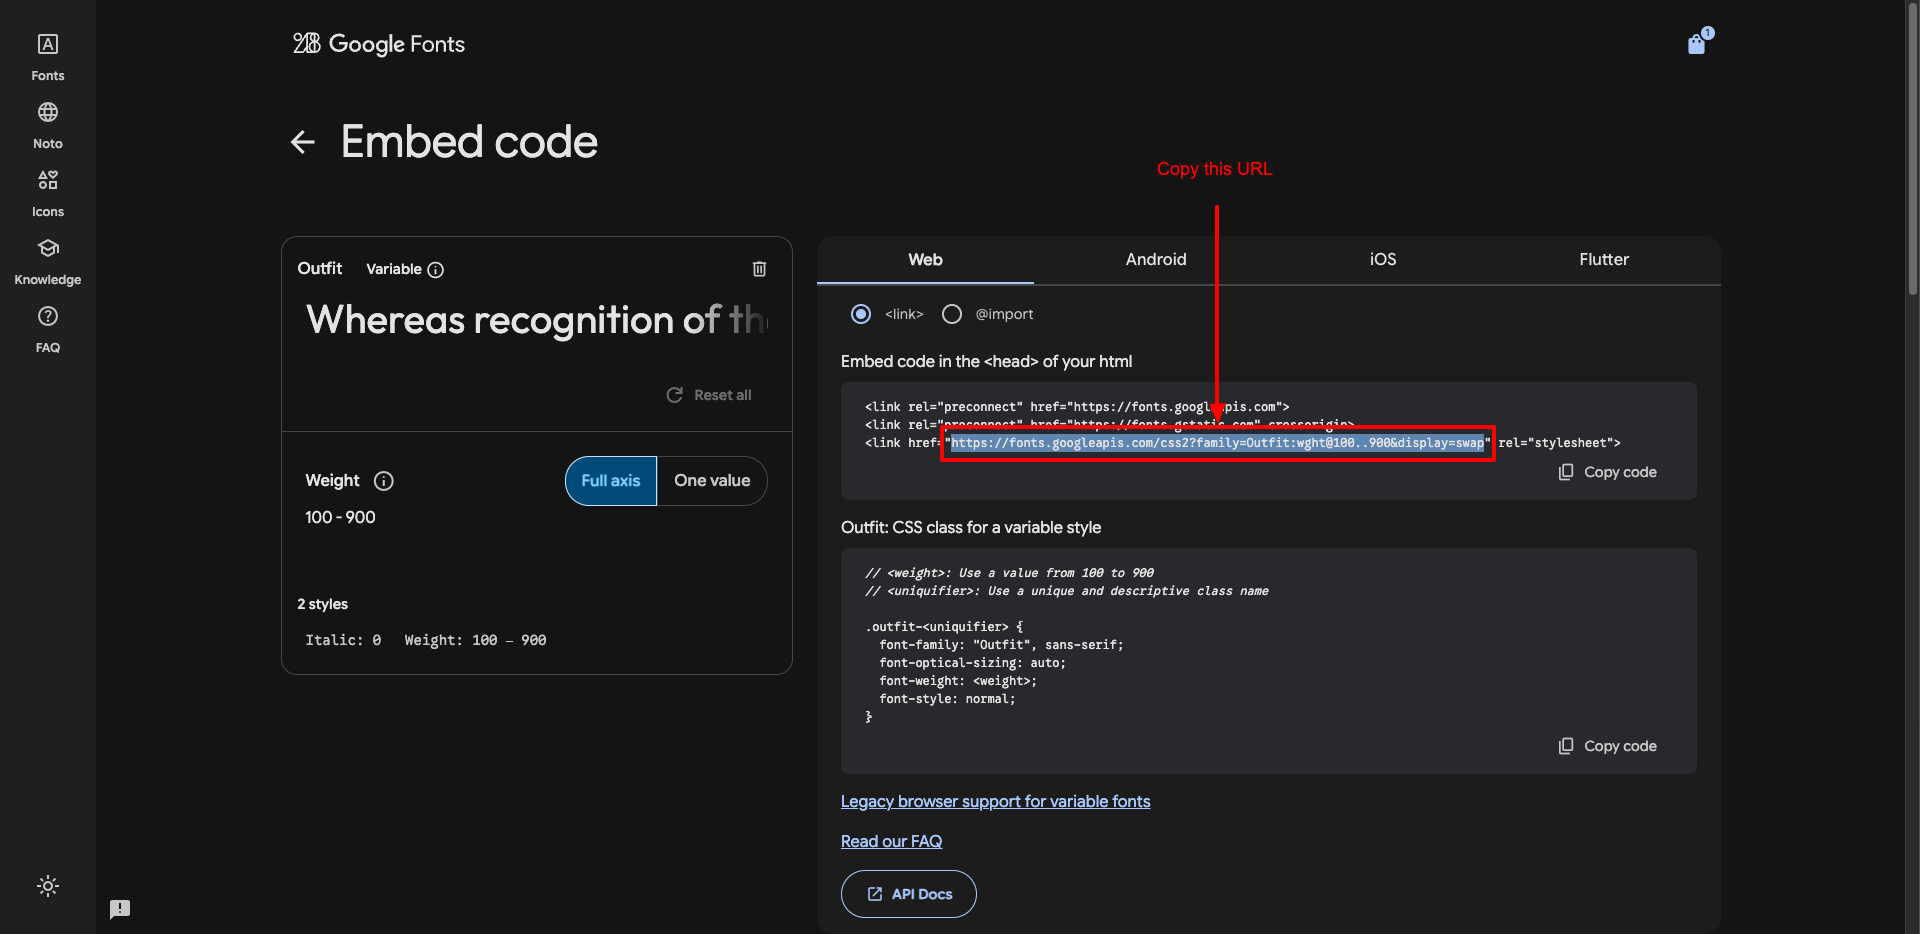
Select the Font URL from the "Embed code in the <head> of your html" area, as seen below.
Step 2: Load the font into Convert Forms
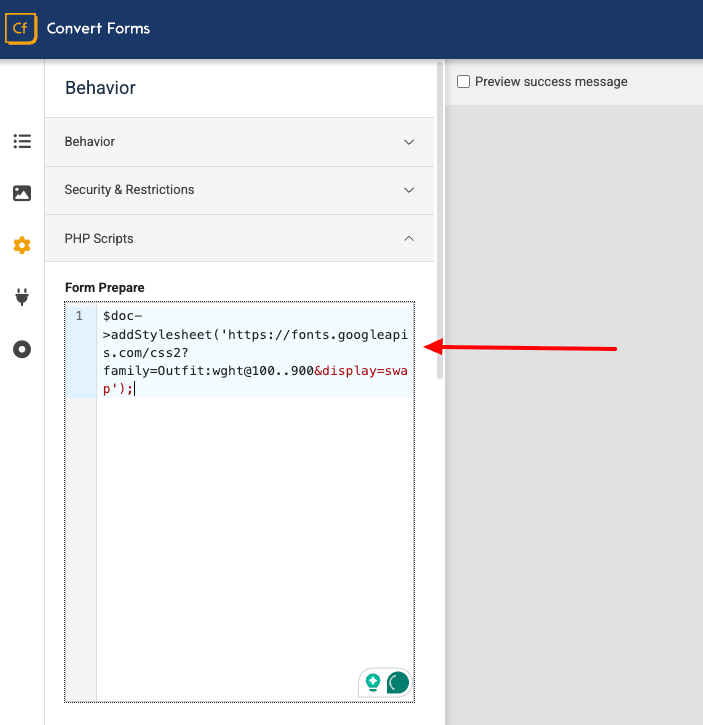
Next step is to edit your form and go to Behavior > PHP Scripts > Form Prepare so we can load the font and be able to use it in the form.
Add the PHP snippet:
$doc->addStylesheet('https://fonts.googleapis.com/css2?family=Outfit:[email protected]&display=swap');Replace the Google Font URL with the URL you copied from the previous step.
Step 3: Apply the font in your form
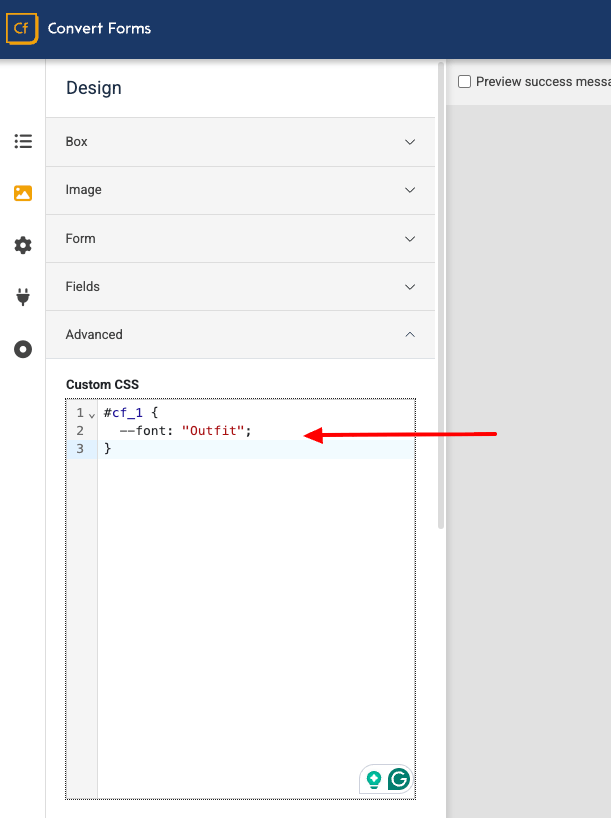
Finally, we need to apply the font in the form. To do so, navigate to Design > Advanced > Custom CSS area and add:
#cf_123 {
  --font: "Outfit", sans-serif;
}- Replace 123 with your Form ID.
- Replace "Outfit" with your Google Font name.



 Rated: