Unlock this and dozens of other powerful features by upgrading to Convert Forms Pro.
Unlock this feature
-
- Managing Form Submissions
- Searching and Filtering Submissions
- Submission Context Tracking
- Customizing Submission Columns
- Editing Submissions
- Deleting Submissions
- Importing Submissions
- Exporting Submissions
- Exporting Submissions with a Webhook URL
- Tracking the User's IP Address
- Tracking the User's Country
- Disable Submission Storage
- Auto-Delete Old Submissions
- Auto-Save Each Submission to a JSON file
- Increment a Count on Each Submission
- Add a Unique ID to Each Submission
-
- Email the Person Who Filled Out the Form
- Send an Email Only When a Checkbox Is Checked
- Attach the Submission PDF to Emails
- Send Email Based on Drop Down Selection
- Send Different Email Content Based on Form Responses
- Set up Auto-Responder Emails
- Styling Emails with CSS
- Sending Plain-Text Alternative Body Emails
- Troubleshooting Email Delivery
- Tracking Sent Emails
- Resending Emails
-
- Browser Autocomplete for Form Fields
- Redirect to a Menu Item After Form Submission
- Show a Form Only to Logged-In Users
- Adding an “Other” Option
- Show or Hide Form Fields Based on User Joomla User Group
- Scroll the Page to the Top When a Long Form is Submitted
- Display Submissions Count for a Specific Form
- Populate Drop Down, Radio Buttons or Checkboxes with a CSV File
- Silently POST Submitted Data to Any API or URL
- Create a Custom Login Form
- Auto-Populate Fields with Article Data
- Add a placeholder text to a Dropdown field
- Create Multilingual Forms in Joomla
- Redirect User to a URL After Form Submission
- Importing and Exporting Forms
- Display Convert Forms in a popup
-
- Does Convert Forms Use Cookies?
- Minimum Time to Submit
- Restrict Form Submissions Based on IP
- Enforcing a Custom Password Policy in Convert Forms
- Add ALTCHA Proof of Work to your Joomla form
- Add Cloudflare Turnstile to your Joomla Form
- Implement the Iubenda Consent Database in Joomla with Convert Forms
- Add Custom Validations to Fields and Forms
- Add Math Captcha to your Form
- Prevent a Field From Saving in the Database
- Add hCaptcha to your Form
- Enable Double Opt-in
- Allow Form Submissions in Specific Date Range
- Ensure a Unique Value is Entered Into a Field
- Block Form Submissions Containing Profanity (Bad Words)
- Block Email Addresses or Email Domains
- Honeypot
- Setting Up Google reCAPTCHA
- Create GDPR Compliant Forms
Article Creator Integration
Let users submit articles from the front-end. Create article submission forms and collect titles, text, and images. Supports custom fields and tags. Perfect for guest posts, blogs, and community-contributed content.
Article Creator Integration is available in Pro
Create a Joomla Article
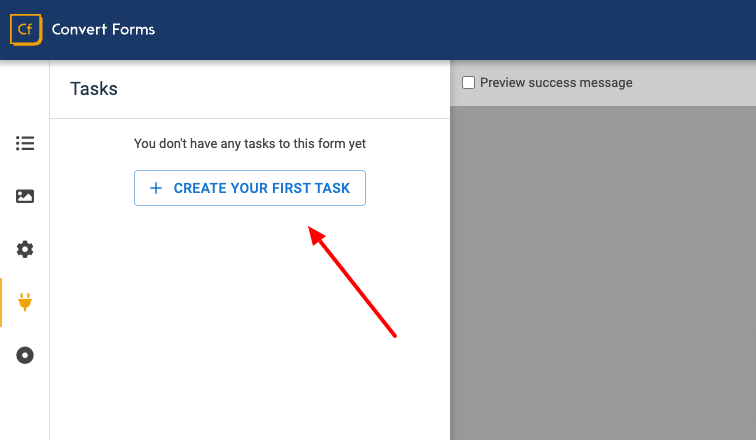
To create a Joomla article using Convert Forms, open the form builder, navigate to the Tasks panel, and click Create Your First Task. This starts the process of creating a new task.
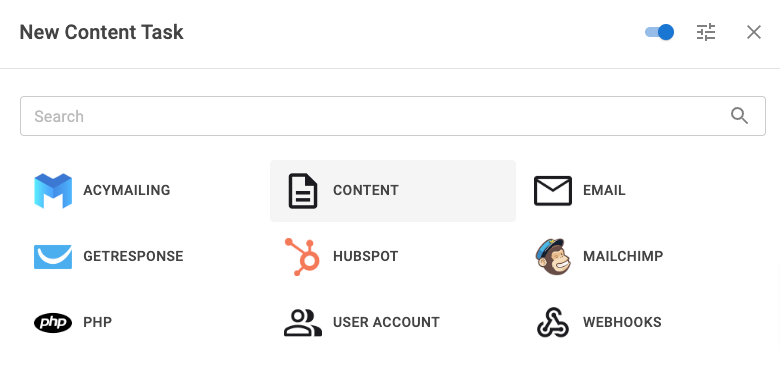
Upon opening the pop-up dialog, you will see a list of apps. Search and click the Content app. Your screen should look like this:
Give your task a name for easy reference. This will only be seen on the back-end of your site.
Set the Trigger option to New Submission and the Action option to Create Article. This translates to "when a new submission comes in, create a new article". Your screen should look like this.
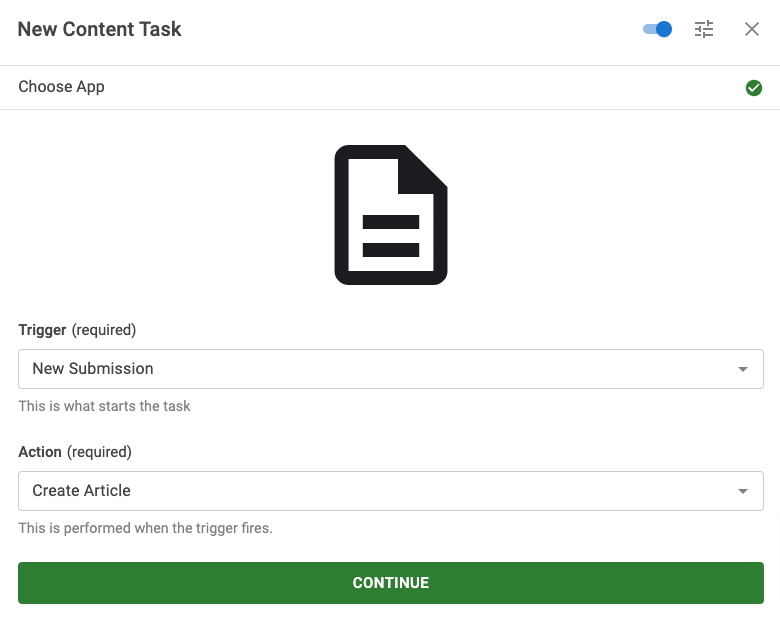
Click Continue to proceed to the next step. There you will see all available settings to configure the action.
The first important opinion is the Title. In this option, select a form field from the dropdown menu. Fields from your form will appear as options in this dropdown.
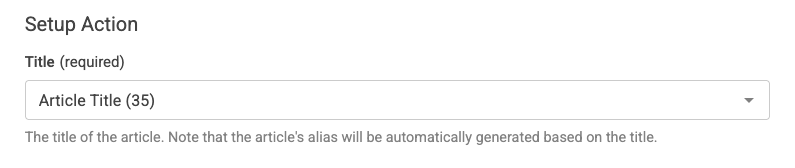
Note the article’s alias is automatically generated based on the article’s title during submission. If the generated alias already exists, it will be appended with an incrementing trailing number, separated by a dash.
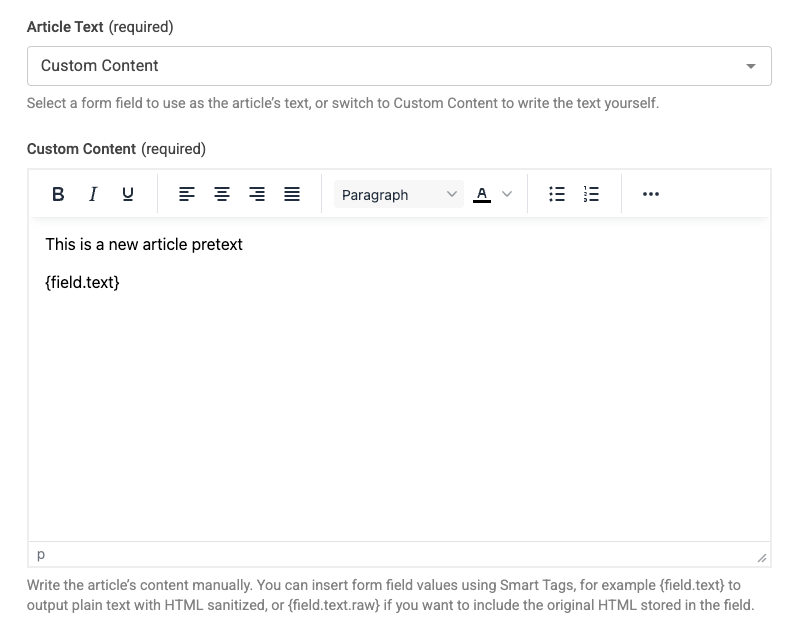
Next, select a form field from the dropdown to represent the article's text.

If mapping the article's text to a single form field does not fit your needs, select the Custom Content option to enable a rich text editor where you can write the text yourself. There, you can combine plain text with dynamic content using Smart Tags. For instance, to output the value of a form field, use the {field.NAME} shortcode where NAME represents the name of the field.
Next, in the Category option, select the category that will be associated with the article. This option lists all the published categories for your convenience. If you map this option with a Smart Tag, ensure it returns a valid category ID.

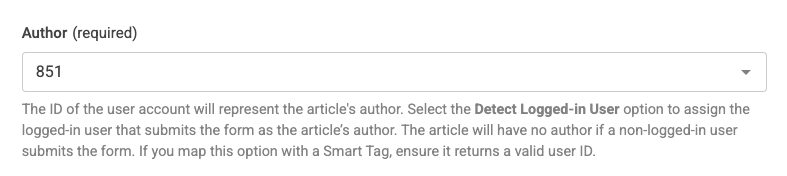
The Author option expects the ID of the user account to represent the author of the article. Here, you have the following options:
- Type a user account ID if the article is going to have a specific author.
- Select a form field from the list if you want a dynamic author assignment. In this case, ensure the field returns a valid user ID.
- Select Detect Logged-in User, if the current logged-in user who submits the form will always be the author of the new article. The article will have no author if a non-logged-in user submits the form. To allow only logged-in users to access the form, publish the form using a Form Menu Type and set the proper access level.
Next, set the article's status. This option lists all the supported statuses for your convenience. If you map this option with a Smart Tag, ensure it returns one of the following status codes: Published = 1, Unpublished = 0, Trashed = -1, Archived = 2.

Tags
Assign one or more tags to the article. Either select tags from the list or type your own. If you want to assign an existing tag with a Smart Tag, ensure it returns a valid Tag ID. A new tag will be created and assigned if the Smart Tag returns text or an unrecognized Tag ID.
If the form is expected to create tags, the proper permissions must be given in the Tags component. For instance, if guest users access the form, you must give the Guests user group permission to create tags.
Access Level
Set who will be able to access the article. This option lists all the available access levels for your convenience. If you map this option with a Smart Tag, ensure it returns a proper Access Level ID.
Start Publishing Date
Set a date to publish the article in Y-M-D H:M:S format. Leave it empty to publish the article immediately. If you map this option with a Date Time field, you must set its format to Y-m-d H:i.
Finish Publishing Date
Set a date to unpublish the article in Y-M-D H:M:S format. Leave it empty to never unpublish the article. If you map this option with a Date Time field, you must set its format to Y-m-d H:i.
Intro Image
The relative path of the image is meant to be used in the category, list, and featured views.
Full Article Image
The relative path of the image is meant to be used in the article details page.
Featured
Set whether the article will be featured. If you map this option with a Smart Tag, ensure it returns 0 or 1.
Language
If your site is multilingual, select the article's associated language. Otherwise, select the “All” option (default). If you map this option with a Smart Tag, ensure it returns a valid language code, e.g., en-GB or el-GR. Return an asterisk ‘*’ if you don’t want to associate it with a language.
Note
Add a note to this article. This is displayed only on the backend of the article editing page.
Custom Fields
Specify which custom fields you’d like to pre-populate when creating the article. A specific set of single and multiple-value custom fields are supported. You can also use Smart Tags.
How to populate custom fields
The Content app lets you create Joomla articles while also filling in custom fields. You can populate fields that accept both single and multiple values, giving you more flexibility in managing your content.
How to populate simple fields
When creating a Joomla article, you can now easily populate simple fields. Simple fields are custom fields that accept a single value. The custom field value can either be typed manually, or mapped to a form field entered by your users.
The supported custom fields are listed below:
- Text
- Textarea
- Radio
- Calendar
- Color
- Editor
- Integer
- List
- List of Images
- Location
- URL
- User
- User Groups
- ACF Articles
- ACF Convert Forms
- ACF Country
- ACF Currency
- ACF Download Button
- ACF Facebook
- ACF Gravatar
- ACF HTML5 Audio
- ACF IFrame
- ACF Module
- ACF PHP
- ACF Progress Bar
- ACF QR Code
- ACF Telephone
- ACF Timepicker
- ACF True/False
- ACF Twitter
- ACF Video
- ACF WhatsApp Click to Call.
Create Custom Field
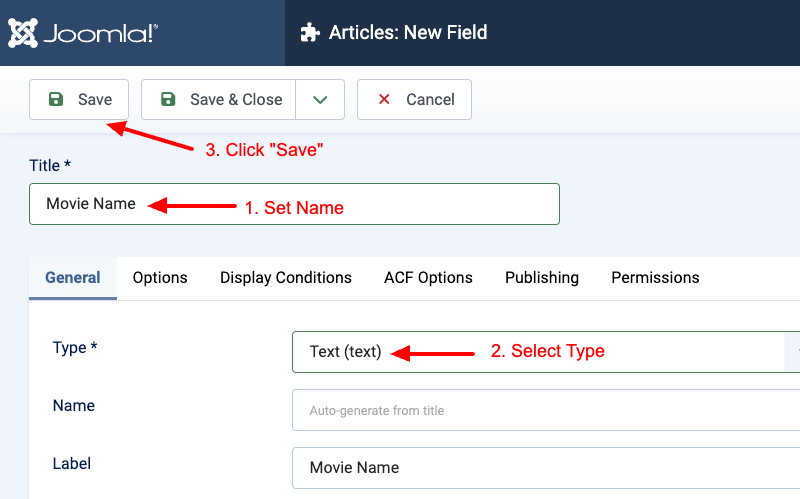
Let’s get started by creating a custom field under Components > Content > Fields.
Select the “Text” type, and set it’s name to “Movie Name”.
Example #1: Mapping a Text field to a form field
Within our form, let’s add a text field called “Movie Name” in which our visitors will type in the Movie Name.
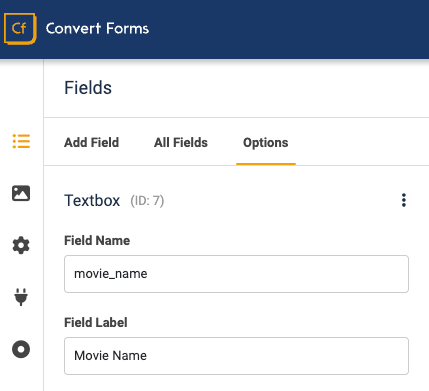
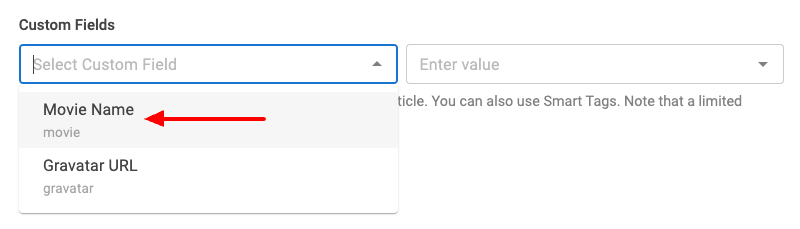
To populate the “Movie Name” custom field, head over to your form’s settings > Tasks > click to edit your Content app, under the Custom Fields setting, click on the “Select Custom Field” area, and from the left-hand side select the “Movie Name” custom field.
After selecting the “Movie Name” custom field, we then need to specify the value of this custom field. In this case, we select the “Movie Name” form field which we just created.
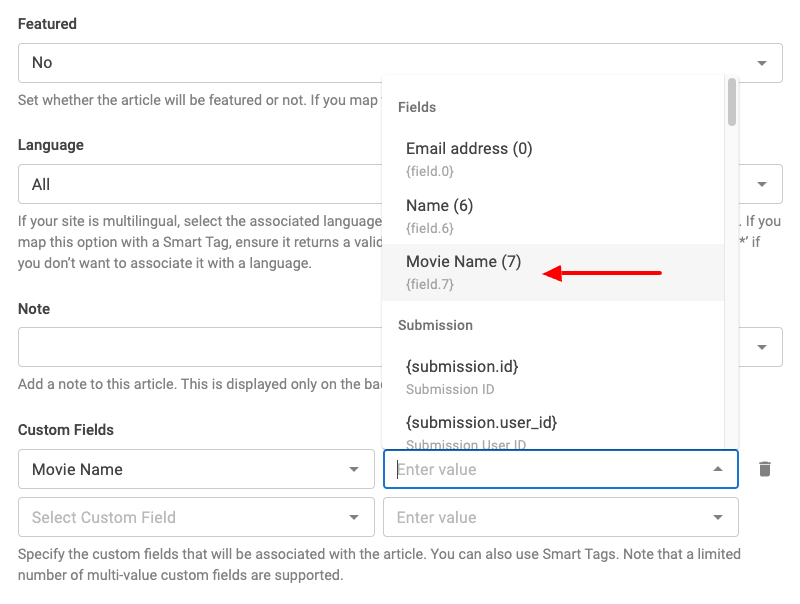
The final configuration looks like this:

Now, whenever a visitor types in a movie name, it will automatically appear in the article settings, in the corresponding custom field that’s named “Movie Name”.
Example #2: Mapping a Text field to a fixed value
An alternative way to populate a custom field is by entering a fixed value instead of relying on the user input.
To populate the “Movie Name” custom field, head over to your form’s settings > Tasks > click to edit your Content app, under the Custom Fields setting, click on the “Select Custom Field” area, and from the left-hand side select the “Movie Name” custom field.
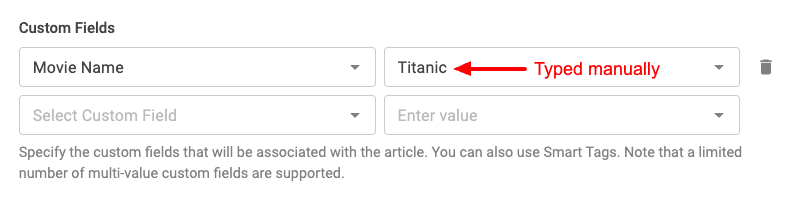
After selecting the “Movie Name” custom field, we then need to specify the value of this custom field. In this case, we set a fixed value by typing the text “Titanic”.
How to populate list fields
When you’re creating Joomla articles, you can now easily populate list-type fields. You can either populate list fields by mapping them to a form field or by setting a fixed value.
The supported list fields are listed below:
- List
- Checkbox
- List of Images
- User Groups
- ACF Articles
Create Custom Field
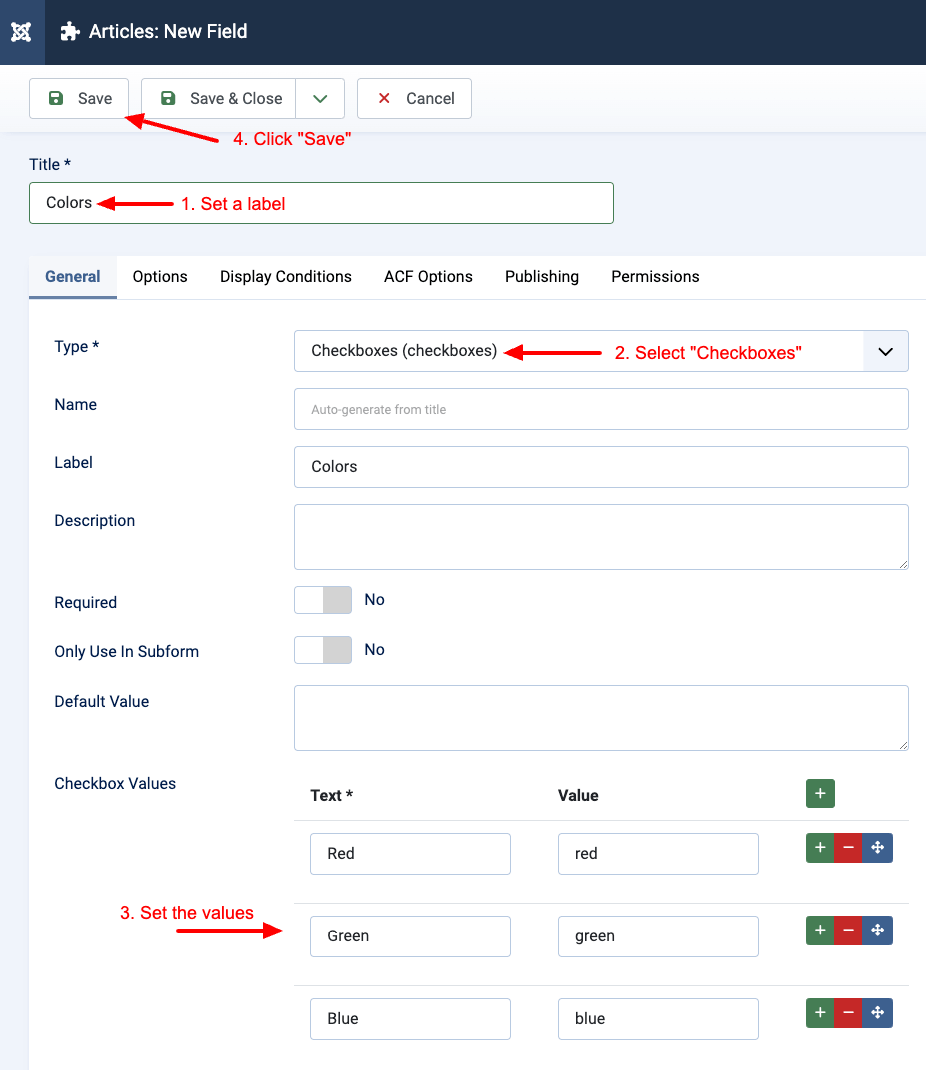
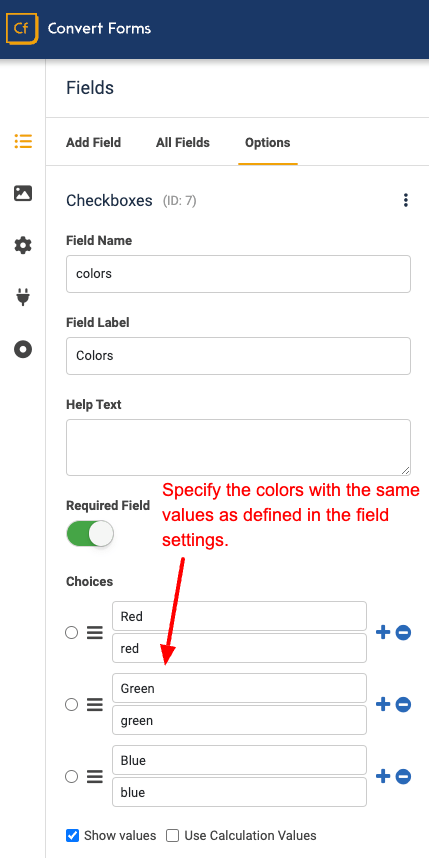
Let’s create a Checkbox custom field that accepts multiple values under Components > Content > Fields, by selecting the “Checkboxes” type, and name it “Colors”.
Then specify the colors Red, Blue, Green, as seen below.
Example #1: Populating a List field by mapping it to a form field
Within our form, let’s add a Checkbox field called “Colors” in which our visitors will be able to select their desired colors.
Each value must correspond to an option defined in the previously created custom field settings.
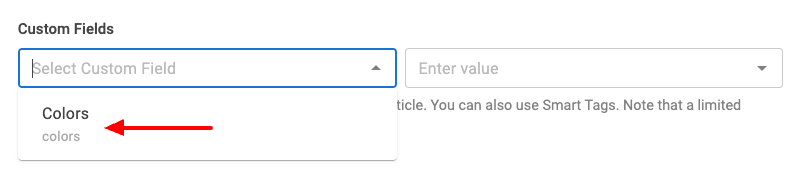
To populate the “Colors” custom field, head over to your form’s settings > Tasks > click to edit your Content app, under the Custom Fields setting, click on the “Select Custom Field” area, and from the left-hand side select the “Colors” custom field.
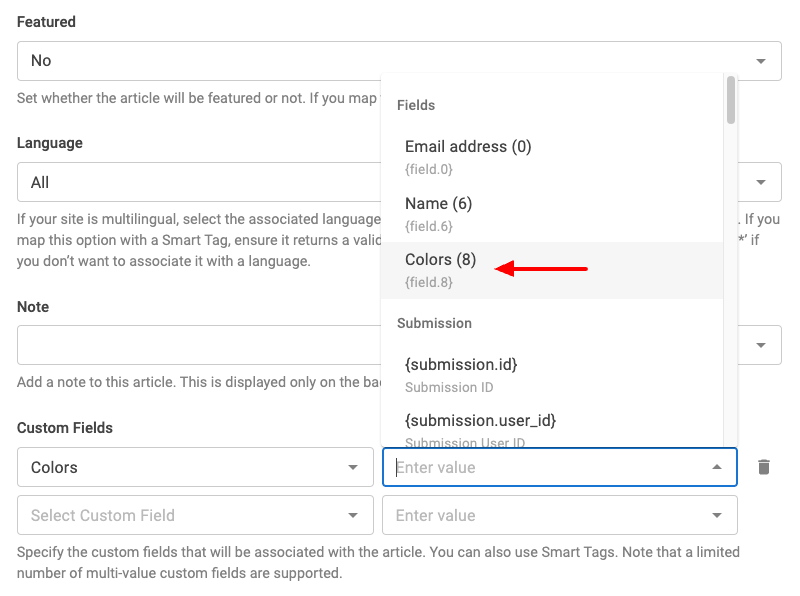
After selecting the “Colors” custom field, we then need to specify the value of this custom field. In this case, we select the “Colors” form field.
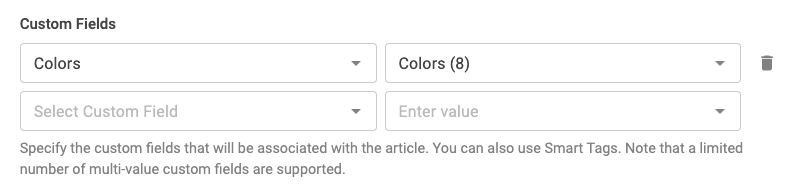
The final configuration looks like this:
Example #2: How to populate a list field with a fixed value
An alternative way to populate a list field is by entering the custom field value manually.
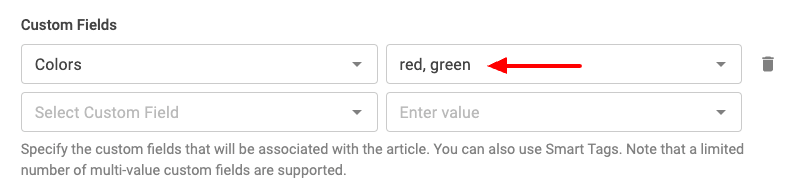
To populate the “Colors” custom field, head over to your form’s settings > Tasks > click to edit your Content app, under the Custom Fields setting, click on the “Select Custom Field” area, and from the left-hand side select the “Colors” custom field.
After selecting the “Colors” custom field, we then need to specify the value of this custom field. In this case, we set a fixed value by typing the text “red, green”.
Note that the fixed value we set must correspond to an option defined in the custom field settings. We can define multiple values by separating each value with a comma, as seen below.
How to populate advanced fields
You may be wondering why we haven’t mentioned any advanced fields such as ACF - File Upload, ACF - Gallery, ACF - Map, etc…
These custom fields don’t accept a single or multi value(comma separated) but an object as a value which makes it difficult to populate via the existing Custom Fields section.
The complete list of custom fields that are currently unsupported are:
- Media
- ACF Address
- ACF Chained Fields
- ACF Countdown
- ACF Email
- ACF FAQ
- ACF File Upload
- ACF Gallery
- ACF Map
- ACF PayPal
- ACF SoundCloud
- Any advanced 3rd-party custom fields
We are committed to improve the user experience of the Custom Fields section to support such advanced custom fields.
Reading the new article details in the next step
Let’s say that after creating the Joomla article, you would also like to email the administrator, letting them know that a new article has been submitted. To make the email more meaningful, you want to include the ID and the title of the article in the subject like this:
New Article Submission: #ARTICLE_ID - ARTICLE_TITLEOnce the Content app runs successfully and the article is created in the database, it exposes all article properties so they can read the next steps. That way, you can create advanced workflows and scenarios with your forms. For instance, if the Email app runs right after the Content app, you can read the ID and the Title of the article using the {task.prev.response.id} and {task.prev.response.title} Smart Tags respectively in any configuration option in the Email app.
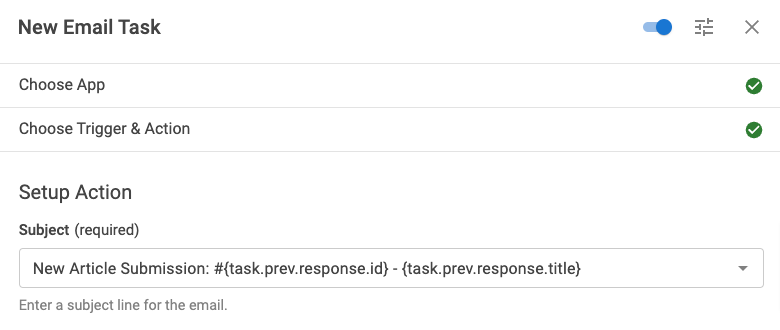
So, in our case, the Email Subject option becomes:
New Article Submission: #{task.prev.response.id} - {task.prev.response.title}Your screen should look like this:
With the same syntax, you read any article property like: alias, fulltext, state, catid, created_by, publish_up.
Auto-Redirecting to New Article After Submission
You can make Convert Forms automatically redirect the user to the article that was just created after form submission. To do this, you add a PHP Task right after the Create Article Task. The Create Article Task returns a response object containing the newly created article (with ID, title, catid, language etc.). Then you use that to set the redirect to the new article’s URL.
Here are the steps, with a code snippet:
First, in your form Tasks, add a PHP Task immediately after the Create Article Task. Then, in the PHP Task, use something like the following snippet:
// Get the response from the Create Article task
$article = end($responses)['response'];

// Build the front-end URL for that article
$articleURL = \Joomla\CMS\Router\Route::_(
  \Joomla\Component\Content\Site\Helper\RouteHelper::getArticleRoute(
    $article->id,
    $article->catid,
    $article->language
  )
);

// Set redirect on success
$submission->form->onsuccess = 'url';
$submission->form->successurl = $articleURL;
Finally, save your tasks and test the form submission. After a successful article creation, the user should be redirected to the new article.
For the redirect to work, the article must be published (i.e. not in a pending or unpublished state), or the user submitting the form needs sufficient permissions (correct user group, access level, and view rights) to see it immediately.
Troubleshooting
Below is a list of common issues you may encounter using this app. If you don't see your issue listed, open a support ticket with the relevant information related to your issue.
I am getting the error: incorrect datetime value: '10/05/2023’ for column 'publish_up' at row 1
You are using the wrong date format, either in the Start Publishing Date or Finish Publishing Date options. Both options expect the following date format: Y-M-D H:M:S.
Frequently Asked Questions
Can I update an existing article?
No. Updating an existing article is not currently supported, but it’s on our plans. You can use the Webhooks app to make this happen as a temporary workaround.
Are there any alternative ways to create a Joomla Article?
If this article submission addon does not fit your needs, you can find other methods below to automatically generate a Joomla article when someone submits your form.
Article Creator Integration is available in Pro
Unlock this and dozens of other powerful features by upgrading to Convert Forms Pro.
Unlock this feature
Last updated on Sep 29th 2025 15:09
Tassos offers a premium suite of Joomla extensions with 7 products and over 2.3 million downloads, providing reliable solutions since 2014.


 Rated:
Copyright © 2014 - 2026 - Smile Motive Development LP. All Rights Reserved.