-
- AcyMailing
- Browser
- City
- Component Condition
- Continent Condition
- Convert Forms Conditions
- Cookie Condition
- Country Condition
- Date Condition
- Day of Week
- Device Condition
- Display Conditions
- E-Commerce Conditions (VirtueMart - HikaShop)
- EngageBox - Viewed Another Popup Condition
- Homepage
- IP Address Condition
- Joomla! Content Article Condition
- Joomla! Content Category Condition
- Joomla! Content Component View Condition
- K2 Category
- K2 Item
- K2 Page Type
- K2 Tag
- Language
- Menu Item
- Month
- New/Returning Visitor Condition
- Operating System
- Pageviews Condition
- PHP
- Referrer URL Condition
- Region
- Time on Site
- Time Range
- Trigger based on URL match
- URL Condition
- User Access Level Condition
- User Condition
- User Group
-
- Show a Floating Button After Popup is Closed
- Create Multilingual Popups
- Randomly Rotate Popups on a Page
- Αdd Sound Effects to Popup
- Make Accessible Popups
- Add Countdown Timer to Popup
- Limit impressions per unique visitor
- Test the responsiveness of your boxes for various devices and viewports
- Open a box by clicking on a menu item
- Trigger based on the minimum time visitor spent on the site
- Auto-Close Popup After a Specific Time
- Control Popup using HTML Attributes
Create a Cookie Law Popup
European and American laws require digital publishers to inform visitors to their sites and apps about their use of cookies and other forms of local storage and obtain consent.
The implementation of such notice can vary from website to website. In this tutorial, we have chosen to explain the most common use case: a sticky bar popup with some informational text and an "Agree" button.
How to add a Cookie Consent Popup
EngageBox offers many cookie consent pre-made popup templates you can choose from, which is what we will do. There's no need to create one from scratch.
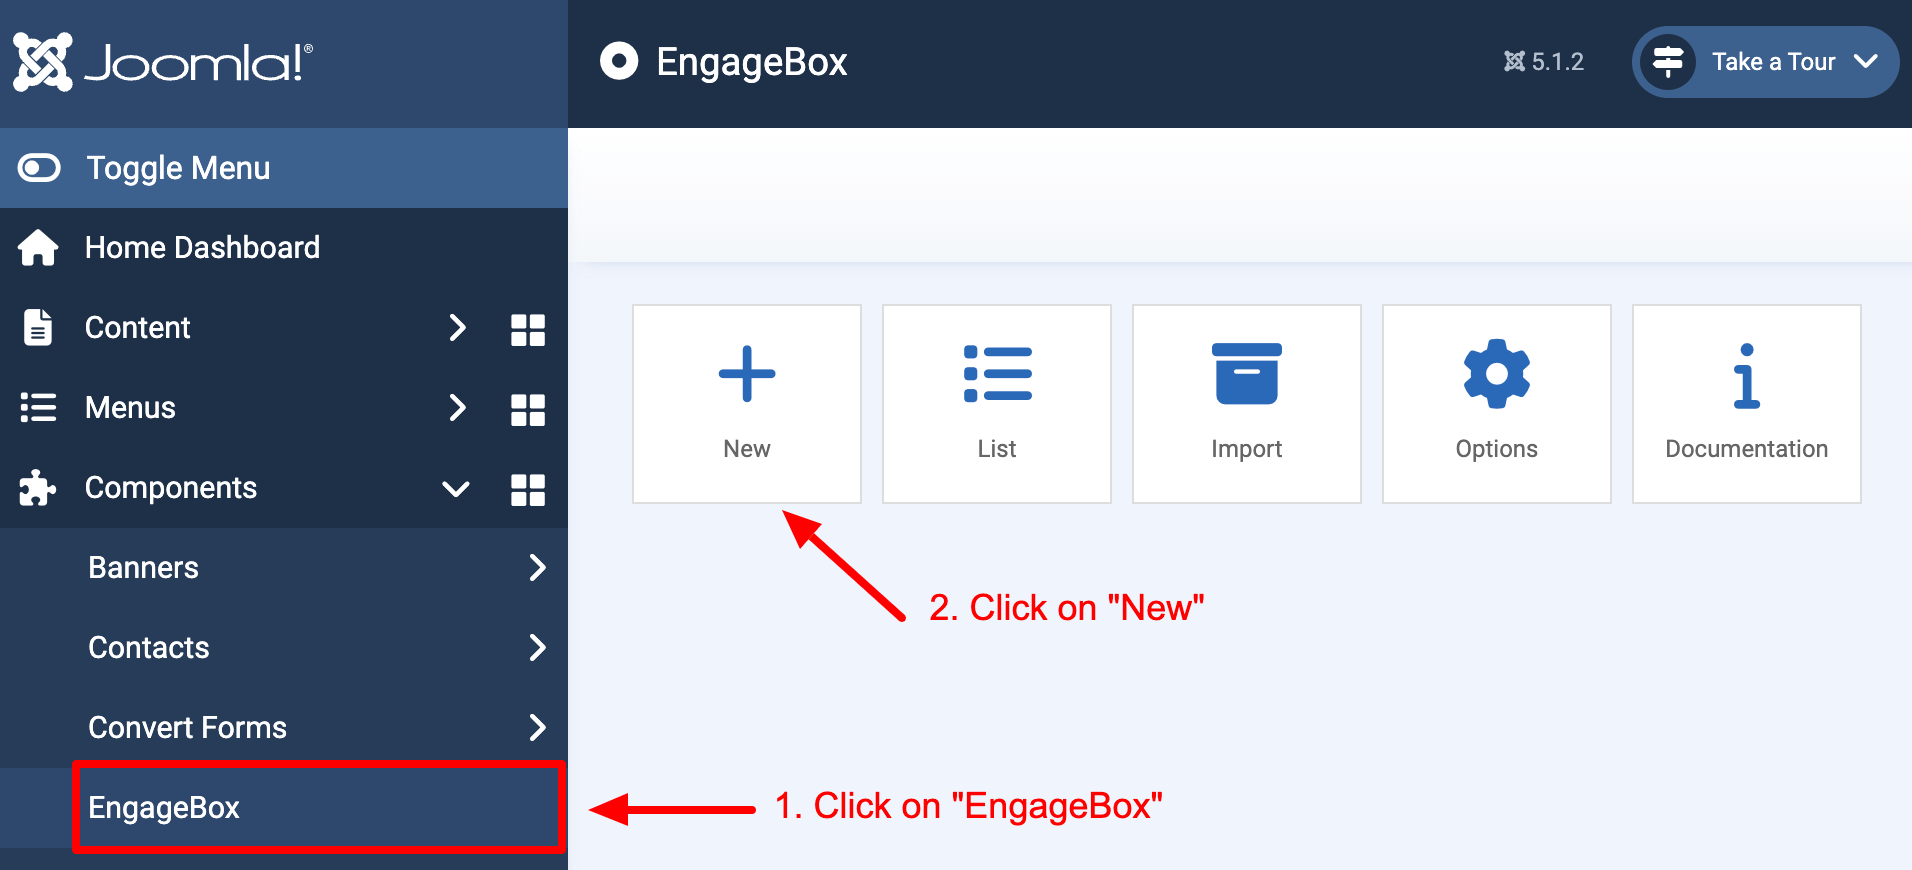
Step 1: Go to Components > EngageBox > Click "New"
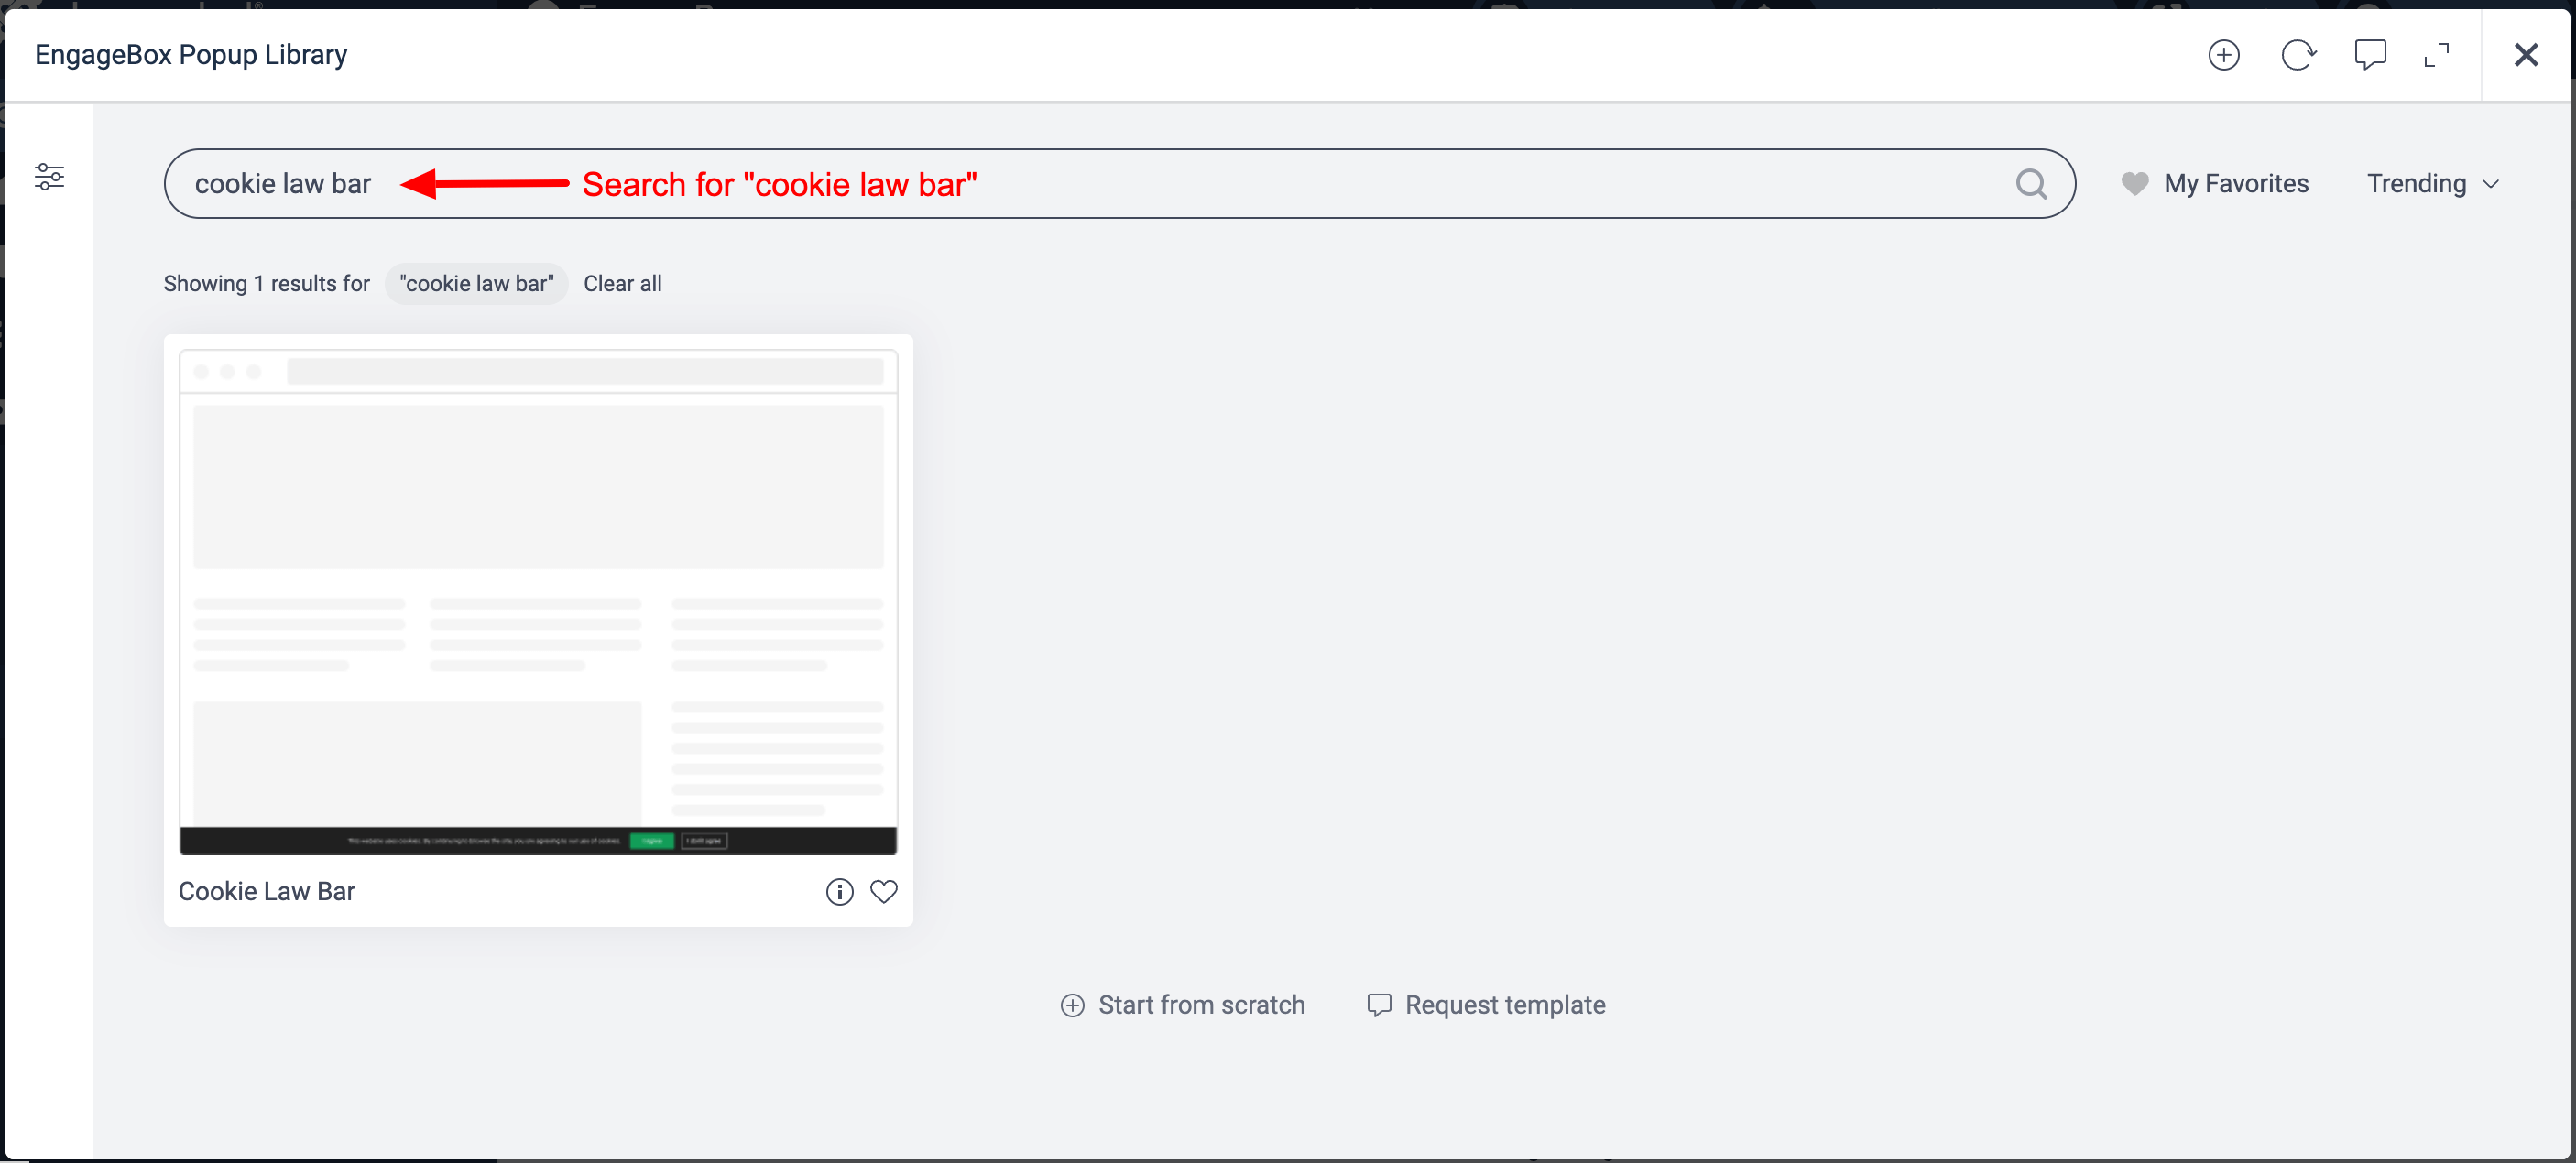
Step 2: Search for "cookie law bar"
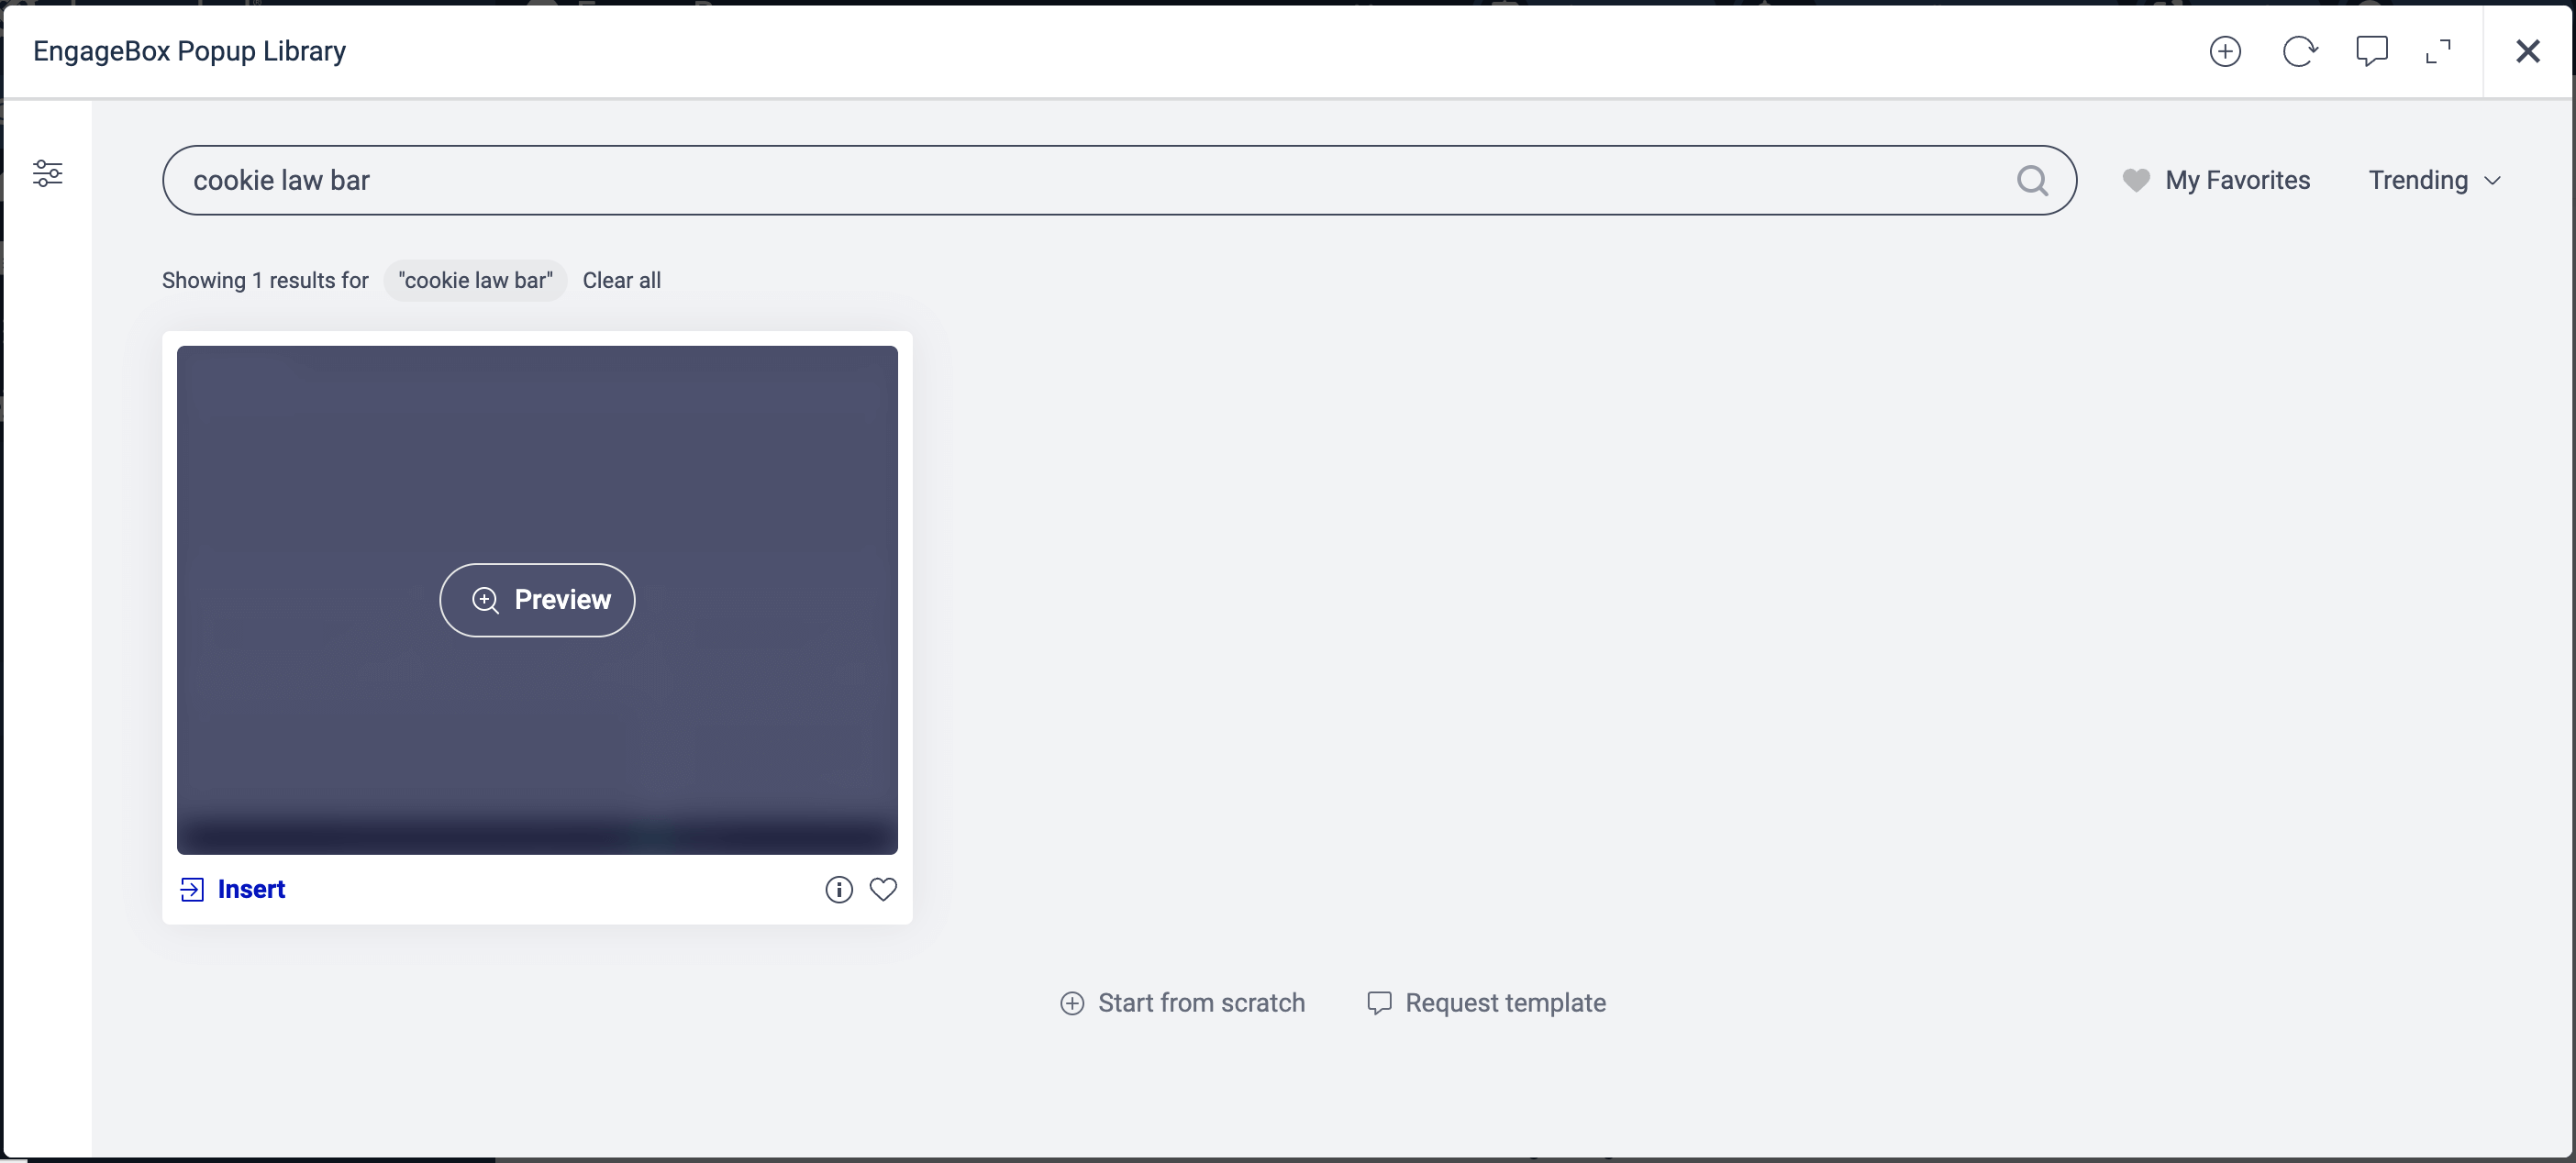
Step 3: Insert the popup
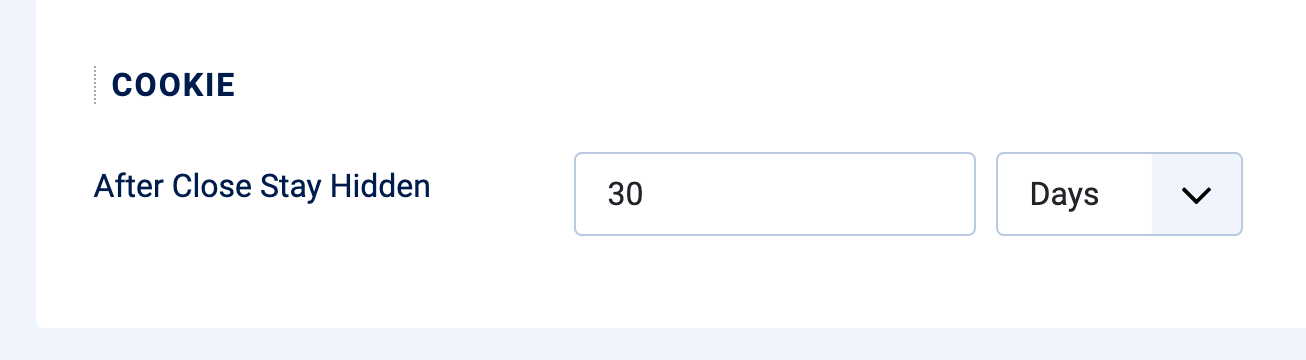
Step 4: How do you trigger it correctly
Go to Behavior > Trigger and select the "Page Load" trigger (selected by default). This ensures our popup appears on page load.

Secondly, we need to tell the popup not to reappear after it has been closed. In this example, we'll set the popup to hide for 30 days. You can configure it as desired.
Note
EngageBox's purpose is to display the text given in the Content tab; it doesn't prevent cookies from being stored on the visitor's browser.


 Rated: