-
- AcyMailing
- Browser
- City
- Component Condition
- Continent Condition
- Convert Forms Conditions
- Cookie Condition
- Country Condition
- Date Condition
- Day of Week
- Device Condition
- Display Conditions
- E-Commerce Conditions (VirtueMart - HikaShop)
- EngageBox - Viewed Another Popup Condition
- Homepage
- IP Address Condition
- Joomla! Content Article Condition
- Joomla! Content Category Condition
- Joomla! Content Component View Condition
- K2 Category
- K2 Item
- K2 Page Type
- K2 Tag
- Language
- Menu Item
- Month
- New/Returning Visitor Condition
- Operating System
- Pageviews Condition
- PHP
- Referrer URL Condition
- Region
- Time on Site
- Time Range
- Trigger based on URL match
- URL Condition
- User Access Level Condition
- User Condition
- User Group
-
- Show a Floating Button After Popup is Closed
- Create Multilingual Popups
- Randomly Rotate Popups on a Page
- Αdd Sound Effects to Popup
- Make Accessible Popups
- Add Countdown Timer to Popup
- Limit impressions per unique visitor
- Test the responsiveness of your boxes for various devices and viewports
- Open a box by clicking on a menu item
- Trigger based on the minimum time visitor spent on the site
- Auto-Close Popup After a Specific Time
- Control Popup using HTML Attributes
Yes No Box Type
With the Yes No Box Type you can easily create boxes whose purpose is to easily guide visitors towards targeted pages with easy Yes or No questions. Let's see how you can do this with EngageBox.
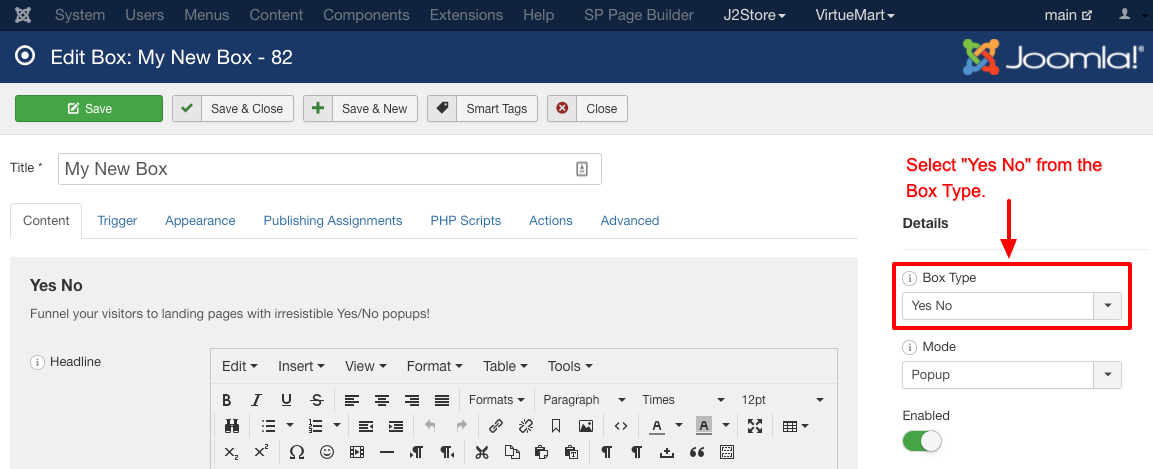
The Yes No Box Type Selection
First, you need to make sure that you have selected the "Yes No" Box type as shown in the screenshot below.
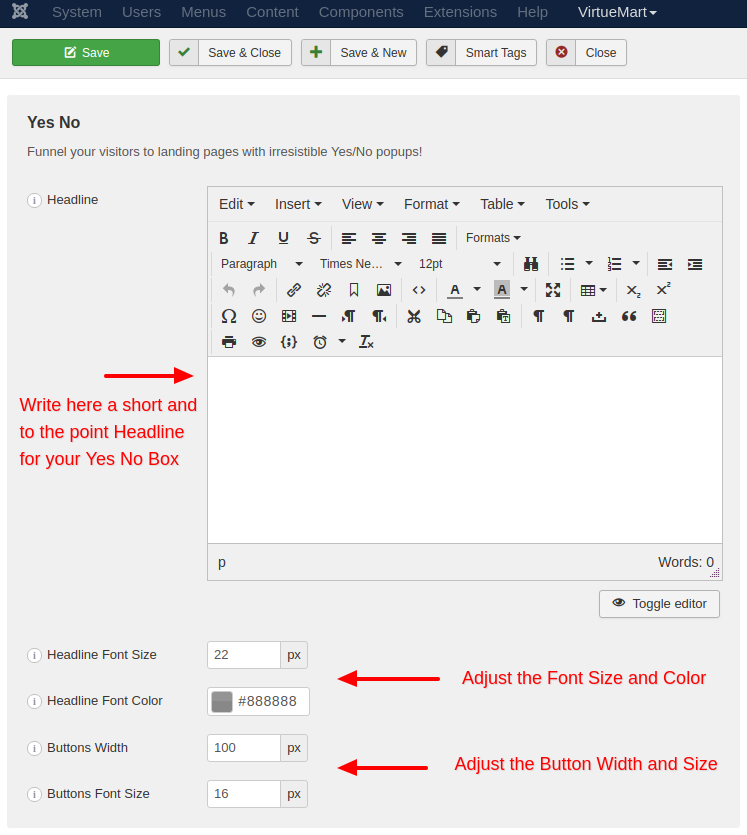
The Headline
Then, you should start by writing a Headline which will be the main focus of the box. We recommend that you try to be short and to the point to achieve maximum effectiveness. Also, as you can see in the screenshot below, you can experiment with the headline's font size and color to perfectly fit your website's design.
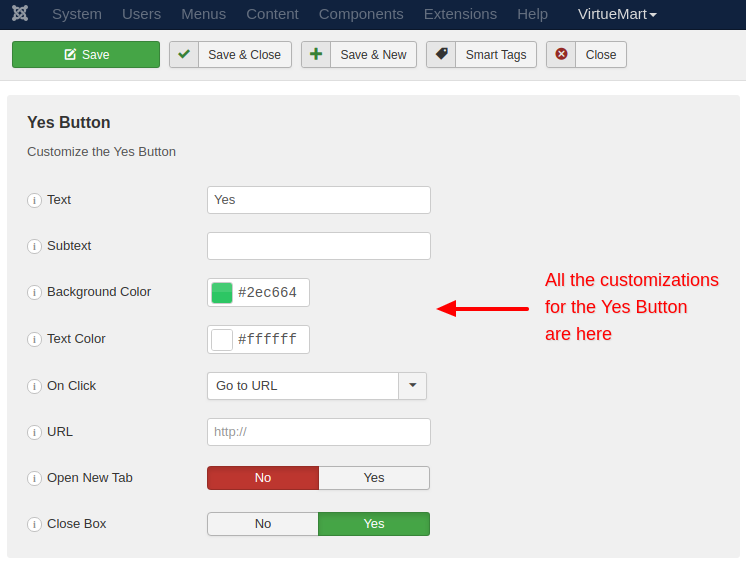
The Yes Button
Now we move on to the customization of the Yes Button. Apparently you need to write the text of the Yes button first. It can be just the word "Yes" or something a bit more thought out. After, apart from the fact that you can change the design of the button, you need to choose what will be done once the user click the button.
There are 3 options for you to choose from.
- Go to URL: This option redirects the user to a URL of your choosing.
- Open Box: This option lets you choose which other box should open.
- Close Box: This option lets you close the current box.
The No Button
Next is the customization of the No Button. As you can see from the screenshot below, you can choose if you want a No Button to begin with. As for the click event, you can choose the same options as you did with the Yes Button above.

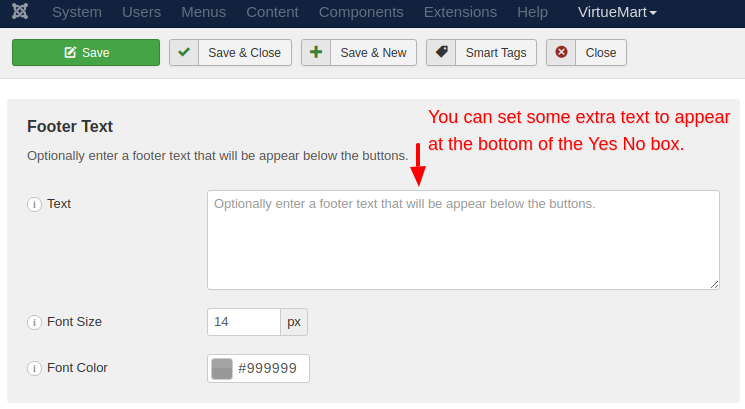
The Footer
Finally, you are able to add extra text under the buttons. This text can probably be instructional or anything else you would like to add. It is completely optional.


 Rated: